Just finished testing a new plugin I wrote for controlling my ROTEL A12 amplifier with built in DAC. Short video of plugin in action below
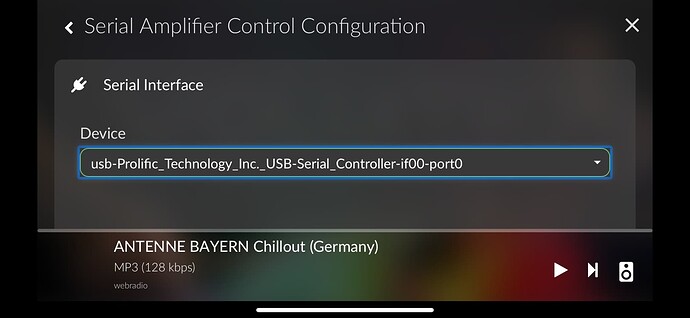
The amp is connected to Volumio on a RaspberryPi 3 with HifiBerry Digi Hat via optical SP/DIF. Since the optical connection does not allow volume control from Volumio, I bought a cheap USB-to-RS232 converter based on Prolific PL2303.
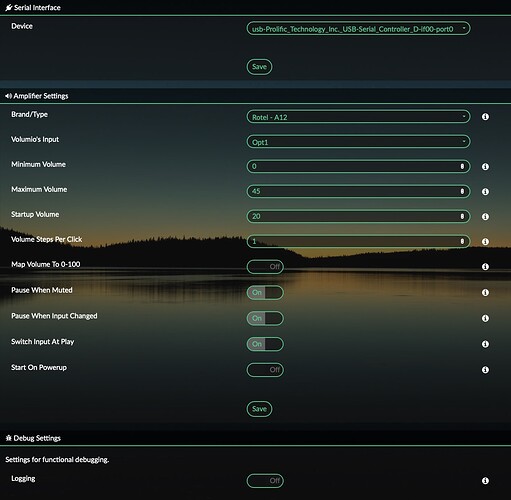
The plugin allows to control volume and mute from the Volumio GUI and supports some additional features like:
- defining max volume
- defining startup volume
- map to 100
- pausing and resuming when amp is muted
- pausing and resuming when input source of amp is changed
- switching to the correct source when play is pressed on volumio
The configuration of the serial interface and the commands to send to the amps are stored in a json file that can easily be extended to support other models and brands.
I already added ROTEL A14 and A11 (since the documentation was available) but could not test them directly, since I only have A12 (I did some simulation with the A12, however).
I tried to make the implementation in such a way, that it hopefully works with other amplifiers easily - however, expect some need for debugging and testing, when you try to extend it. I’ll try to offer support here, but my time for that is quite limited.
Links to Github and info summary can be found on the Volumio Plugins Collection Topic
Bugreports:
In case you want to file a bugreport or ask for help, please include:
- Hardware you are using
- Volumio version
- Plugin Version
- Peripheral hardware info (Serial interface device used)
- Logfile showing complete use example with the bug (see step-by-step instructions below)
- Start of the plugin
- The sequence of use that produces the problem
- Stop of the plugin
How to generate a log
- Acitvate logging in the Plugin's settings by going to the 'Debug settings' section and setting 'Logging' to 'On'. Don't forget to save
- Create a log-file by either of these methods:
- via Browser
- Go to the Volumio developer settings and 'enable' the 'Live Log'
- Go to the 'Installed Plugins' page in Volumio
- Switch the Plugin 'off' - wait a few seconds - switch it 'on' again
- Now do whatever you normally do to produce the error
- After the error happened, switch the plugin 'off' again
- Go back to the developer settings, disable the Live Log and copy the log out of the window.
- Put the log into a text file and attach it to a post in this thread or post it directly - but please make sure, you enclose it in three accent characters before and after the log code like this:
```
log text
```
It will then be rendered as source code which makes it more readable and prevents, that this thread gets cluttered with long posts of gibberish.
- via
SSH:- Log into your Volumio system using
SSH, if you do not know how, Google is your friend - At the prompt
volumio@volumio:$enterjournalctl -f. This will start the logging to the terminal you are using. - Follow steps ii. - v. under a. (plugin on - produce error - plugin off)
- In your Terminal, hit
Ctrl-Cto stop the logging - Copy the log out of the terminal and send it like describe in step vii. under a.
- Log into your Volumio system using
- via Browser
Example of a plugin startup-log
Starting Live Log...
[...]
info: Enabling plugin serialampcontroller
info: Loading plugin "serialampcontroller"...
info: Applying required configuration parameters for plugin serialampcontroller
info: Applying required configuration parameters for plugin serialampcontroller
info: PLUGIN START: serialampcontroller
info: [SERIALAMPCONTROLLER] loadI18nStrings: /data/plugins/system_hardware/serialampcontroller/i18n/strings_de.json
info: [SERIALAMPCONTROLLER] loadI18nStrings: loaded: {"[...list of language strings...]"}
info: [SERIALAMPCONTROLLER] loadAmpDefinitions: loaded AmpDefinitions: {[...content of amp definition file...]},"filePath":"/data/configuration/system_hardware/serialampcontroller/ampCommands.json"}
info: [SERIALAMPCONTROLLER] loadAmpDefinitions: loaded AmpDefinitions for 5 Amplifiers.
info: CoreCommandRouter::volumioGetState

info: [SERIALAMPCONTROLLER] on.pushState: undefined - pause

info: [SERIALAMPCONTROLLER] listSerialDevices: [{“path”:"/dev/ttyAMA0"},{“manufacturer”:“Prolific Technology Inc. “,“pnpId”:“usb-Prolific_Technology_Inc._USB-Serial_Controller_D-if00-port0”,“vendorId”:“067b”,“productId”:“2303”,“path”:”/dev/ttyUSB0”}]

info: [SERIALAMPCONTROLLER] listSerialDevices: found 1 devices.[{"[…list of devices found on your system…"}]

info: [SERIALAMPCONTROLLER] setActiveAmp: {…settings of active amp…}

info: [SERIALAMPCONTROLLER] setActiveAmp: can send these responses: […]

info: [SERIALAMPCONTROLLER] openSerialPort: connect to /dev/ttyUSB0 configured with: {“autoOpen”:false,“lock”:true,“baudRate”:115200,“dataBits”:8,“stopBits”:1,“parity”:“none”,“rtscts”:false,“xon”:false,“xoff”:false,“xany”:false}

info: [SERIALAMPCONTROLLER] openSerialPort: Connection established.

error: [SERIALAMPCONTROLLER] openSerialPort: Now trying to open port

info: [SERIALAMPCONTROLLER] alsavolume: Set volume “25”

info: [SERIALAMPCONTROLLER] alsavolume: either Serial Interface, listener or Ampconfig missing

info: [SERIALAMPCONTROLLER] updateVolumeSettings: Amp, serial Interface not yet set or listener not yet active.

info: [SERIALAMPCONTROLLER] onStart: successfully started plugin

info: Done.

info: [SERIALAMPCONTROLLER] openSerialPort: Port is now open. Connecting Parser with delimiter: $

info: [SERIALAMPCONTROLLER] getAmpStatus: sending status requests to Amp

info: [SERIALAMPCONTROLLER] sendStatusRequest: Sent command for “reqModel”: model?

info: [SERIALAMPCONTROLLER] sendStatusRequest: Sent command for “reqPower”: power?

info: [SERIALAMPCONTROLLER] sendStatusRequest: Sent command for “reqVolume”: volume?

info: [SERIALAMPCONTROLLER] sendStatusRequest: Sent command for “reqMute”: mute?

info: [SERIALAMPCONTROLLER] sendStatusRequest: Sent command for “reqSource”: source?

info: [SERIALAMPCONTROLLER] openSerialPort: Listener received: model=a12

info: [SERIALAMPCONTROLLER] openSerialPort: no matching regex for: model=a12

info: [SERIALAMPCONTROLLER] openSerialPort: Listener received: power=on

info: [SERIALAMPCONTROLLER] openSerialPort: call processResponse with: respPowerOn

info: [SERIALAMPCONTROLLER] processResponse: Amp signaled PowerOn

info: [SERIALAMPCONTROLLER] alsavolume: Set volume “25”

info: [SERIALAMPCONTROLLER] alsavolume: set volume to integer value.

info: [SERIALAMPCONTROLLER] sendCommand: send volValue,25

info: [SERIALAMPCONTROLLER] sendCommand: now sending cmdString: vol_25!

info: [SERIALAMPCONTROLLER] processResponse: Amp Status is now {“volume”:25,“mute”:false,“power”:“on”}

info: [SERIALAMPCONTROLLER] sendCommand: sent cmdString: vol_25!

info: [SERIALAMPCONTROLLER] openSerialPort: Listener received: volume=25

info: [SERIALAMPCONTROLLER] openSerialPort: call processResponse with: respVolume

info: [SERIALAMPCONTROLLER] processResponse: Amp signaled volume is 25

info: [SERIALAMPCONTROLLER] getVolumeObject: {“vol”:25,“mute”:false,“disableVolumeControl”:false}
Low level function check of serial interface
- Disable the plugin. To be sure the interface is responsive, disconnect the RS232 interface from the system, wait a second and plug it back in.
- Use
ssh
to connect to your Volumio system via terminal - Issue the command
stty -F /dev/ttyUSB0 115200 raw -echo -echoe -echok -echoctl -echoke
to configure your interface. You may need to replace/dev/ttyUSB0
with the path to your interface and put the right Baudrate of your amp instead of the 115200. - Issue
cat /dev/ttyUSB0
. This will echo all data received from the amp on the terminal prompt. - Now do something with the user controls of the amp. Turn the volume dial, switch inputs or whatever else is supported by the serial interface. You should see messages from the amp being echoed.
- If not, there is something wrong at the base of the connection. This needs to be fixed before the plugin can work.


