Hey @Radio-M1,
I think it will be easier to discuss changes, if any, should you share the content of the files in question.
Kind Regards,
Hey @Radio-M1,
I think it will be easier to discuss changes, if any, should you share the content of the files in question.
Kind Regards,
user-data
#cloud-config
hostname: RFC-Volumio1
manage_etc_hosts: true
packages:
users:
timezone: Europe/Vienna
runcmd:
network-.con
version: 2
wifis:
renderer: networkd
wlan0:
dhcp4: true
optional: true
access-points:
“XXXXXX”:
password: “xxxxxxxxxxxxxxxxxxxxxxxxxxxxxxxxxxxxxxxxxxxxf”
Hey @Radio-M1,
I must admit, I am lost with your Volumio OS setup.
I am in a favor of completely clean install of the basic Volumio OS where the introduced changes bear relevance.
Let’s begin (again) with wiping MicroSD clean or a new one, clean install of https://updates.volumio.org/pi/volumio/3.771/Volumio-3.771-2024-10-31-pi.zip with no plugins (none!) and only ssh enabled.
Please share zipped dmesg, lsmod and /boot list output.
Kind Regards,
o.k.
and here we go again, thanks in advance
boot_list.zip (3.8 KB)
dmesg.zip (11.2 KB)
lsmod.zip (1.1 KB)
Hey @Radio-M1,
Files user-data and network-.con - can get my head around these two.
Let’s talk process for a moment:
After downloading Volumio OS - what are actions you take, step-by-step, with no details spared, however small.
Kind Regards,
hi nerd,thank you for your efforts, attention and help
I start the Pi Imager, select Pi model and customOS and card; now go to edit settings, enter hostname, password, wifi, timezone and save this data; then apply OS adjustments and write to SD card; after Volumio starts, the Volumio app opens on the mobile phone, here the data (name, wife, PW etc.) is requested again and is then saved in the app and Volumio starts…
Don’t touch/use “Edit Settings” this will break the Volumio OS. Only burn the downloaded image from Volumio to the card.
o.k. wheaten (&nerd) ;
i‘m testing it…
here are the news…
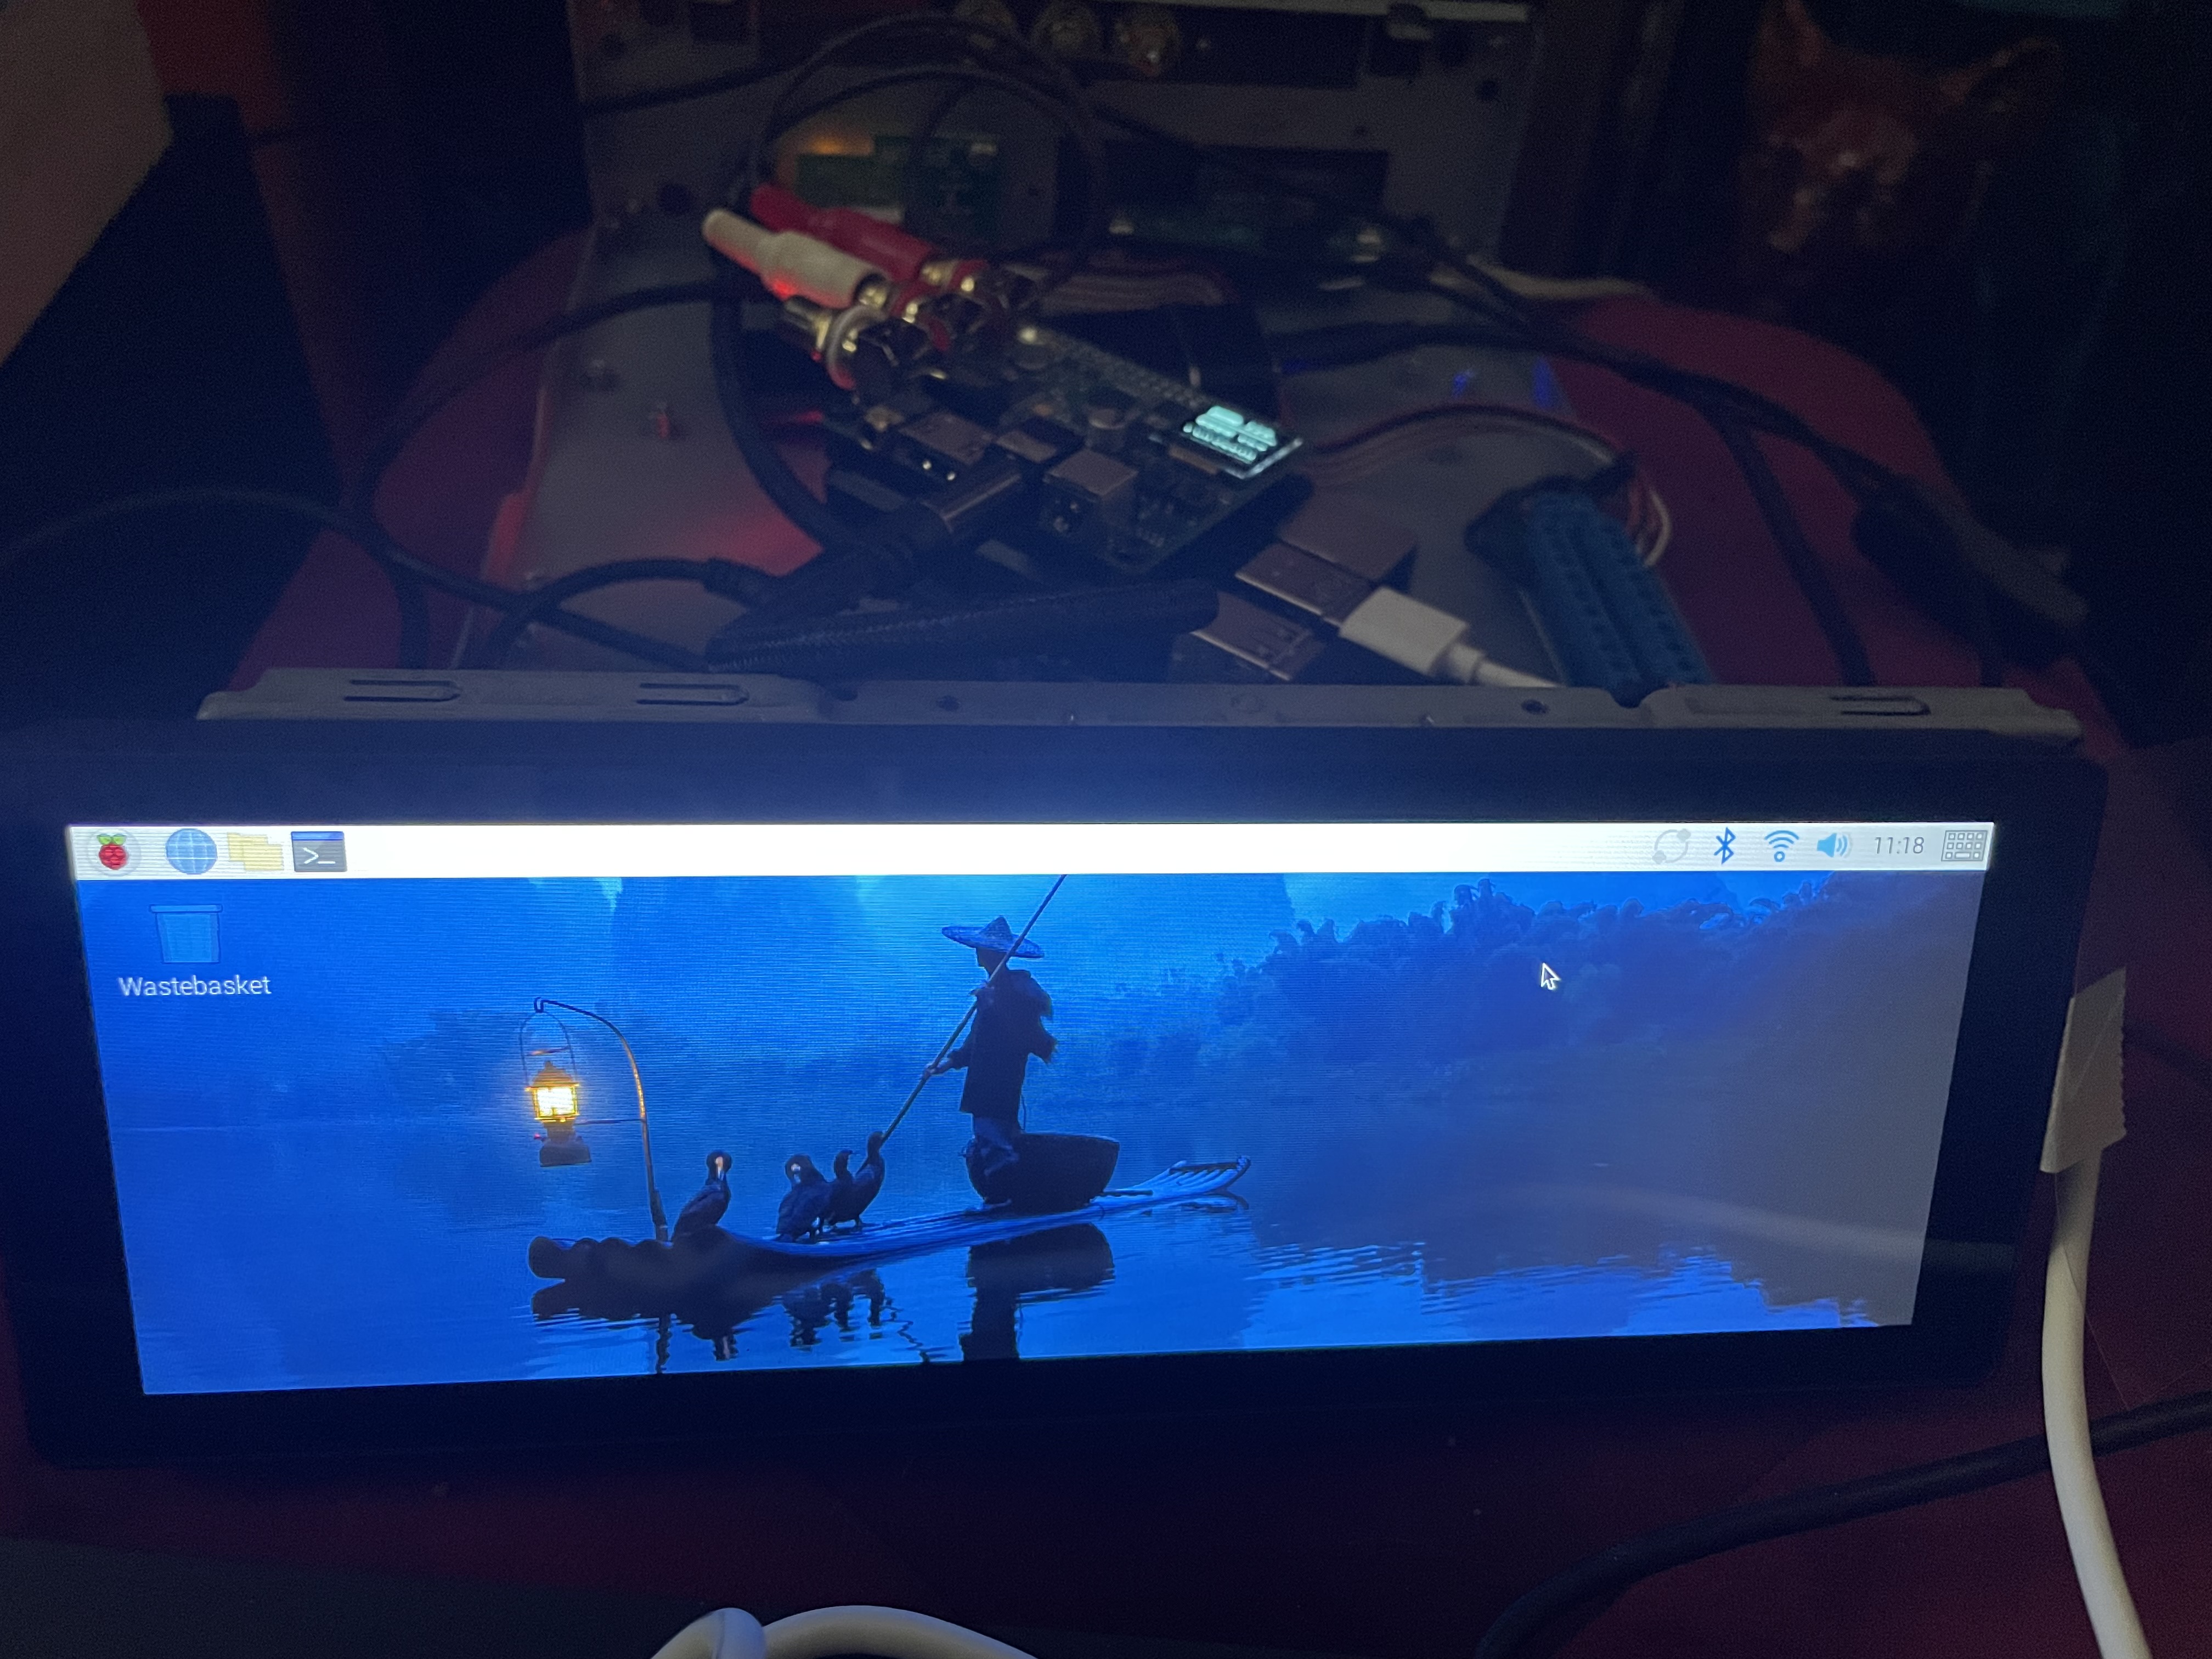
new volumio (clear burn) has so far not been successful in recognizing and using the 1280x400 HDMI ISO display…![]()
same procedure with Rasperry OS, and HDMI display works immediately…?
At the very beginning, when you had problems, I wrote you a PM on how to do it step by step. Why didn’t you use it? Everything would have been fine a long time ago.
I may have completely overlooked your information in the trouble or paid too little attention to it at the beginning, sorry for that,
I will look for it now, in any case thanks for the reminder…
!!!Addition!!!: I found your PM;
the advice you sent unfortunately didn’t lead to any success,
so “nerd” got in touch and tried to solve the problem with the crazy HDMI monitor with individual suggestions and tests…
@nerd has already spent a lot of time to solve the problem. My last piece of advice: try to use BALENA to burn the image, not Pi Imager. Also follow @wheaten’s advice
Best regards
OK; in the meantime I’ll try again with Balena and your description and will let you know…
INFO:
I searched through babe wheaten`s profile, but now I don’t know exactly which installation instructions I should follow, thanks in advance for your msg.
Currently three different volumio images unpacked in the archive; the following error appears in all of them in baleno etcher…
ok, I understood it and tried, so far no change after new sd card flash and started volumio os noticeable on the display,
delete the .ZIP file and point to the .img file. If that doesn’t help, download the file from the volumio website
Don’t flash with Balena, as 9 out of 10 goes wrong. Use Raspberry Pi Imager without any custom settings.
and this is new. I flashed Balena with maybe 100 sd cards and it was always fine.
This is everything but new, your one of the lucky people then.