[PLUGIN] FM/DAB Radio - RTL-SDR

Hey @Steve1,

Ha - sorry about the timing on that one. The V4 really did land at an awkward moment. Glad Amazon made the swap painless.

Thank you for the kind words. Honestly, half the fun is figuring things out alongside everyone else here. The community teaches me as much as I manage to contribute back. Looking forward to hearing how you get on with the V4.

Kind Regards,

Hey @AudioPete,

Cheers for that - appreciated.

Kind Regards,

Thank you for your detailed analysis and comparison — it saved me valuable time and money.
I’m now looking forward to receiving my V4 from Amazon. Thanks again!

BTW, I noticed that the RTL-SDR Blog V4 comes in two versions:
one with a USB Type-C female connector, and another with a regular USB male plug.
Which one would be the better choice?
Thanks!

https://www.rtl-sdr.com/rtl-sdr-blog-v3-v4-usb-c-model-released-for-sale/

Hey @dewen,

Glad the comparison was helpful!

USB-C vs USB-A Connector

From what I can see, both V4 variants use identical hardware - same R828D tuner, same RTL2832U ADC, same filtering and TCXO. The only difference is the physical connector. I have the standard USB-A version, so cannot comment on USB-C build quality from direct experience.

Important: Direct connection not recommended

Regardless of which connector you choose, plugging the dongle directly into your Raspberry Pi is not ideal for radio reception. The Pi generates considerable electrical noise from:

  • USB controller and hub circuitry
  • Ethernet PHY (particularly on Pi 4/5)
  • WiFi/Bluetooth module
  • Switch-mode power regulation
  • SD card activity

This noise raises your noise floor and can mask weak signals, particularly noticeable on DAB where signal quality matters for stable decoding.

Recommendation: Short quality USB cable

A short (15-30cm) quality USB cable creates physical separation between the dongle and Pi, substantially reducing coupled noise. Ferrite cores on the cable can help further. Some users report 3-6 dB improvement in signal-to-noise ratio with this simple change.

  • USB-C version: Short USB-A to USB-C cable (the kind everyone has for phone charging)
  • USB-A version: USB-A extension cable

The USB-C version might actually be more convenient since USB-A to USB-C cables are everywhere these days.

Either version will work well with the plugin. Enjoy your V4!

Kind Regards,

On the Raspberry Pi, the dongle’s size blocks 2–3 USB ports, so a short extension cable is the practical solution. :slight_smile:

Thank you for your valuable advice.
I think I’ll choose the USB Type-C version because its extension cables seem easier to find.

@nerd

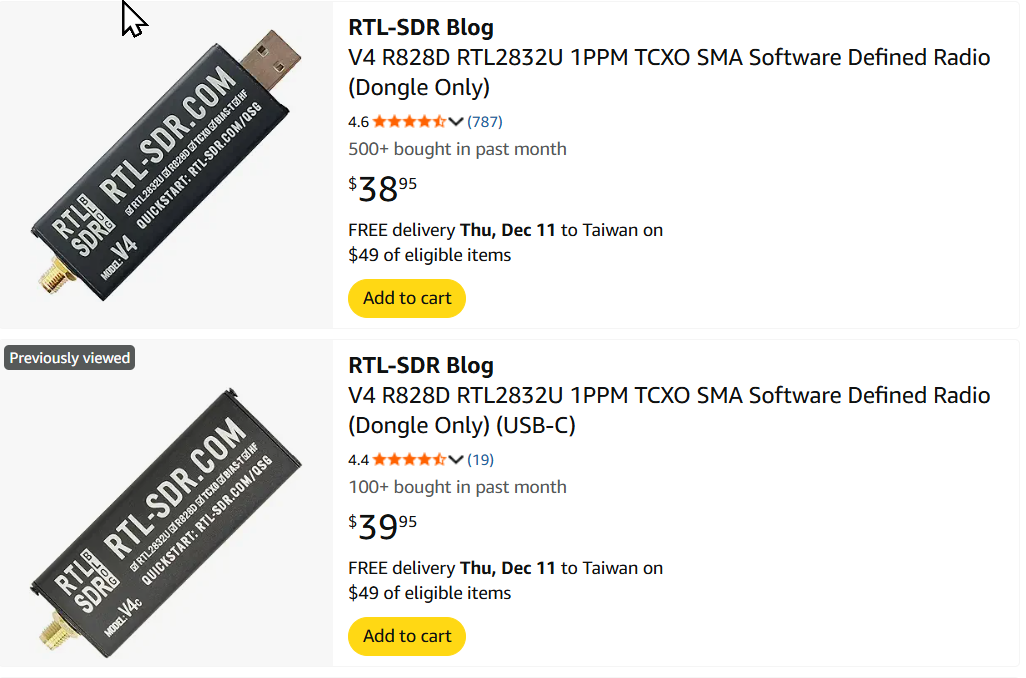
You can add this one too: https://www.amazon.nl/dp/B079C3FHPG

image

Channel 5B: Peak=-6.27 dB, Noise=-10.81 dB, SNR=4.54 dB
Channel 5A: Peak=-0.90 dB, Noise=-13.62 dB, SNR=12.72 dB
Channel 5C: Peak=18.68 dB, Noise=-17.12 dB, SNR=35.80 dB
Channel 5D: Peak=16.61 dB, Noise=-16.39 dB, SNR=33.00 dB
Channel 6A: Peak=-10.40 dB, Noise=-15.25 dB, SNR=4.85 dB
Channel 6B: Peak=3.42 dB, Noise=-14.17 dB, SNR=17.59 dB
Channel 6C: Peak=-3.09 dB, Noise=-10.17 dB, SNR=7.08 dB
Channel 6D: Peak=-0.43 dB, Noise=-11.11 dB, SNR=10.68 dB
Channel 7A: Peak=-1.24 dB, Noise=-13.00 dB, SNR=11.76 dB
Channel 7B: Peak=-8.76 dB, Noise=-4.74 dB, SNR=-4.02 dB
Channel 7C: Peak=1.00 dB, Noise=-12.61 dB, SNR=13.61 dB
Channel 8A: Peak=-3.13 dB, Noise=-9.58 dB, SNR=6.45 dB
Channel 7D: Peak=-4.18 dB, Noise=-8.25 dB, SNR=4.07 dB
Channel 8B: Peak=-3.64 dB, Noise=-8.66 dB, SNR=5.02 dB
Channel 8D: Peak=3.50 dB, Noise=-10.29 dB, SNR=13.79 dB
Channel 8C: Peak=5.61 dB, Noise=-11.02 dB, SNR=16.63 dB
Channel 9A: Peak=16.85 dB, Noise=-13.17 dB, SNR=30.02 dB
Channel 9B: Peak=-8.71 dB, Noise=-5.30 dB, SNR=-3.41 dB
Channel 9C: Peak=2.07 dB, Noise=-12.45 dB, SNR=14.52 dB
Channel 9D: Peak=-3.37 dB, Noise=-13.39 dB, SNR=10.02 dB
Channel 10B: Peak=4.71 dB, Noise=-11.31 dB, SNR=16.02 dB
Channel 10A: Peak=-6.75 dB, Noise=-10.39 dB, SNR=3.64 dB
Channel 10D: Peak=9.55 dB, Noise=-11.65 dB, SNR=21.20 dB
Channel 10C: Peak=1.69 dB, Noise=-12.94 dB, SNR=14.63 dB
Channel 11A: Peak=2.05 dB, Noise=-12.43 dB, SNR=14.48 dB
Channel 11C: Peak=1.79 dB, Noise=-11.46 dB, SNR=13.25 dB
Channel 11B: Peak=-7.98 dB, Noise=-3.71 dB, SNR=-4.27 dB
Channel 11D: Peak=-10.20 dB, Noise=-12.39 dB, SNR=2.19 dB
Channel 12A: Peak=-0.09 dB, Noise=-12.97 dB, SNR=12.88 dB
Channel 12B: Peak=23.75 dB, Noise=-13.51 dB, SNR=37.26 dB
Channel 12C: Peak=-10.10 dB, Noise=-22.52 dB, SNR=12.42 dB
Channel 13A: Peak=-6.62 dB, Noise=-19.20 dB, SNR=12.58 dB
Channel 12D: Peak=-12.89 dB, Noise=-17.74 dB, SNR=4.85 dB
Channel 13C: Peak=2.72 dB, Noise=-12.24 dB, SNR=14.96 dB
Channel 13B: Peak=-1.04 dB, Noise=-12.74 dB, SNR=11.70 dB
Channel 13D: Peak=-4.33 dB, Noise=-14.54 dB, SNR=10.21 dB
Channel 13F: Peak=0.88 dB, Noise=-12.26 dB, SNR=13.14 dB
Channel 13E: Peak=9.94 dB, Noise=-12.65 dB, SNR=22.59 dB

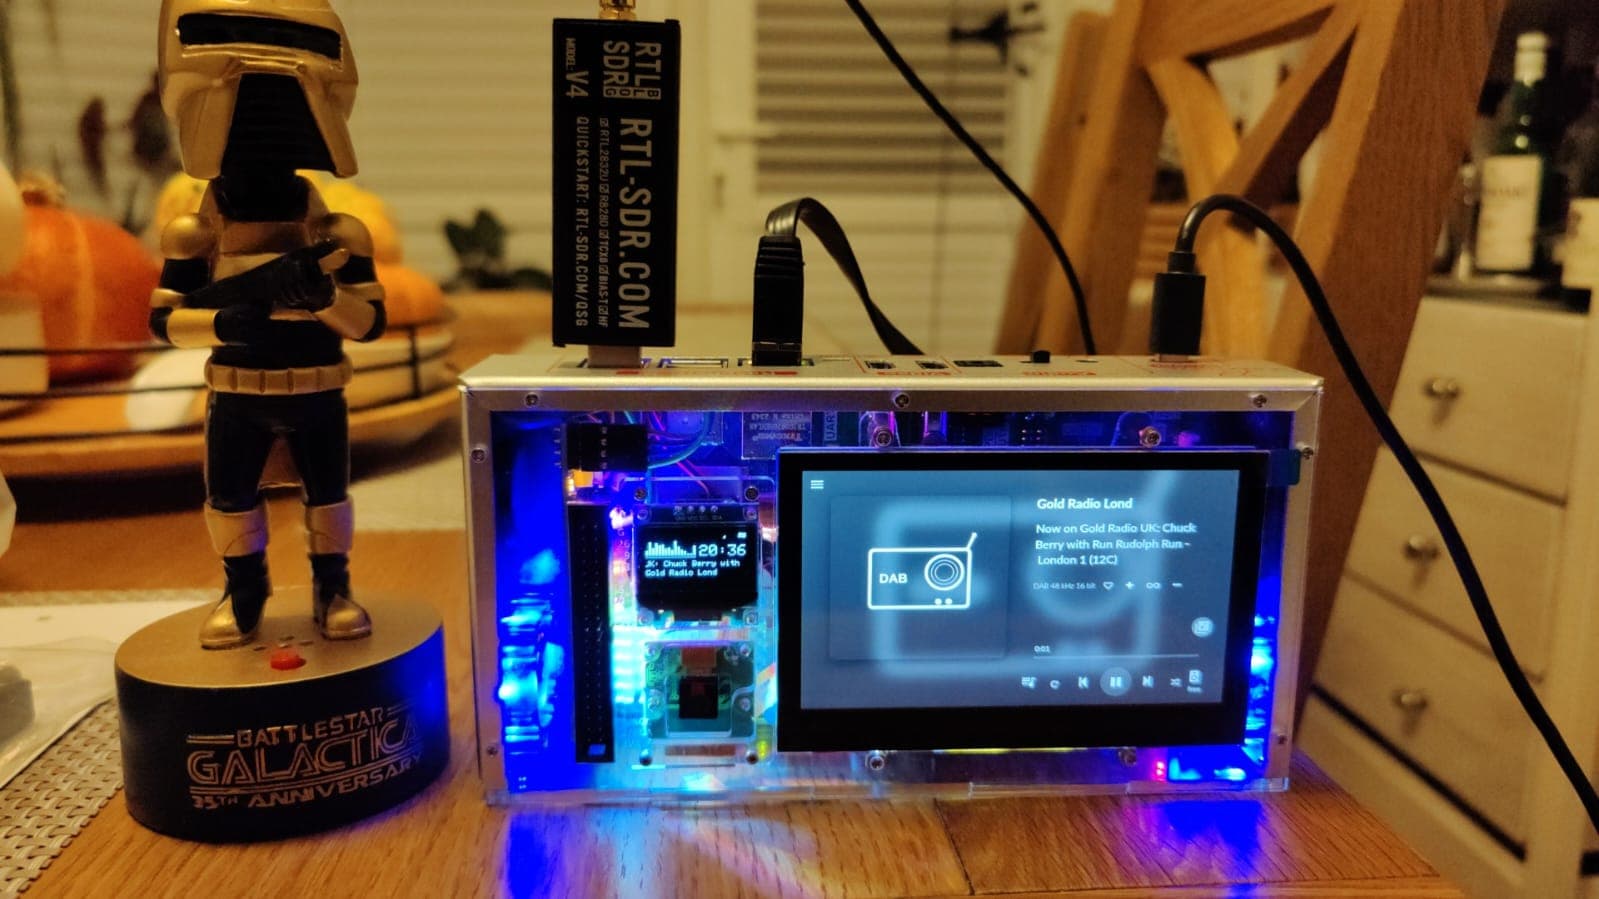
Just to show the difference between a X86 (previous screenshots) and a rpi4 (below):
(Same default settings, same antenna, same position, same dongle)

image

volumio@rpi4-hdmi-v4:~/scripts$ ./snrc.sh
Channel 5B: Peak=-7.48 dB, Noise=-11.18 dB, SNR=3.70 dB
Channel 5A: Peak=6.04 dB, Noise=-12.93 dB, SNR=18.97 dB
Channel 5C: Peak=9.42 dB, Noise=-16.23 dB, SNR=25.65 dB
Channel 5D: Peak=8.69 dB, Noise=-13.28 dB, SNR=21.97 dB
Channel 6A: Peak=-6.00 dB, Noise=nan dB, SNR=nan dB
Channel 6B: Peak=7.29 dB, Noise=-15.28 dB, SNR=22.57 dB
Channel 6C: Peak=-0.20 dB, Noise=-12.42 dB, SNR=12.22 dB
Channel 6D: Peak=4.32 dB, Noise=-12.10 dB, SNR=16.42 dB
Channel 7A: Peak=6.54 dB, Noise=-14.34 dB, SNR=20.88 dB
Channel 7B: Peak=-8.89 dB, Noise=-4.42 dB, SNR=-4.47 dB
Channel 7C: Peak=5.76 dB, Noise=-11.93 dB, SNR=17.69 dB
Channel 8A: Peak=-4.22 dB, Noise=-11.80 dB, SNR=7.58 dB
Channel 7D: Peak=-6.51 dB, Noise=-9.59 dB, SNR=3.08 dB
Channel 8B: Peak=-9.29 dB, Noise=-7.37 dB, SNR=-1.92 dB
Channel 8D: Peak=-6.27 dB, Noise=-9.13 dB, SNR=2.86 dB
Channel 8C: Peak=0.84 dB, Noise=-10.01 dB, SNR=10.85 dB
Channel 9A: Peak=8.42 dB, Noise=-12.36 dB, SNR=20.78 dB
Channel 9B: Peak=-7.97 dB, Noise=-2.68 dB, SNR=-5.29 dB
Channel 9C: Peak=2.81 dB, Noise=-10.63 dB, SNR=13.44 dB
Channel 9D: Peak=-10.96 dB, Noise=-15.68 dB, SNR=4.72 dB
Channel 10B: Peak=-2.90 dB, Noise=-12.26 dB, SNR=9.36 dB
Channel 10A: Peak=-8.75 dB, Noise=-11.47 dB, SNR=2.72 dB
Channel 10D: Peak=4.46 dB, Noise=-11.93 dB, SNR=16.39 dB
Channel 10C: Peak=-6.64 dB, Noise=-14.05 dB, SNR=7.41 dB
Channel 11A: Peak=-9.69 dB, Noise=-15.04 dB, SNR=5.35 dB
Channel 11C: Peak=3.34 dB, Noise=-11.79 dB, SNR=15.13 dB
Channel 11B: Peak=-7.19 dB, Noise=-3.27 dB, SNR=-3.92 dB
Channel 11D: Peak=-11.51 dB, Noise=-13.41 dB, SNR=1.90 dB
Channel 12A: Peak=-0.87 dB, Noise=nan dB, SNR=nan dB
Channel 12B: Peak=8.51 dB, Noise=-14.57 dB, SNR=23.08 dB
Channel 12C: Peak=-1.60 dB, Noise=-16.72 dB, SNR=15.12 dB
Channel 13A: Peak=-5.42 dB, Noise=-21.95 dB, SNR=16.53 dB
Channel 12D: Peak=-18.10 dB, Noise=-20.66 dB, SNR=2.56 dB
Channel 13C: Peak=-11.61 dB, Noise=-19.38 dB, SNR=7.77 dB
Channel 13B: Peak=-16.43 dB, Noise=-20.06 dB, SNR=3.63 dB
Channel 13D: Peak=-15.72 dB, Noise=-20.75 dB, SNR=5.03 dB
Channel 13F: Peak=-6.63 dB, Noise=-18.70 dB, SNR=12.07 dB
Channel 13E: Peak=-5.24 dB, Noise=-18.03 dB, SNR=12.79 dB
2 Likes

I ordered an RTL-SDR Blog V4 to replace the “el cheepo” blue RTL-SDR dongle (true: buy cheep, buy twice :slight_smile: ) as despite @nerd’s extra efforts with ppm correction, that thing just did not want to do DAB+, though FM was fine.

Oh no :astonished: - Based on Nerd’s advice I returned my new (unopened) RTL-SDR Blog V3 and ordered the V4 which arrives tomorrow :cold_sweat:

Why?

V4 - winner in all noise tests so far.

Kind Regards,

1 Like

Dear Volumionauts,

FM/DAB Radio Plugin - Version 1.2.5

New release adds real-time signal quality display for both FM and DAB.

What’s New:

Signal strength now visible in two places:

  1. Volumio playback screen - Shows signal level next to track type

    • FM ●●●○○ or DAB ●○○○○
    • 5-level indicator updates as reception changes
  2. Station manager - Currently playing station shows signal icon

    • Color-coded: red (weak) to green (strong)
    • Green border highlights the playing station
    • Updates every 2 seconds

Technical Details:

FM signal quality derived from RDS block error rate (BLER) via redsea -E flag. DAB signal quality derived from FIB quality and AAC decode success rate via new fn-dab binary callbacks.

Feedback welcome. Signal thresholds can be adjusted if the levels don’t match real-world reception quality.

Kind Regards,

Thank you for all your efforts, they bring a smile.
With the new dongle and active antenna, reception is strong and the audio quality more than acceptable.
For me, the real advantage is eliminating the streaming delays, nearly 12 minutes a day, since most streams don’t provide a time stamp.

1 Like

Nice addition @nerd signal strength.

image

FM/DAB Radio Plugin - Version 1.2.6

Fixes for issues found after v1.2.5 release.

Bug Fixes:

  • Signal indicator now updates immediately when signal strength changes
  • Custom station names display correctly at playback start (FM and DAB)
  • Hidden stations no longer appear in Volumio browse views

Details:

Signal changes were being blocked by the 2-second RDS throttle - now bypassed for responsive updates.

Custom names were taken from queued track metadata instead of current database value - now looked up fresh at playback time.

Hidden stations were shown with eye-slash icon but not filtered from browse - now properly excluded from FM, DAB, and ensemble views.


Should no other “undocumented features” surface, the FM/DAB Radio Plugin - Version 1.2.6 will be promoted to stable.


Kind Regards,

3 Likes

FM/DAB Radio Plugin - Version 1.2.8

New release adds Best Effort Artwork - album artwork for FM and DAB stations.

Important Limitation:

Artwork depends entirely on what stations broadcast. FM stations transmit
RDS (Radio Data System) metadata. DAB stations transmit DLS (Dynamic Label
Segment) metadata. Both are optional - stations choose what to send.

What you might see:

  • FM station name only (“Capital XTRA”) - no artwork possible
  • Song info (“Dua Lipa - Levitating”) - artwork lookup triggered
  • Mixed content (“Traffic update… Dua Lipa - Levitating”) - filtered then lookup
  • Slogans and promos (“The Best Mix of the 80s 90s and Today”) - no artwork

The plugin cannot invent metadata. If a station broadcasts only its name,
you will see the station text only. This is not a bug - it is the broadcast.

What’s New:

Album artwork now appears in the Volumio playback screen when stations
broadcast song metadata. The plugin parses RDS (FM) and DLS (DAB) text,
queries Last.fm for matching artwork, and caches results locally.

Why “Best Effort”:

Radio metadata is messy. Stations format it differently, RDS has bit errors,
and non-music content (adverts, news, DJ chat) gets mixed in. The plugin
uses multiple strategies to maximise artwork success while filtering junk.

How To Use:

  1. Enable “Show Artwork Settings” in plugin settings
  2. Leave defaults initially - they work for most stations
  3. Play a music station and watch for artwork
  4. If wrong artwork appears, add the triggering phrase to the Block List

The Block List:

Open Station Manager > Block List tab. Add phrases that trigger false matches:

  • DJ names (“Dave Berry”)
  • Show titles (“The Breakfast Show”)
  • Station slogans (“The Best Mix”)
  • Local adverts

The blocklist uses fuzzy matching - minor typos and RDS corruption are
handled automatically. Time announcements are filtered by default.

Settings Explained:

Best Effort Artwork (on/off)
Master toggle. Turn off for headless systems to save CPU/network.

Confidence Threshold (0-95%)
How certain the parser must be before triggering lookup.

  • 0%: Lookup everything. Maximum artwork, more false matches.
  • 60%: Default. Balanced.
  • 95%: Only clear “Artist - Title” patterns. Fewer false matches.

Lower if you’re missing artwork. Raise if you’re getting wrong artwork.

Artwork Persistence
What happens when metadata disappears (during promos, adverts).

  • “Keep until artist changes”: Best for music. Prevents flicker.
  • “Keep until track changes”: More responsive.
  • “Always refresh”: Use only if stale artwork is a problem.

Artwork Timeout (Disabled / 2-30 min)
Auto-clears artwork after N minutes with no artist change.
Use for talk radio, audiobooks, or long DJ sets.
Resets when new artist detected.

Debug Logging
Verbose logs showing cache hits, lookups, and URLs.
Leave off unless troubleshooting.

Bug Fixes:

  • FM stations with edited frequencies now update Recently Played correctly
  • Database auto-repairs on startup if frequencies were saved incorrectly

Backup Note:

Block List has separate backup/restore from stations. Find it in
Station Manager > Maintenance tab.


Plugin will be available after all tests are completed.


Kind Regards,

4 Likes

:rocket: The RTL-SDR Blog V4 and antenna landed today! Had it up and running in under 10 minutes, instantly pulling in all 61 local DAB & DAB+ stations where I live in the UK. Flawless performance as always — hats off to Nerd for the excellent work. :clap:

All,

Just sharing some firsthand experience to help you avoid the pitfalls I ran into:

  • Avoid cheap dongles, they tend to deliver cheap performance. (17 channels, with only 2 that actually played) (El Cheapo1, El Cheapo2)
  • Use a quality extension cable if you need to place the dongle further from your device. Poor cables can cause all sorts of issues: dropouts, failed connections, erratic behavior. This one works perfect. This one not so much.
  • Go for a powered DAB+ antenna — it makes a noticeable difference in reception. Just make sure your dongle supports LNA (Low Noise Amplifier). (79 channels with good quality) (Dongle, Powered DAB+)

Hope this saves someone a headache.

Hey @Steve1,

Thank you - appreciated. 61 stations in 10 minutes is a solid result. The V4 really does perform well for DAB reception in areas with decent signal coverage.

Enjoy the tinkering.

Kind Regards,

Hey @Wheaten,

Good observations - especially the point about cable quality. Poor USB extensions are a common source of mysterious problems that waste hours of troubleshooting.

For others reading this, here is a reference on dongles and bias tee capability for powering active antennas and LNAs:


Dongles with BIAS TEE support:

RTL-SDR based:

  • RTL-SDR Blog V3: Software switchable 4.5V, handles 150mA+
  • RTL-SDR Blog V4: Software switchable 4.5V, handles 150mA+
  • Nooelec NESDR SMArTee: Always-on bias tee (not switchable)
  • Nooelec NESDR SMArTee XTR: Always-on bias tee with extended tuner range

Higher-end SDRs:

  • Airspy (various models): Has bias tee
  • SDRplay RSP1A: Has bias tee, limited to 100mA maximum
  • SDRplay RSP1B: Has bias tee
  • SDRplay RSPdx: Has bias tee

Dongles without BIAS TEE support:

  • Nooelec NESDR SMArt (standard version)
  • Nooelec NESDR SMArt V5
  • Generic/budget RTL-SDR dongles
  • Most “El Cheapo” variants

CURRENT DRAW WARNING:

The SDRplay RSP1A has a 100mA limit and trips a fuse above that. Check your LNA specifications:

  • RTL-SDR Blog Wideband LNA: 150mA - exceeds RSP1A limit
  • Nooelec SawBird+ GOES: 180mA - exceeds RSP1A limit
  • Nooelec SawBird GOES (non-plus): 30-40mA - works with RSP1A

If your dongle lacks bias tee or your LNA draws too much current, external bias tee boards are available that support higher voltages and current ratings.

Kind Regards,

All,

A present form the mod’s (@nerd , @Wheaten ) :tada:

Why this script is a must‑have

Most people “tune by feel”, crank the gain up, wiggle the antenna, hope the audio stops stuttering. That’s fine for casual listening, but if you actually want to optimize your setup, you need numbers. This script gives you exactly that.

  • Gain isn’t magic, it’s balance.
    Too low → weak signals, poor decode.
    Too high → dongle overload, distorted peaks.
    The sweet spot is different for every stick, antenna, and room. This script sweeps through gains and shows you where the SNR is best.
  • Antenna position is voodoo until you measure it.
    Move it 10 cm and multipath reflections change completely. Indoors vs outdoors, vertical vs horizontal — all of it matters. Run the script after each tweak and you’ll see if your “better spot” actually improves the noise floor.
  • Channels aren’t equal.
    Some ensembles blast in strong, others limp along. The script compares them side‑by‑side so you know which multiplexes are reliable and which are marginal.
  • Objective data beats guesswork.
    Instead of “sounds better,” you get tables:
   Gain|Channel|Peak |Noise |SNR
   10  |7C     |0.92 |-14.24|15.16
   10  |7D     |-7.16|-8.30 |1.14
   10  |8A     |-3.26|-10.80|7.54

   Gain|Min SNR|Max SNR|Avg SNR
   -10 |1.04   |15.43  |11.41
   -9  |2.28   |24.05  |16.65
   -8  |2.18   |22.68  |16.13

   Best gain overall: -5 (Avg SNR=21.73)
  • That’s reproducible, shareable, and makes troubleshooting a team sport.

Why it’s important

  • Saves time: no endless fiddling, just run and read.
  • Diagnoses problems: if one channel is always weak, it’s coverage, not your dongle.
  • Helps the community: post your tables, compare setups, and everyone learns.
  • Adapts to change: weather, interference, or moving gear? Rerun and instantly see the new best gain.

TL;DR
This script turns “black‑magic SDR tinkering” into science. It’s your lab tool for finding the perfect gain and antenna position, proving what works, and sharing results with others. Once you’ve used it, you’ll never go back to guessing.

  • Copy the script to a convenient location, for example:
    /home/volumio/scripts
    chmod +x snrd-api_V2.sh

Running the Script

  1. Scan all available channels with a custom gain range
    Use the -g :: option to define the gain sweep.
    Example: sweep from -10 to 10 in steps of 2:
    ./snrd-api_V2.sh -g -10:10:2

  2. List available channels in your region
    Use the -l option to query the station manager and show detected channels:
    ./snrd-api_V2.sh -l

Example output:

Querying station manager at localhost:3456...
Available DAB channels:
  11C   220352000 Hz
  12C   227360000 Hz
  7C    192352000 Hz
  7D    194064000 Hz
  8A    195936000 Hz
  9C    206352000 Hz
  1. Adjust integration time per measurement
    Use the -i option to set how long each channel is measured.
    Example: sweep from -10 to 10 in steps of 2, with 10 seconds integration:
    ./snrd-api_V2.sh -g -10:10:2 -i 10

  2. Show help
    Use the -h option to display usage information:
    ./snrd-api_V2.sh -h

  3. Query specific channels
    You can specify one or more channel names after the options.
    Example: measure 11C and 7C with gain sweep from -10 to 10 in steps of 5:
    ./snrd-api_V2.sh -g -10:10:5 11C 7C

Sample output:

Gain|Channel|Peak|Noise|SNR
-10 |7C     |2.23|-7.73|9.96
-10 |11C    |3.00|-9.55|12.55
...
Gain|Min SNR|Max SNR|Avg SNR
-10 |9.96   |12.55  |11.26
-5  |21.19  |22.28  |21.73
...
Best gain overall: -5 (Avg SNR=21.73)
  1. Run with default gain sweep
    If you don’t specify -g, the script defaults to sweeping from -10 to 49 in steps of 5:
    ./snrd-api_V2.sh

Output

  • The script prints per‑channel measurements (Gain|Channel|Peak|Noise|SNR).
  • Then it prints a summary table (Gain|Min SNR|Max SNR|Avg SNR).
  • Finally, it highlights the best gain overall based on average SNR.

snrd-api_V2.zip (3.2 KB)

2 Likes