My DIY volumio project

Hello everyone.

This is my first post on the volumio forum and I wanted to share with you my little volumio project.

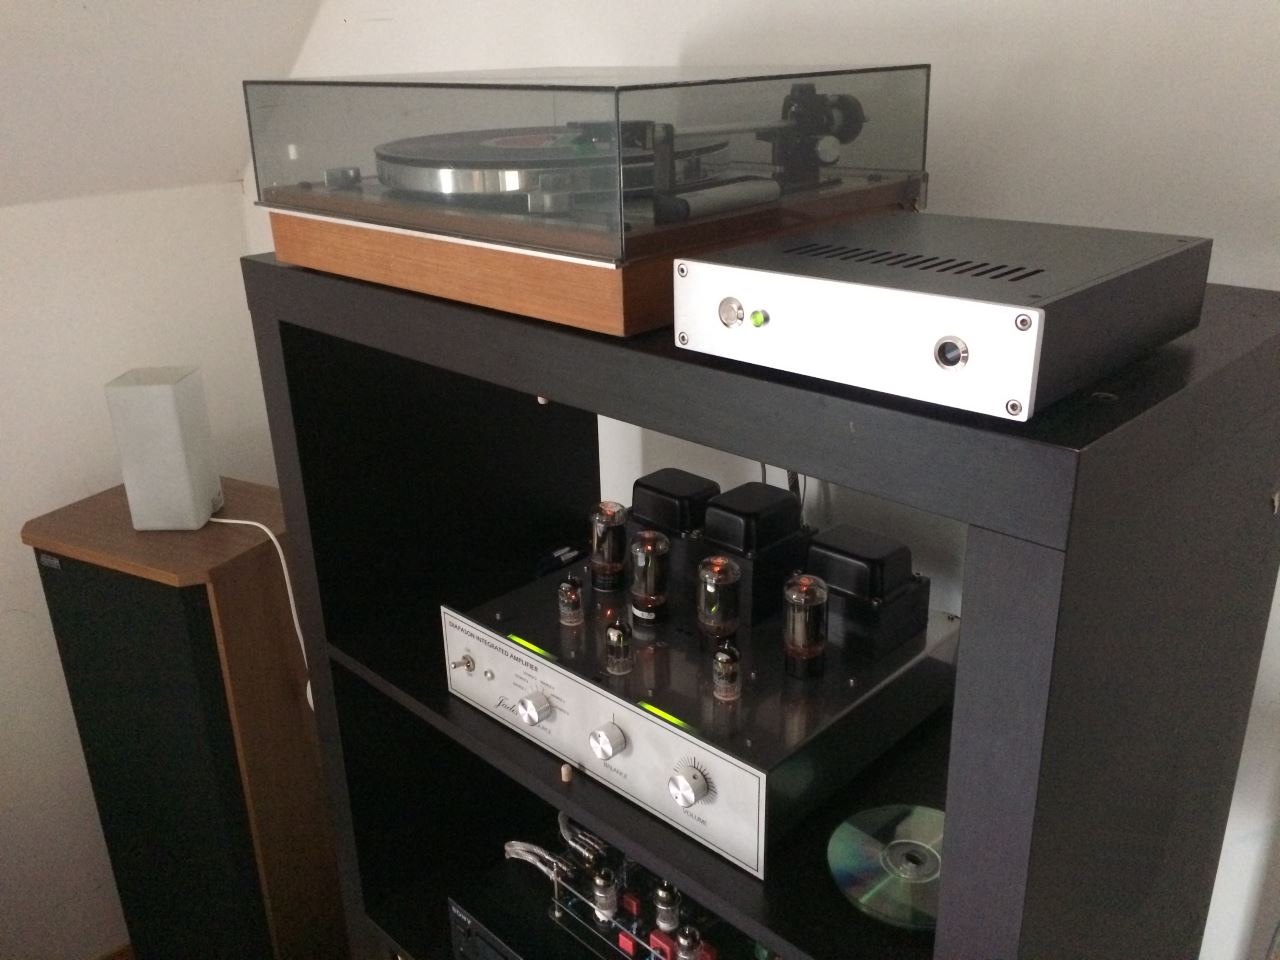
First of all, a picture of the finished version of the system.

IMG_3939.JPG

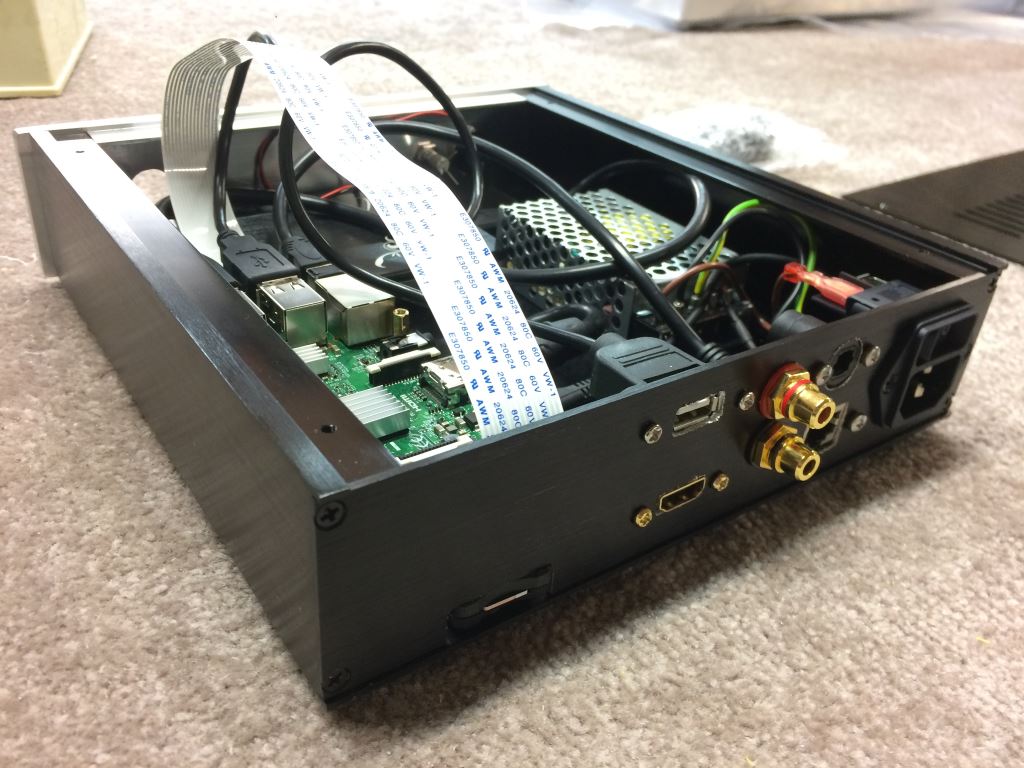
The server is composed of :

  • R-pi 3
  • Pifi DIGi (chinese clone of Hifiberry Digi+) even tho the hardware volume control doesnt work for some reason.
  • power supply : MEANWELL RS-25-5 which deliver up to 5V - 5A (not a linear one but much more affordable…)
  • aluminum case (from china)
  • different connectors and extender to go from the PI and the “DAC” to the back and front of the case.

I wanted this solution to be “independant” and thus I chose to integrate the USB hard drive inside the case and not to use a NAS.

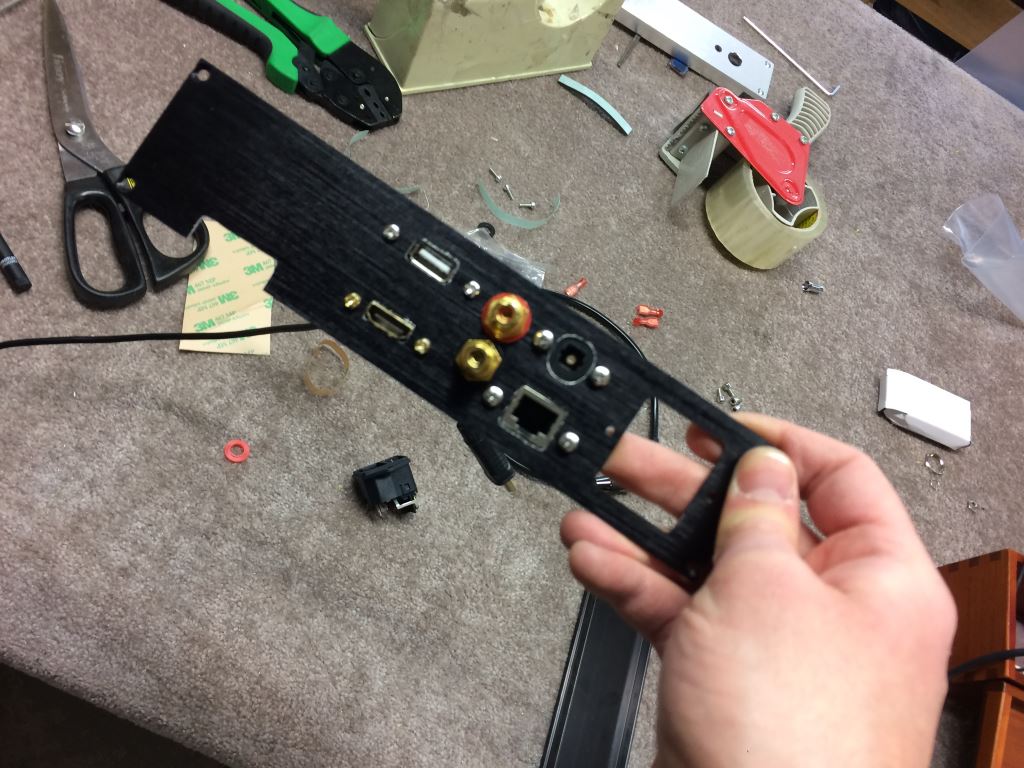
Step one after receiving the case was to dig some hole on the back in order to get the necessary outputs connection.
(Be nice that is my first DIY project) :slight_smile:

IMG_3317.jpg

As you can see, I also chose to place the SD card on the back of the case for easier maintenance/update with a micro SD extender.
I also Added an USB port to the back to connect a USB stick or a WIFi dongle (the integrated one is bad and once you put it in a case it is terrible…)
The optical output is also there and I anticipated that if someday I would like to replace the DIGI board by a DAC, I have the two RCA output ready :slight_smile:
The HDMI output has been also deported to the back in case I want to make this box a video server as well with KODI or whatever.
IMG_3334.jpg

As you may know, the advantage of the chinese close of the Hifiberry DIGI is that it includes an IR receiver out of the box.

I wanted to take advantage of this as it is so much more convenient to use a remote to skip a song or manage the volume control than going on the phone open the app etc…

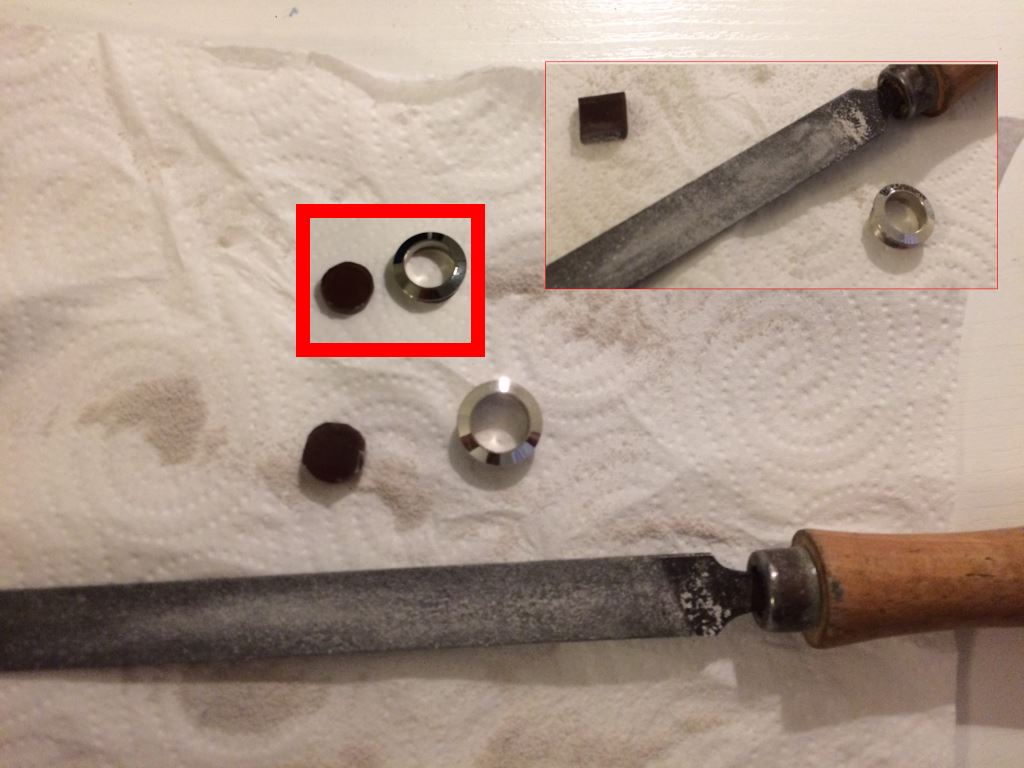
Making the receptor look nice on the front plate was the most exausting part of the project :slight_smile:

IMG_3357.JPG

First step was to file the square shaped dark smoked PVC in a round shape so that it would fit in the frame of an emptied power switch (the same as the actual power switch on the front plate)

And then hold the received behind it the best I could.

IMG_3366.JPG

Voilà !

On the front plate you might have noticed the LED.
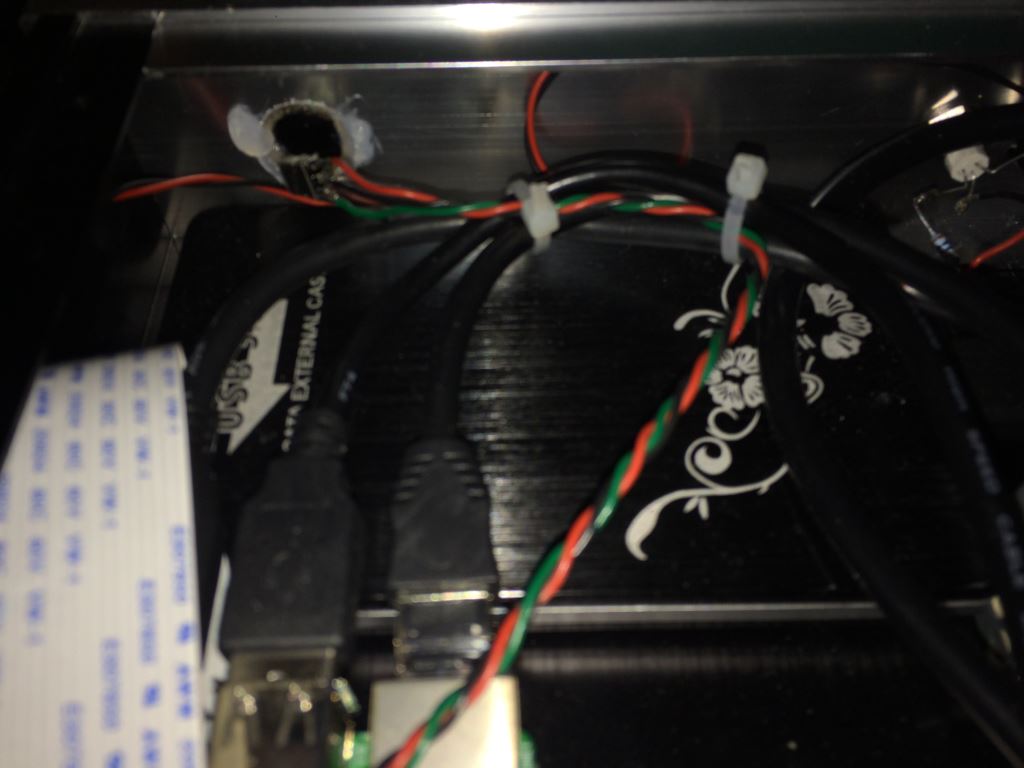
This LED is connected to the TxD pin along with a 460 ohm resistor.

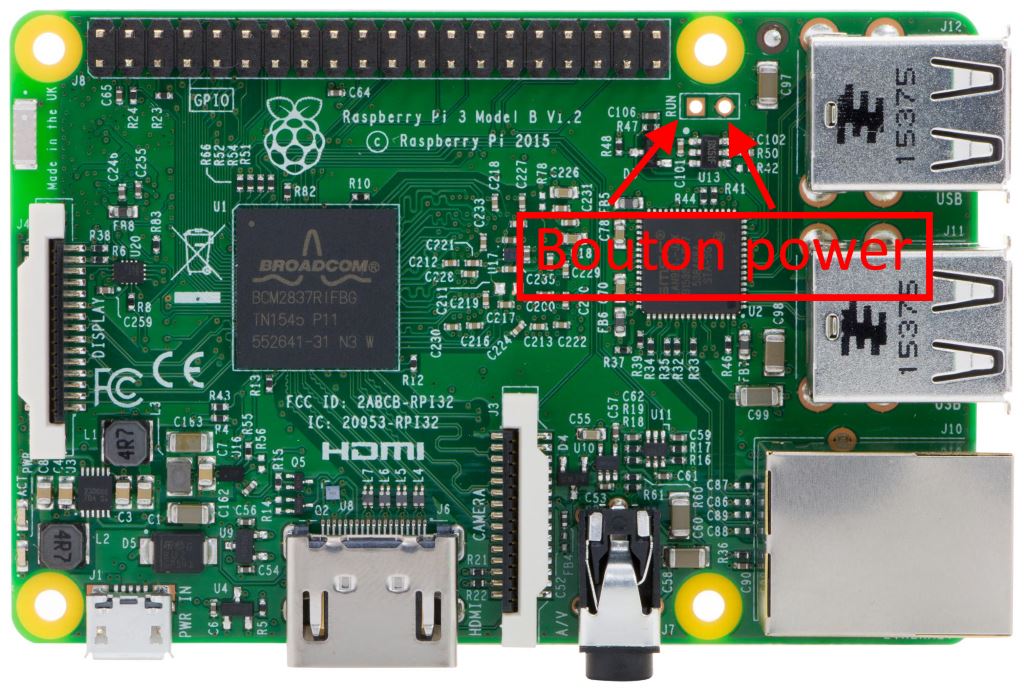
The power button (which is in fact more a reset button) is simply connected to the reset connectors of the PI.

Rpi3-top.jpg

For the final post, here is how I made these things work.

First let’s have the power LED indicate us whenever volumio is ON (which mean you dont want to press the power button) :slight_smile:

You need to connect in SSH to volumio and add :

enable_uart=1
to the /boot/config.txt

Now the remote control :

To be honnest I have been using Runeaudio for a while as this fuction didnt work on Volumio 2.
Recently a plugging was added and made things really easier.
I use an apple A1156 which is not supported nativelly by the plugging but it is not complicated to add the compatibility.

First, install the IR plugging.

Then, you need to change the GPIO input for IR which is set to 25 by default in the plugging while the GPIO used by the Pifi Digi is the 26th.
To do so, you need to connect into SSH to your pi and modify the “index.js”. (I use Putty to do this)
(remember that you need to activate the SSH on the newer version of volumio) => go to volumio.local/DEV and click “activate”

The Index.js file is located at : /data/plugins/system_controller/ir_controller/
To modify it, simply use SUDO =>

sudo nano /data/plugins/system_controller/ir_controller/index.js

On line 221 you will see : lirc-rpi gpio_in_pin=25’, {uid:1000,gid:1000},

Replace pin=25 to pin=26 save and reboot the pi.

now you need to add your remote into the plugging :
with Filezilla connect into your PI with SSH and go to :
/data/plugins/system_controller/ir_controller/configurations

There you will see the folders of the remotes that are included with the plugging.
You have to create a folder (I called it Apple A1156) .

The LIRC for the A1156 is available at this link : lirc.sourceforge.net/remotes/apple/A1156
Copy the content and past it in a TXT file called : lircd.conf and put it in your Apple A1156 folder.

Then open the apple A1294 folder and copy the “lircrc” file you will find there into your A1156 folder.
Now, you just need to slightly modify this file so that the lircd.conf and lircrc match each others.

Indeed A1156 buttons are named as so :

      KEY_PLAY               
      KEY_KPPLUS             
      KEY_FASTFORWARD     
      KEY_REWIND               
      KEY_KPMINUS              
      KEY_MENU       

A1294 are named as bellow :

      KEY_UP           
      KEY_DOWN              
      KEY_LEFT           
      KEY_RIGHT            
      KEY_PLAY         
      KEY_MENU         
      KEY_OK           

Take these names and replace the ones found in lircrc.
Try to make the functions match to the correct buttons :slight_smile:

once it is done save and restart.

Go to the plugging and the in setting you will be able to chose the Apple A1156 remote.
Click apply and it should work.

If you have any suggestion, I would be happy to hear about it.

My main two concerns are about the LED, I’ve read somewhere that doing this could mess with the bluetooth bus or something…
Also about the Pifi DIGi, if you have an idea how to make the hardware mixer work :slight_smile:
With the latest version released today I am able to use the software mixer (before it crashed when I selected it).
When I set up the Digi+Pro as I2S and output, Volumio will select hardware mixer by default but then, even if the songs are playing I have no sound coming out :frowning:

Thanks for reading and I hope you enjoyed :slight_smile:

Good series of postings there … well done and tyvm for contributing :slight_smile:

That’s a wealth of information, looking great! Thanks for sharing indeed :slight_smile:

You are very welcome :slight_smile:

I made this post as precise as I could because I struggled myself on some aspects of the project.

By the way, do you have an idea of how I could replace the “toggleend” of the MENU button of the remote by a shutdown command ?
I was abble to do this with rune.

Here I tried to replace “togglend” by “toggleshutdown” but no luck with that, even after rebooting and disactivating and reactivating the plugging the button would still trigger the “MUTING”.

Thanks :slight_smile:

Nice project, thanks for sharing.

Did you already update Volumio to 2.246? Please be aware of a problem with enable_uart=1, i.e. with your status LED.

Thank you :slight_smile:
I skipped directly from 2.221 (if I remember Well) and made a clean install of the 2.246.
I didn’t encounter any issue with my LED on the TxD pin.

Hi,

I will see if I can do a PR regarding the selection of the GPIO pin, imo it should be configurable in the plugin.

As for the MENU button, where did you find the TOGGLEEND? Because I think you can just edit the lircrc file and change this:

begin prog = irexec button = KEY_MENU config = /usr/local/bin/volumio random end

into this

begin prog = irexec button = KEY_MENU config = /sbin/shutdown end

Please note that I have not tested this, nor do I have an IR setup. Found this in code only :wink:

Just tested shutting down with my ODroid remote, which has a power button:

begin prog = irexec button = KEY_POWER config = /sbin/shutdown -h now end
And it works, very nice!
BTW, you have to change the applicable lircrc file in
/data/plugins/system_controller/ir_controller/configurations
and not /etc/lirc/lircrc as that one is overwritten after every reboot.

Thank you guys for the support.

Here is what my files look like in :
/data/plugins/system_controller/ir_controller/configurations
and
/etc/lirc/lircrc
Even after a reboot.

begin prog = irexec button = KEY_PLAY config = /usr/local/bin/volumio toggle end begin prog = irexec button = KEY_MENU config = /usr/local/bin/volumio volume toggle end begin prog = irexec button = KEY_KPPLUS config = /usr/local/bin/volumio volume plus end begin prog = irexec button = KEY_KPMINUS config = /usr/local/bin/volumio volume minus end begin prog = irexec button = KEY_REWIND config = /usr/local/bin/volumio previous end begin prog = irexec button = KEY_FASTFORWARD config = /usr/local/bin/volumio next end begin prog = irexec button = KEY_MENU config = /sbin/shutdown -h now end

Nevertheless, despite disabling and restarting the plugging, the MENU button still mutes the music.
I have no idea why.

Damn I just noticed my mistake.

I used the same files as the A1294 Apple remote which have one more button but I didnt delete the extra button from the Licrc file.
I will correct this and post back :wink:

Silly me.

Alright, so I deleted the extra MEMU line I had in my Lircr file and now it doesnt mute the player whenever I press the button.

But it still doesnt shut down volumio.

Here is my file :

[code]begin
prog = irexec
button = KEY_PLAY
config = /usr/local/bin/volumio toggle
end

begin
prog = irexec
button = KEY_KPPLUS
config = /usr/local/bin/volumio volume plus
end
begin
prog = irexec
button = KEY_KPMINUS
config = /usr/local/bin/volumio volume minus
end
begin
prog = irexec
button = KEY_REWIND
config = /usr/local/bin/volumio previous
end
begin
prog = irexec
button = KEY_FASTFORWARD
config = /usr/local/bin/volumio next
end
begin
prog = irexec
button = KEY_MENU
config = /sbin/shutdown -h now
end[/code]

Any idea?

Alright gyus ! It is now working :slight_smile: Thank you so much !

Here is what the lircr looks like :

begin prog = irexec button = KEY_PLAY config = /usr/local/bin/volumio toggle end begin prog = irexec button = KEY_KPPLUS config = /usr/local/bin/volumio volume plus end begin prog = irexec button = KEY_KPMINUS config = /usr/local/bin/volumio volume minus end begin prog = irexec button = KEY_REWIND config = /usr/local/bin/volumio previous end begin prog = irexec button = KEY_FASTFORWARD config = /usr/local/bin/volumio next end begin prog = irexec button = KEY_MENU config = /sbin/shutdown -h now end

But (yes again). When I was using Runeaudio, holding volume up or down would repeat the volume down or up function.
Now I have to press many times to put the volume up or down.

I tried to modify the lircr as I did with rune by adding “repeat = 4” for each function as bellow :

begin
prog = irexec
button = KEY_KPPLUS
config = /usr/local/bin/volumio volume plus
repeat = 4
end

But then when I press the volume buttons the UI says volume : NaN/100

Great find, I think OP can patch what he needs now :slight_smile:

Indeed, now all is perfect expect the “repeatable” volume selection which doesnt work even when I activate MPD clients volume control in the setting.
This is not a big deal anyway :slight_smile:

So here are the final version of the code for “Lircd.conf” and licrc in /data/plugins/system_controller/ir_controller/configurations/Apple Remote A1156

Lircd.conf :

[code]# this config file was automatically generated

using lirc-0.8.1(iguanaIR) on Fri Mar 30 19:20:40 2007

contributed by Matthias Urlichs <matthias|urlichs.de>

brand: Apple

model no. of remote control: A1156

devices being controlled by this remote: new (late 2006) MacBook

This config files are for non-Apple receivers only.

Use the lircd.conf.macmini file when you are using the Apple receiver.

begin remote
name Apple_A1156
bits 8
flags SPACE_ENC
eps 30
aeps 100

header 9065 4484
one 574 1668
zero 574 547
ptrail 567
repeat 9031 2242
pre_data_bits 16
pre_data 0x77E1
post_data_bits 8
post_data 0xC5
gap 37600
toggle_bit 0
ignore_mask 0x80ff

  begin codes
      KEY_PLAY                 0x20                      #  Was: play
      KEY_KPPLUS               0xD0
      KEY_FASTFORWARD          0xE0                      #  Was: ffwd
      KEY_REWIND               0x10
      KEY_KPMINUS              0xB0                      #  Was: minus
      KEY_MENU                 0x40                      #  Was: menu
  end codes

end remote
[/code]

licrc :

begin prog = irexec button = KEY_PLAY config = /usr/local/bin/volumio toggle end begin prog = irexec button = KEY_KPPLUS config = /usr/local/bin/volumio volume plus end begin prog = irexec button = KEY_KPMINUS config = /usr/local/bin/volumio volume minus end begin prog = irexec button = KEY_REWIND config = /usr/local/bin/volumio previous end begin prog = irexec button = KEY_FASTFORWARD config = /usr/local/bin/volumio next end begin prog = irexec button = KEY_MENU config = /sbin/shutdown -h now end

If the GPIO would be added to the plugging that would be awesome and makes things even easier :slight_smile:

Thanks to the volumio team for the great work ! I love it :slight_smile:

Repeated volume buttons didn’t work for me either, untill I replaced the ODroid lircd.conf from the plugin by the official one from here:
wiki.odroid.com/odroid-c2/application_note/lirc

Apparently the lircd.conf supplied by the plugin is not entirely correct.
Btw, I still had to add repeat = 3 to lircrc.

Hey, thank you for the tip.
I didn’t find another good Lircd.conf that would allow me to use the “repeat colume function”.
It is not a big problem but it just makes the experience smoother :slight_smile:

Little update regarding the last version (2.285).

The “enable_uart=1” that is to be added to the config file located in boot in order to have the status LED connected on the TxD pin working makes volumio crash during bootime.

Intead add the following :

dtoverlay=pi3-disable-bt

It will disactivate the bluetooth on the PI but it isn’t used by volumio anyway.

More info on the thread bellow :

https://volumio.org/forum/245-does-not-boot-with-enable-uart-t7194.html

Hi Nicolarson, very nice job! As I never built a DIY streamer, I’m curious also about the tools you’ve used to make the holes in the case!. Only pure hand-tool or a CNC machine? From the picture they seem to be very precise, fitting exactly with the dimensions of the plugs (RCA, HDMI, USB, etc.).
Could you post a link of the chinese web site where it comes from?

thanks
Andrea