Hi,
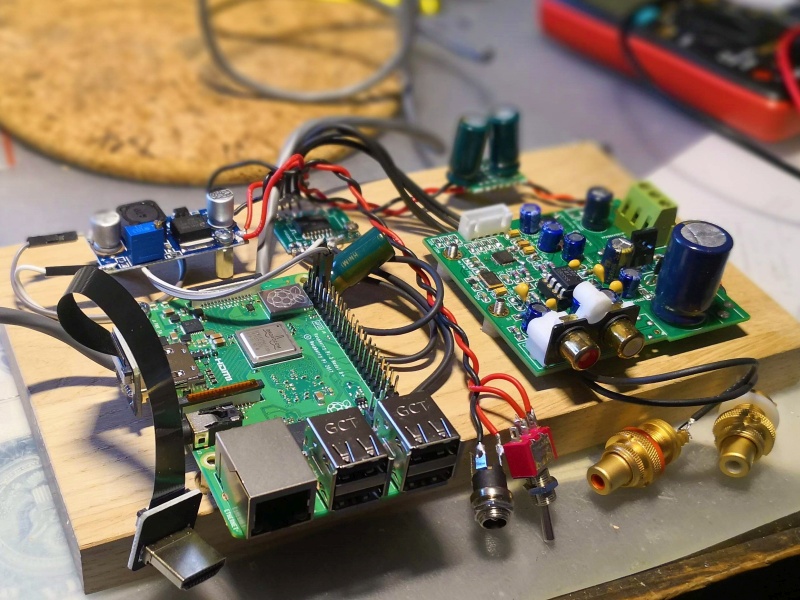
this guide shows how to setup Volumio 2 with an ES9018K2M DAC with I2C control. It is based on this guide but instead of using UART commands I rewrote the pyton script to communicate to the DAC through it’s native I2C interface. It works on the cheap boards like shown in foto of my setup (RPi 3 with Waveshare 7" touch screen, see here).
The problem with this DAC is that information about it is scarce and with it’s default settings it can only play 32bit and 24bit I2S streams so all audio has to be resampled. To make it play 16bit audio natively the configuration register has to be adjusted (for example to play Spotify on Volumio).
Also in order to take advantage of the hardware volume control the registers for left and right channel attenuation have to be set.
The python script takes care of that by constantly polling the Volumio status and updating the DACs registers if needed.
Step by step setup:
Install Volumio, set I2S DAC to ‘on’ and choose ‘Volumio ESS 9028QM’ as the DAC. Reboot to make it work (selecting another I2C DACs may also work, I tested it only like this)
Setup the network connection through the Volumio webinterface, an internet connection is required. Connect to your RPi through SSH (Activate SSH on Volumio first)
Check that a DAC is recognized (listing as ‘hifiberry’)
aplay -lmust show card1 as something like:
card 1: sndrpihifiberry [snd_rpi_hifiberry_dac], device 0: HifiBerry DAC HiFi pcm5102a-hifi-0 [HifiBerry DAC HiFi pcm5102a-hifi-0] Subdevices: 1/1
Leave the other output settings unchanged. You should now be able to play 24bit files and radio streams but 16bit files will sound horrible. Check that you have the I2C lines properly connected: SCL is on pin 3 and SDA is on pin 4 of the DAC. Also make sure your board has pullup resistors to the 3.3V supply, add 4.7k resistors if it does not.
Now that the DAC is up and running, let’s add hardware volume control through I2C. First add a dummy volume control:
sudo nano /var/lib/alsa/asound.stateadd these lines at the end (there may already be a similar block called state.sndrpihifiberry , can just replace that)
state.sndrpihifiberry {
   control.1 {
      iface MIXER
      name Digital
      value.0 99
      value.1 99
      comment {
         access 'read write user'
         type INTEGER
         count 2
         range '0 - 99'
         tlv '00000001000000080000000000000032'
         dbmin 0
         dbmax 4950
         dbvalue.0 4950
         dbvalue.1 4950
      }
   }
}
then run
sudo alsactl restore 1to load the new digital mixer.
check it shows up by running:
amixer -c 1it should sow a mixer called 'Simple mixer control ‘Digital’ ,0
Go to ‘Playback options’ on the webinterface, select ‘Hardware’ under mixer type, and select the
just created ‘Digital’ mixer. Save the settings. Now the mixer control works but does not do
anything yet as we have not linked it to the I2C bus yet. This is done with a python script.
On my system the I2C bus was already properly initialized.
it will show up as ‘i2c-1’ under /dev :
cd /dev
ls
-> check the list for ‘i2c-1’
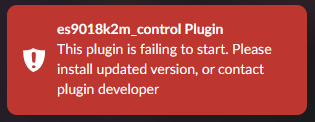
Google on how to install it on your raspberry pi if this is not installed or you can just install this plugin by ChrisPanda which will set it up as well plus this plugin will let you play with all of the DAC’s settings like jitter reduction and filters. Also if it does not work
there may be a wiring problem (it crashes if I2C lines are not properly connected, not the plugins fault). Please not that the plugin may not properly work after you setup the python script as it may overwrite some settings constantly.
cd /home/volumio
wget https://github.com/ChrisPanda/volumio-es9018k2m-plugin/releases/download/0.1.0/volumio-es9018k2m-plugin-0.1.0-sys-2.4x.zip
miniunzip volumio-es9018k2m-plugin-0.1.0-sys-2.4x.zip
cd volumio-es9018k2m-plugin-0.1.0-sys-2.4x
volumio plugin install
install the python I2C library called smbus
sudo apt-get install python-smbus i2c-toolscheck that you have the correct I2C bus (should be loaded in /dev/i2c-1) if you are using port I2C0 then change that in the python file main function.
create a python script:
nano /volumio/app/plugins/system_controller/i2s_dacs/scripts/ES9018K2M_I2C_Volumio.pypaste this python code:
[code]#!/usr/bin/python2
coding: utf-8
ESS ES9018K2M DAC I2C bus direct hardware management script for Volumio
by Damian Schneider (January 2020)
Based on python script by vigo
https://forum.volumio.org/setup-audiophonics-es9018k2m-dac-with-volumio-t6041.html
which is based on script for Runeaudio by Audiophonics and Fujitus
https://github.com/audiophonics/ES9018K2M_serial_sync
Required: ES9018K2M DAC with I2C pins connected to Raspberry pi
import time , smbus
import subprocess , os
import json
from urllib2 import Request, urlopen, URLError
#global register definitions
DEVICE_ADDRESS = 0x48 #7 bit address (will be left shifted to add the read write bit), alternat address: 0x49 if pin 5 is pulled high
#useful register numbers, refer to datasheet for more info (is hard to find but can be found online, check chinese sites)
#register number refers to its address, reg 0 is addres 0x00
#Reg0 system&oscillator settings, write 0x01 to reset chip (default 0x00)
#Reg1 input configuration, default=I2S 32bit, 0x8C (highest two bits are bit rate, write 0x4C for 24bit and 0x0C for 16bit)
#Reg6 deemphasis filter settings (off by default) and softe-mute speed (0x40 = fastest, 0x47 = slowest (?) not tested but 3 LSB give the speed, default is 0x42)
#Reg7 filter setting and mute, set to 0x80 (default) for unmute and set to 0x83 to mute both channels (2 LSB are mute or unmute) will ramp up the volume, speed can be set in register 6
#Reg15 left channel volume (0 is 0dB = loudest, 255 is -127.5dB = almost mute)
#Reg16 right channel volume (0 is 0dB = loudest, 255 is -127.5dB = almost mute)
def VolumioGetStatus():
process = subprocess.Popen(’/volumio/app/plugins/system_controller/volumio_command_line_client/volumio.sh status’, stdout=subprocess.PIPE, shell=True)
os.waitpid(process.pid, 0)[1]
Status = process.stdout.read().strip()
ParamList = json.loads(Status)

#set the defaults in case the status call does not return a required value
volumioBitDepth = '32 bit'
volumioStatus = 'stop' #also sets volume = 0
volumioMute = False

# volumioService = ParamList['service'] #service currently not checked

if 'status' in ParamList:
    volumioStatus = ParamList['status']

if 'bitdepth' in ParamList:
    volumioBitDepth = ParamList['bitdepth'] #entry is '24 bit' o r '16 bit', we only need to check if it is 16bit (on webradio this string is empty but plays fine with 32bit)

if 'volume' in ParamList:
    volumioVolume = ParamList['volume'] #volume is an integer

if 'mute' in ParamList:
    volumioMute = ParamList['mute'] #is true or false

if(volumioStatus != 'play'):
    volumioVolume = 0 #set volume low if nothing is playing

return(volumioVolume, volumioBitDepth, volumioMute)
#set the volume by adjusting both left and right channel, input is 0-100
def ES9018K2M_set_volume(vol):
vol = max(min(100, vol), 0) #limit the input value 0-100
vol_set = (100-vol) #map 0-100 to 100-0 (register is attenuation not amplification so 0 = max, 256=min, 100 means -50dB which is qute silent already)
bus.write_byte_data(DEVICE_ADDRESS, 15, vol_set) #set volume of left channel
bus.write_byte_data(DEVICE_ADDRESS, 16, vol_set) #set volume of right channel
if name == ‘main’:
bus = smbus.SMBus(1) # 0 = /dev/i2c-0 (port I2C0), 1 = /dev/i2c-1 (port I2C1)
#set the defaults (also used to check if value changed)
volume = 100
bitrate = 32
mute = False
try:
    while True: #run the script forever
        volumioStatus = VolumioGetStatus() #read the status of the player: reading volume, bit debth and mute

        #check if a state changed
        if(volumioStatus[0] != volume):
            volume = volumioStatus[0]
            ES9018K2M_set_volume(volume)

        if(volumioStatus[1] == '16 bit'):
            if(bitrate != 16):
                bitrate = 16
                bus.write_byte_data(DEVICE_ADDRESS, 1, 0x0C)  # set 16bit mode
        else:
            if(bitrate != 32):
                bitrate = 32
                bus.write_byte_data(DEVICE_ADDRESS, 1, 0x8C)  # set 32bit mode (works fine for 24bit input but not for 16 bit)
                #bus.write_byte_data(DEVICE_ADDRESS, 1, 0x4C)  # set 24bit mode

        if(volumioStatus[2] != mute):  #mute changed
            mute = volumioStatus[2]
            if(mute):
                bus.write_byte_data(DEVICE_ADDRESS, 7, 0x83)  # mute both channels
            else:
                bus.write_byte_data(DEVICE_ADDRESS, 7, 0x80)  # unmute both channels

        time.sleep(0.05)
except KeyboardInterrupt:
    bus.close()
bus.close()[/code]
create a shell script that starts the python script:
nano /volumio/app/plugins/system_controller/i2s_dacs/scripts/ES9018K2M-control.shwith this code
[code]#!/bin/sh
ESS ES9018K2M DAC hardware management starting script
Author: Damian Schneider
python /volumio/app/plugins/system_controller/i2s_dacs/scripts/ES9018K2M_I2C_Volumio.py[/code]
make the script executable:
chmod ugo+x /volumio/app/plugins/system_controller/i2s_dacs/scripts/ES9018K2M-control.shAdd ES9018K2M DAC definition in Volumio:
nano /volumio/app/plugins/system_controller/i2s_dacs/dacs.jsonadd this line (in alphabetically correct order):
{"id":"es9018k2m","name":"ES9018K2M bare DAC","overlay":"hifiberry-dac","alsanum":"1","mixer":"Digital","modules":"","script":"ES9018K2M-control.sh","needsreboot":"yes"},Reboot.
Go to ‘Playback options’ on the web interface, make sure I2S DAC is activated and select the just created ‘ES9018K2M bare DAC’ as the model and save. Set the Mixer type to ‘Hardware’ and the control to ‘Digital’ and save.
Reboot.
The python script is now be running in the background and the Volumio volume control is linked to the DAC hardware volume control. The script checks for the bit-rate and sets it correctly on the DAC. This also works for the Spotify plugin as well as Balbuze’s Volspotconnect plugin.
I was not able to fix the startup-sound so for now just disable it in the settings.