Volumio project with extra hardware buttons

Getting ready to assemble the second iteration of my Volumio box:

  • Hardware is a Pi 3B+ and IQAudio Pi Digi+ HAT.
  • Screen is the standard 7" Raspberry Pi touch screen.
  • The case is a modified Smarti Pi Touch Pro.
  • Other parts are:
    • Pimoroni onoff shim and pico hat hacker soldered on to a tall extension header, and wired to a GPIO breakout board
    • Stripboard with hardware buttons, LEDs and IR sensor
    • Bit of old IDE ribbon cable to connect the Pi and the HAT (note: important to use an old old 40-wire cable, not the later 80-wire type of IDE cable)

Assembled on to the case:


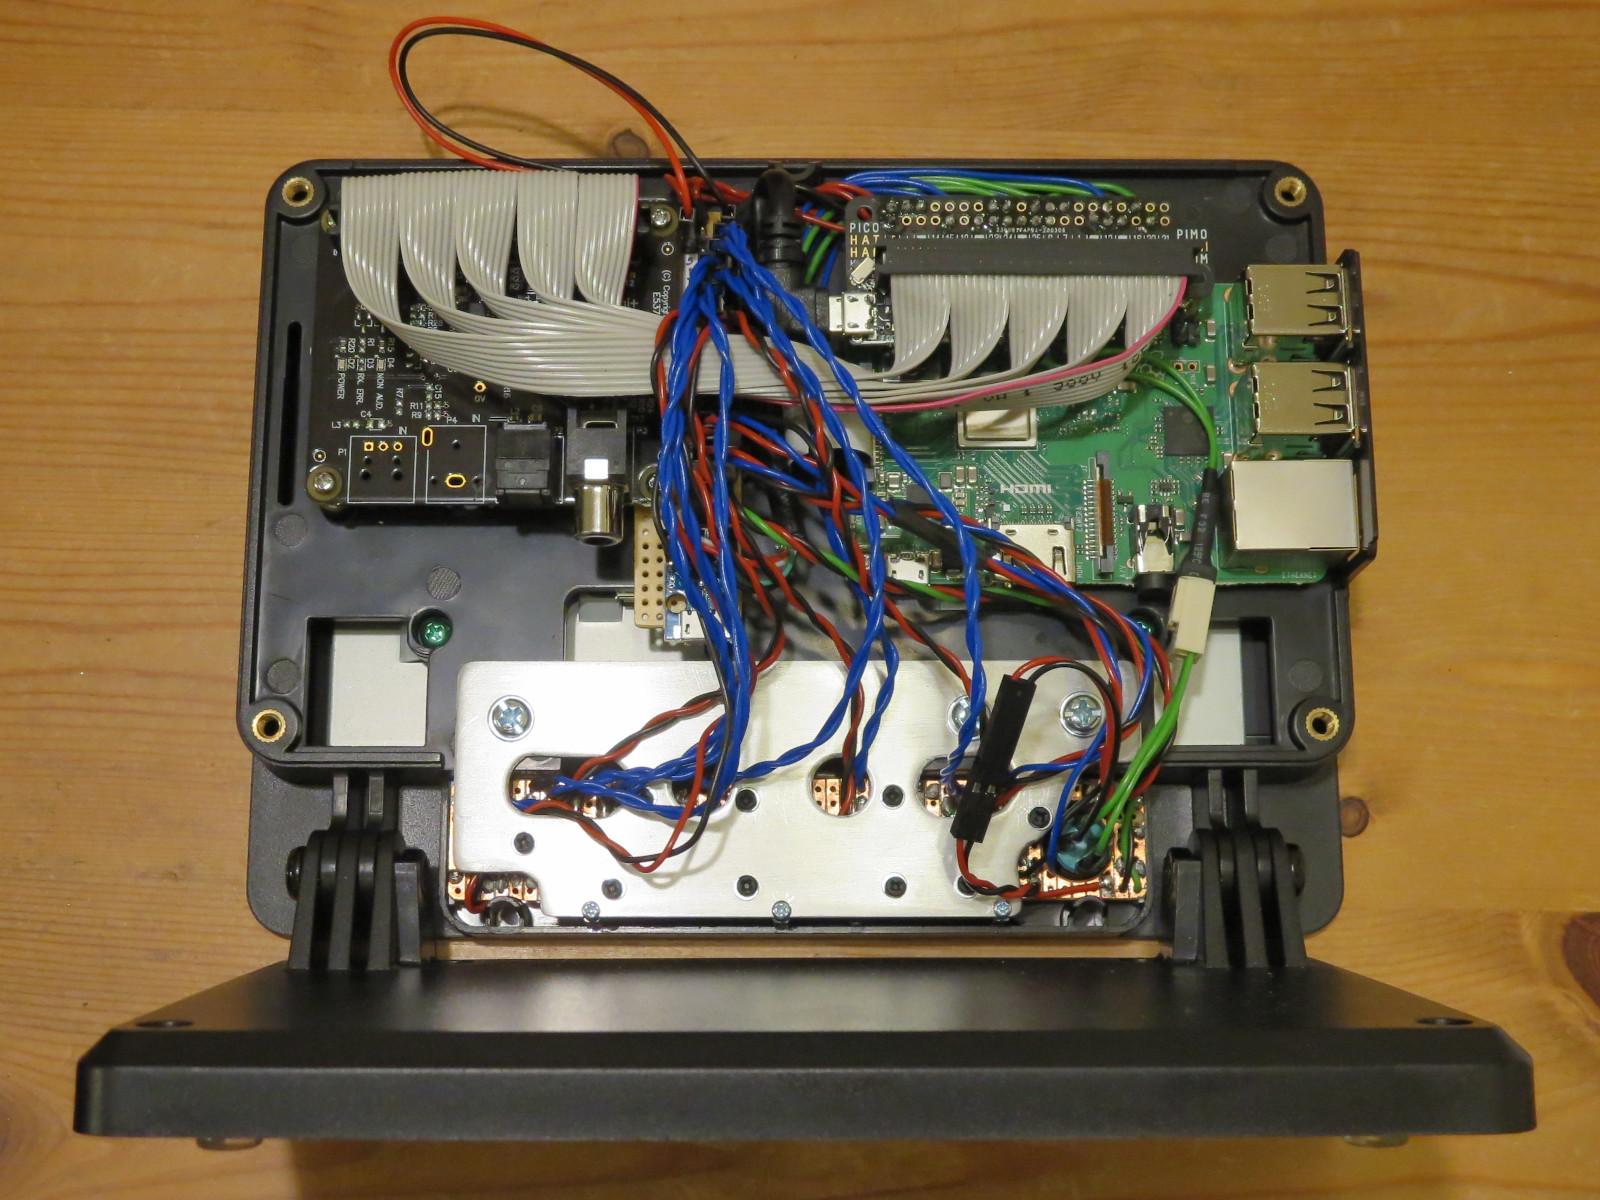
Took a few attempts at re-routing wires before the back panel would fit on. Don’t buy the 25mm version of the Smart Pi Touch Pro case if you want to do anything remotely complicated! The 45mm version is so much easier to fit stuff in. The 25mm one does look nice and sleek though.

Complete:

Here are my modifications to the GPIO-buttons plugin, if anyone wants to use them (or upload to Github). I added support for mute, random and repeat buttons.
gpio-buttons.zip (4.1 KB)
I also did a modified version of gpio_control to support indicator LEDs for those functions. I passed those changes on to supercrab who is still active on here and maintaining that plugin.

10 Likes

Very nice build!

1 Like

Very Nice
:+1:t2:

1 Like

Based on this post I tweaked my display CSS to hide the volume control which is useless with the digital output:

Here’s what I added to the end of app-e831b7a181.css:

@media (min-width: 800px) and (max-width:800px) and (min-height: 480px) and (max-height: 480px)
{
/* hide scrollbar on playback screen */
div#contentWrapper.playback { overflow-y: hidden !important; }

/* hide multi-room */
multi-room-dock {
    display:none;
}

/* wider scrollbars */
::-webkit-scrollbar{
    width: 30px;
    height: 30px;
}

.knobWrapper {
    margin-bottom: 4px;
}

#playbackPanelWrapper #rightPanel {
	display:none;
}

#trackInfo #trackDetails
{
	text-align:center;
	margin-left: -433px;
	width:400px;
	height: 200px;
	overflow:  visible;
}

#playbackPanelWrapper #leftPanel {
	float: left;
	width: 50%
}

#playbackPanelWrapper #centerPanel {
	float: left;
	width: 50%
}

#trackInfo {
	position: relative;
	float: left;
	width: 100%;
	min-height: 1px;
	padding-left: 0px;
	padding-right: 0px;
	text-align: right;
	margin-top: 28px;
	line-height: 1.3;
	margin-left: 25px;
}

#trackInfo img {
	width: 100%;
	margin: 0;
	max-width: 380px;
	max-height: 320px;
	border: 0px;
	margin-top: -200px;
	object-fit:contain;
}
}

there is a nice one for the contemporary:
( i expanded mine to 4 options in menu )

1 Like

have you added somewhere any diagrams how to connect all those parts ?

Hi,
First of all: Great work!
I just have a little bit the same configuration on my table:

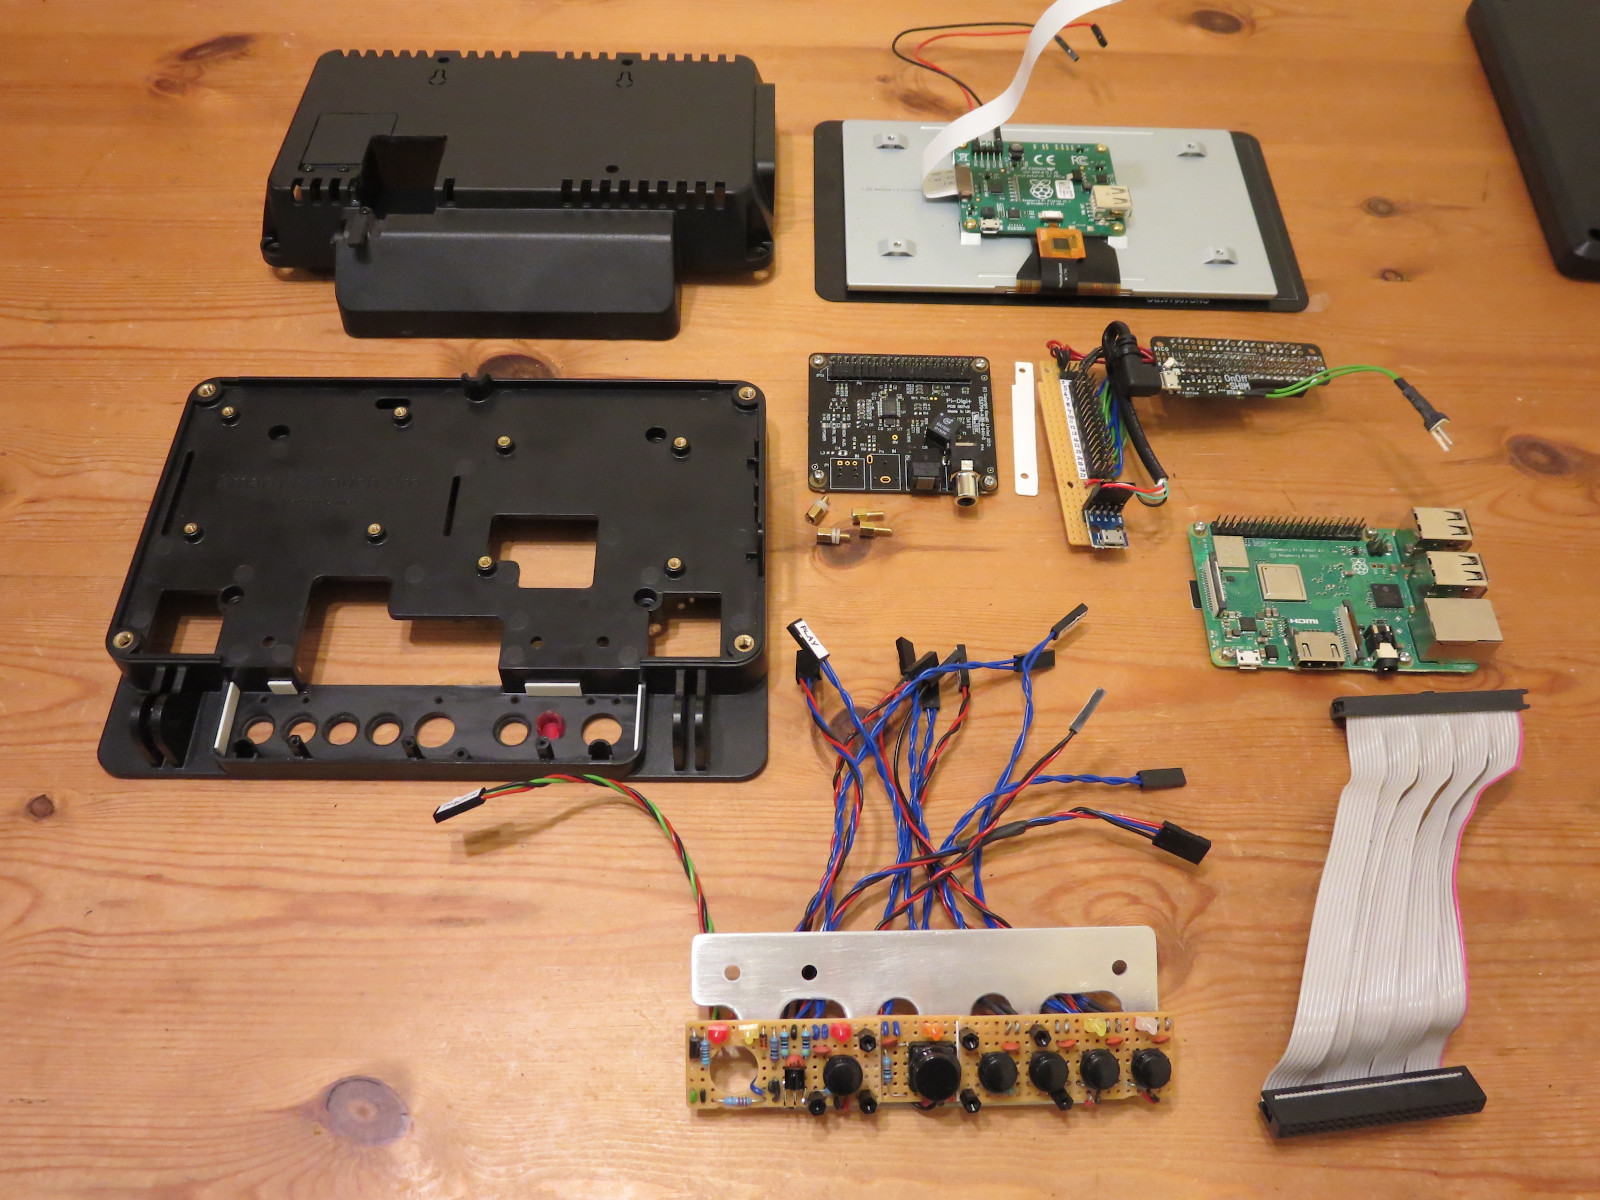
  • Hardware is a Pi 3B+ and Hifiberry DAC+ HAT.
  • Screen is the standard 7" Raspberry Pi touch screen.
  • The case is the bigger Smarti Pi Touch Pro.
    I would like to add only a power button to power on and off the Pi. I saw that the use of some GPIO-PINs are not compatible with I2C, needed for the Hifiberry (On-Off-button-with-DAC.
    How did you wire the power connection to the Pimoroni parts? A small sketch would be sufficient.
    Thank you very much

I connected my power button through a Pimoroni onoff shim. I’ve used this with an IQAudio Digi+ and an IQAudio DAC+ without any compatibility problems, but can’t comment on the Hifiberry DAC+. I think all these DAC hats are similar in principle though.
On this project I soldered the onoff shim to a breakout board, but on other projects I’ve soldered it directly to the GPIO header - it is made thin enough that if you solder it carefully, you can still put a HAT on top of it (with slightly taller standoffs).

I would not even recommend to do this.
Please consider something like this:

Thanks, Wheaten, for this very useful recommendation.
@AndyL :

I’ve used this with an IQAudio Digi+ and an IQAudio DAC+ without any compatibility problems, but can’t comment on the Hifiberry DAC+. I think all these DAC hats are similar in principle though.

Yes, IQAudio Digi+ and Hifiberry DAC+ use I2S. It’s for this reason that your configuration is very similar to mine. It’s also for this reason that I would like to know on which GPIO you use to connect the Pimoroni onoff shim? Do you connect them just on the left side (starting with PINs 1-2, 3-4, 5-6 …)? Or do you connect them to other PINs?
Thanks for further explanations.

The onoffshim connects to pins 1-12. From the description on the product page, it looks like it actually uses pins 7 (GPIO4) and 11 (GPIO17) for signalling, so shouldn’t clash with I2C on pins 3+5 (GPIO2 and GPIO3).

Nake sure that you don’t install the script with the command given by primon.
Download it first:

cd ~
wget curl https://get.pimoroni.com/onoffshim

nano onoffshim
replace:
CONFIG=/boot/config.txt
To: CONFIG=/boot/userconfig.txt

Run:
bash onoffshim

Thanks, AndyL, for these precisions.
And many thanks to Wheaton for the coding. I’ll test it next week.