At first, I wanted to put buttons on the front panel, but on the test bench, the GPIO buttons and Control plugins never worked (perhaps because the Raspberry Pi wasn’t powerful enough).
But it works randomly and is as slow as a snail on amphetamines!
So my idea is to go back to basics, keep only a few elements and start again on a sound footing.
great dac, sounds very nice.
I have played the pcm 1794A dac for about two days now and am very happy with it, plays very nicely and quietly with a nice stereo image.
a side note, I have to upsample with an ian canada FIFO MA 1.5 and ian canada isolator II between a raspberry (volumio as software) otherwise no sound will come out.
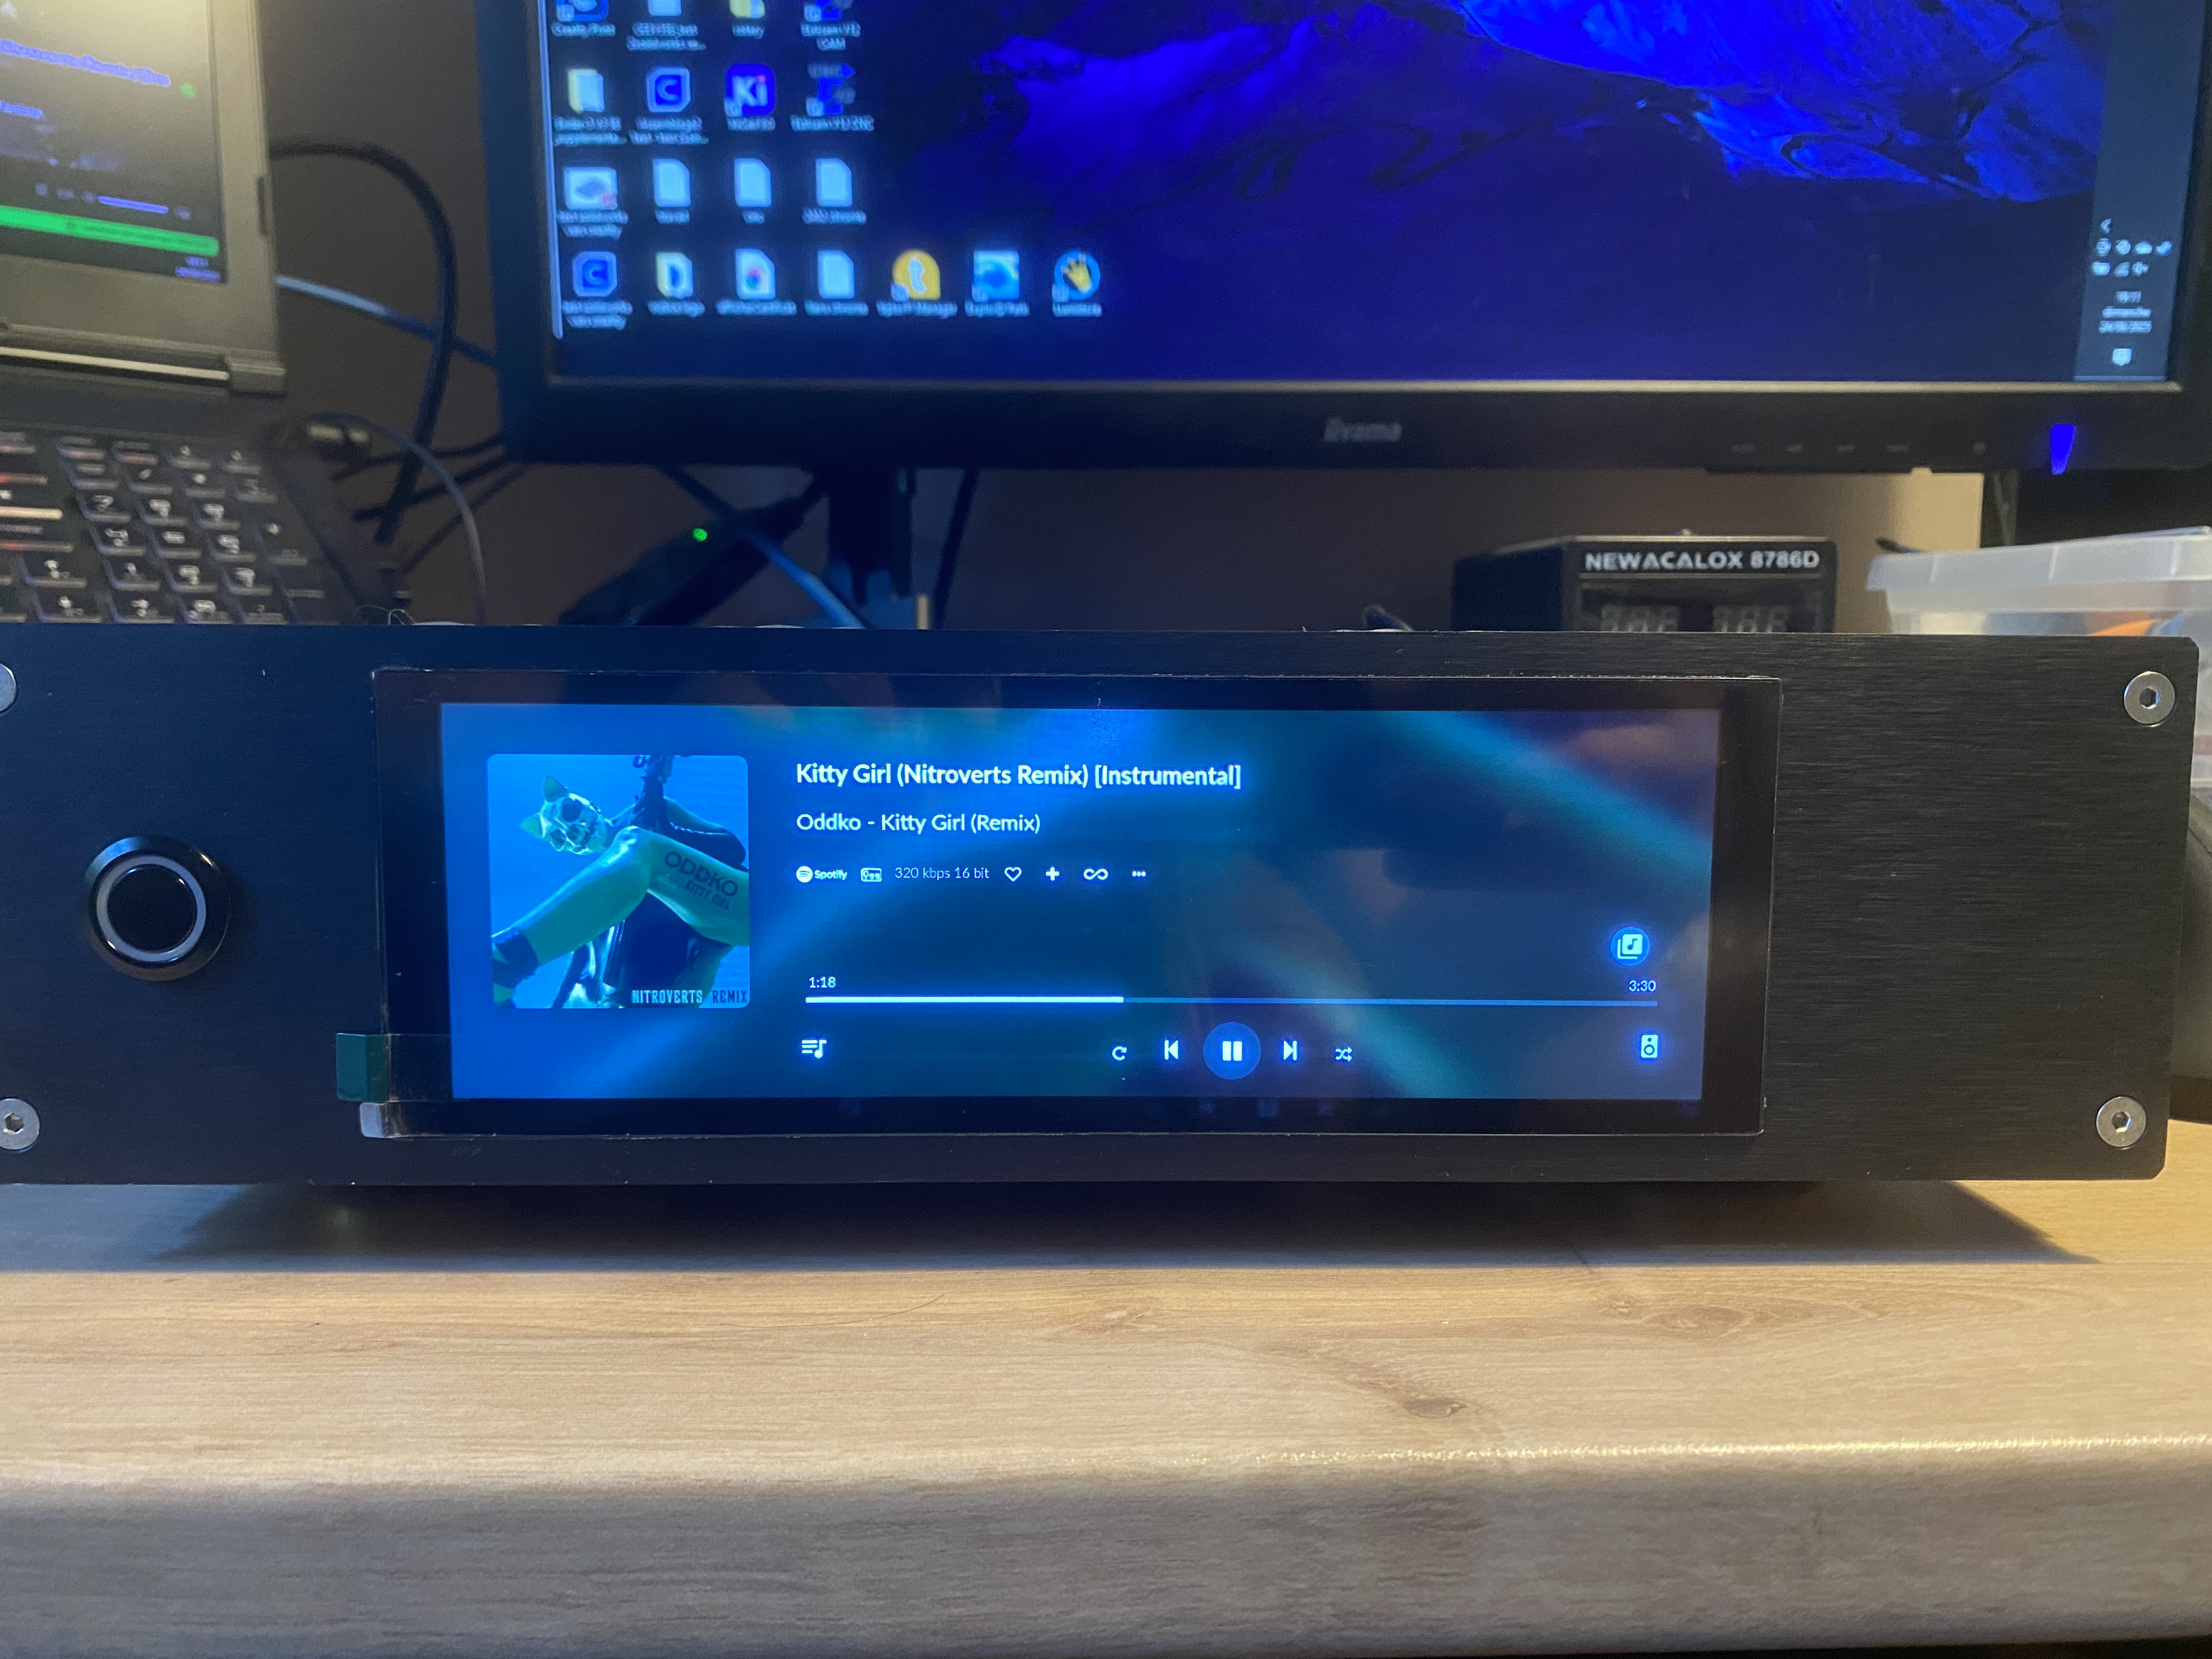
Pi5, DAC Innomaker Pro, XLR jack cable and a new 7.9" screen at home. The previous screen gave up the ghost.
Now comes the stage of putting everything back together with the Pi5.
Do you have the link for the screen configuration? I can’t seem to find it.
And the more complex integration into the IronPre preamp.
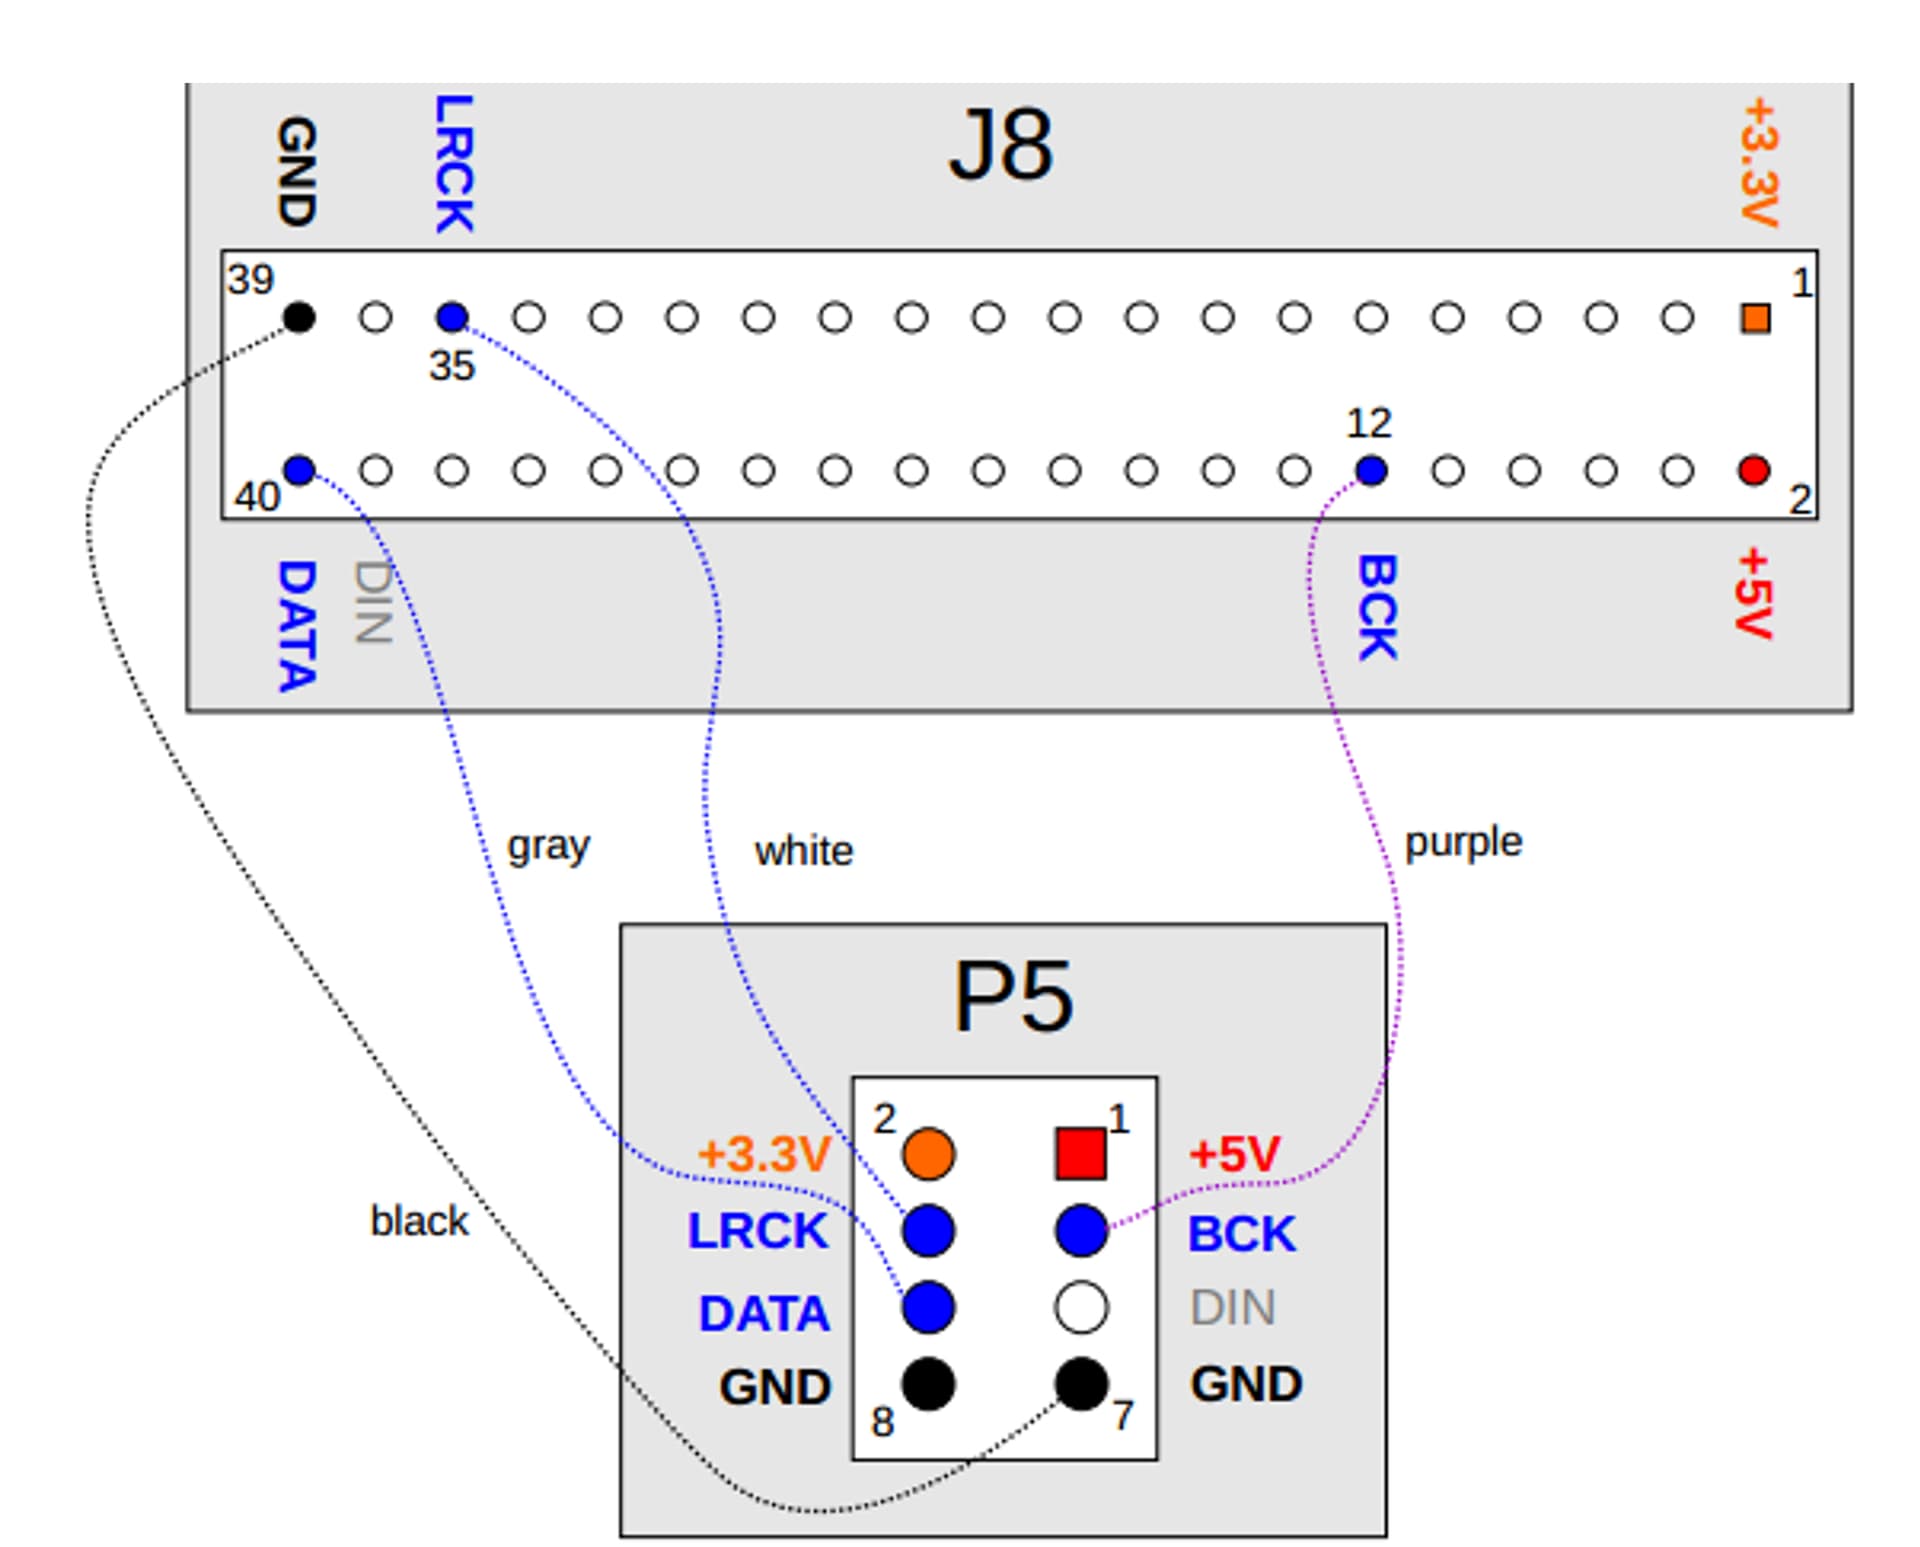
Another question: does anyone know the PAS of the solder connector for the push button, and would there be an LED indicator on the GPIO (the one that flashes when turned on) to give a visual indication of what’s happening?
Well, I managed to find the tutorial by modifying the keywords.
I’ve done the modification via ssh, but the touch display plugin refuses to install, it comes back as an error.
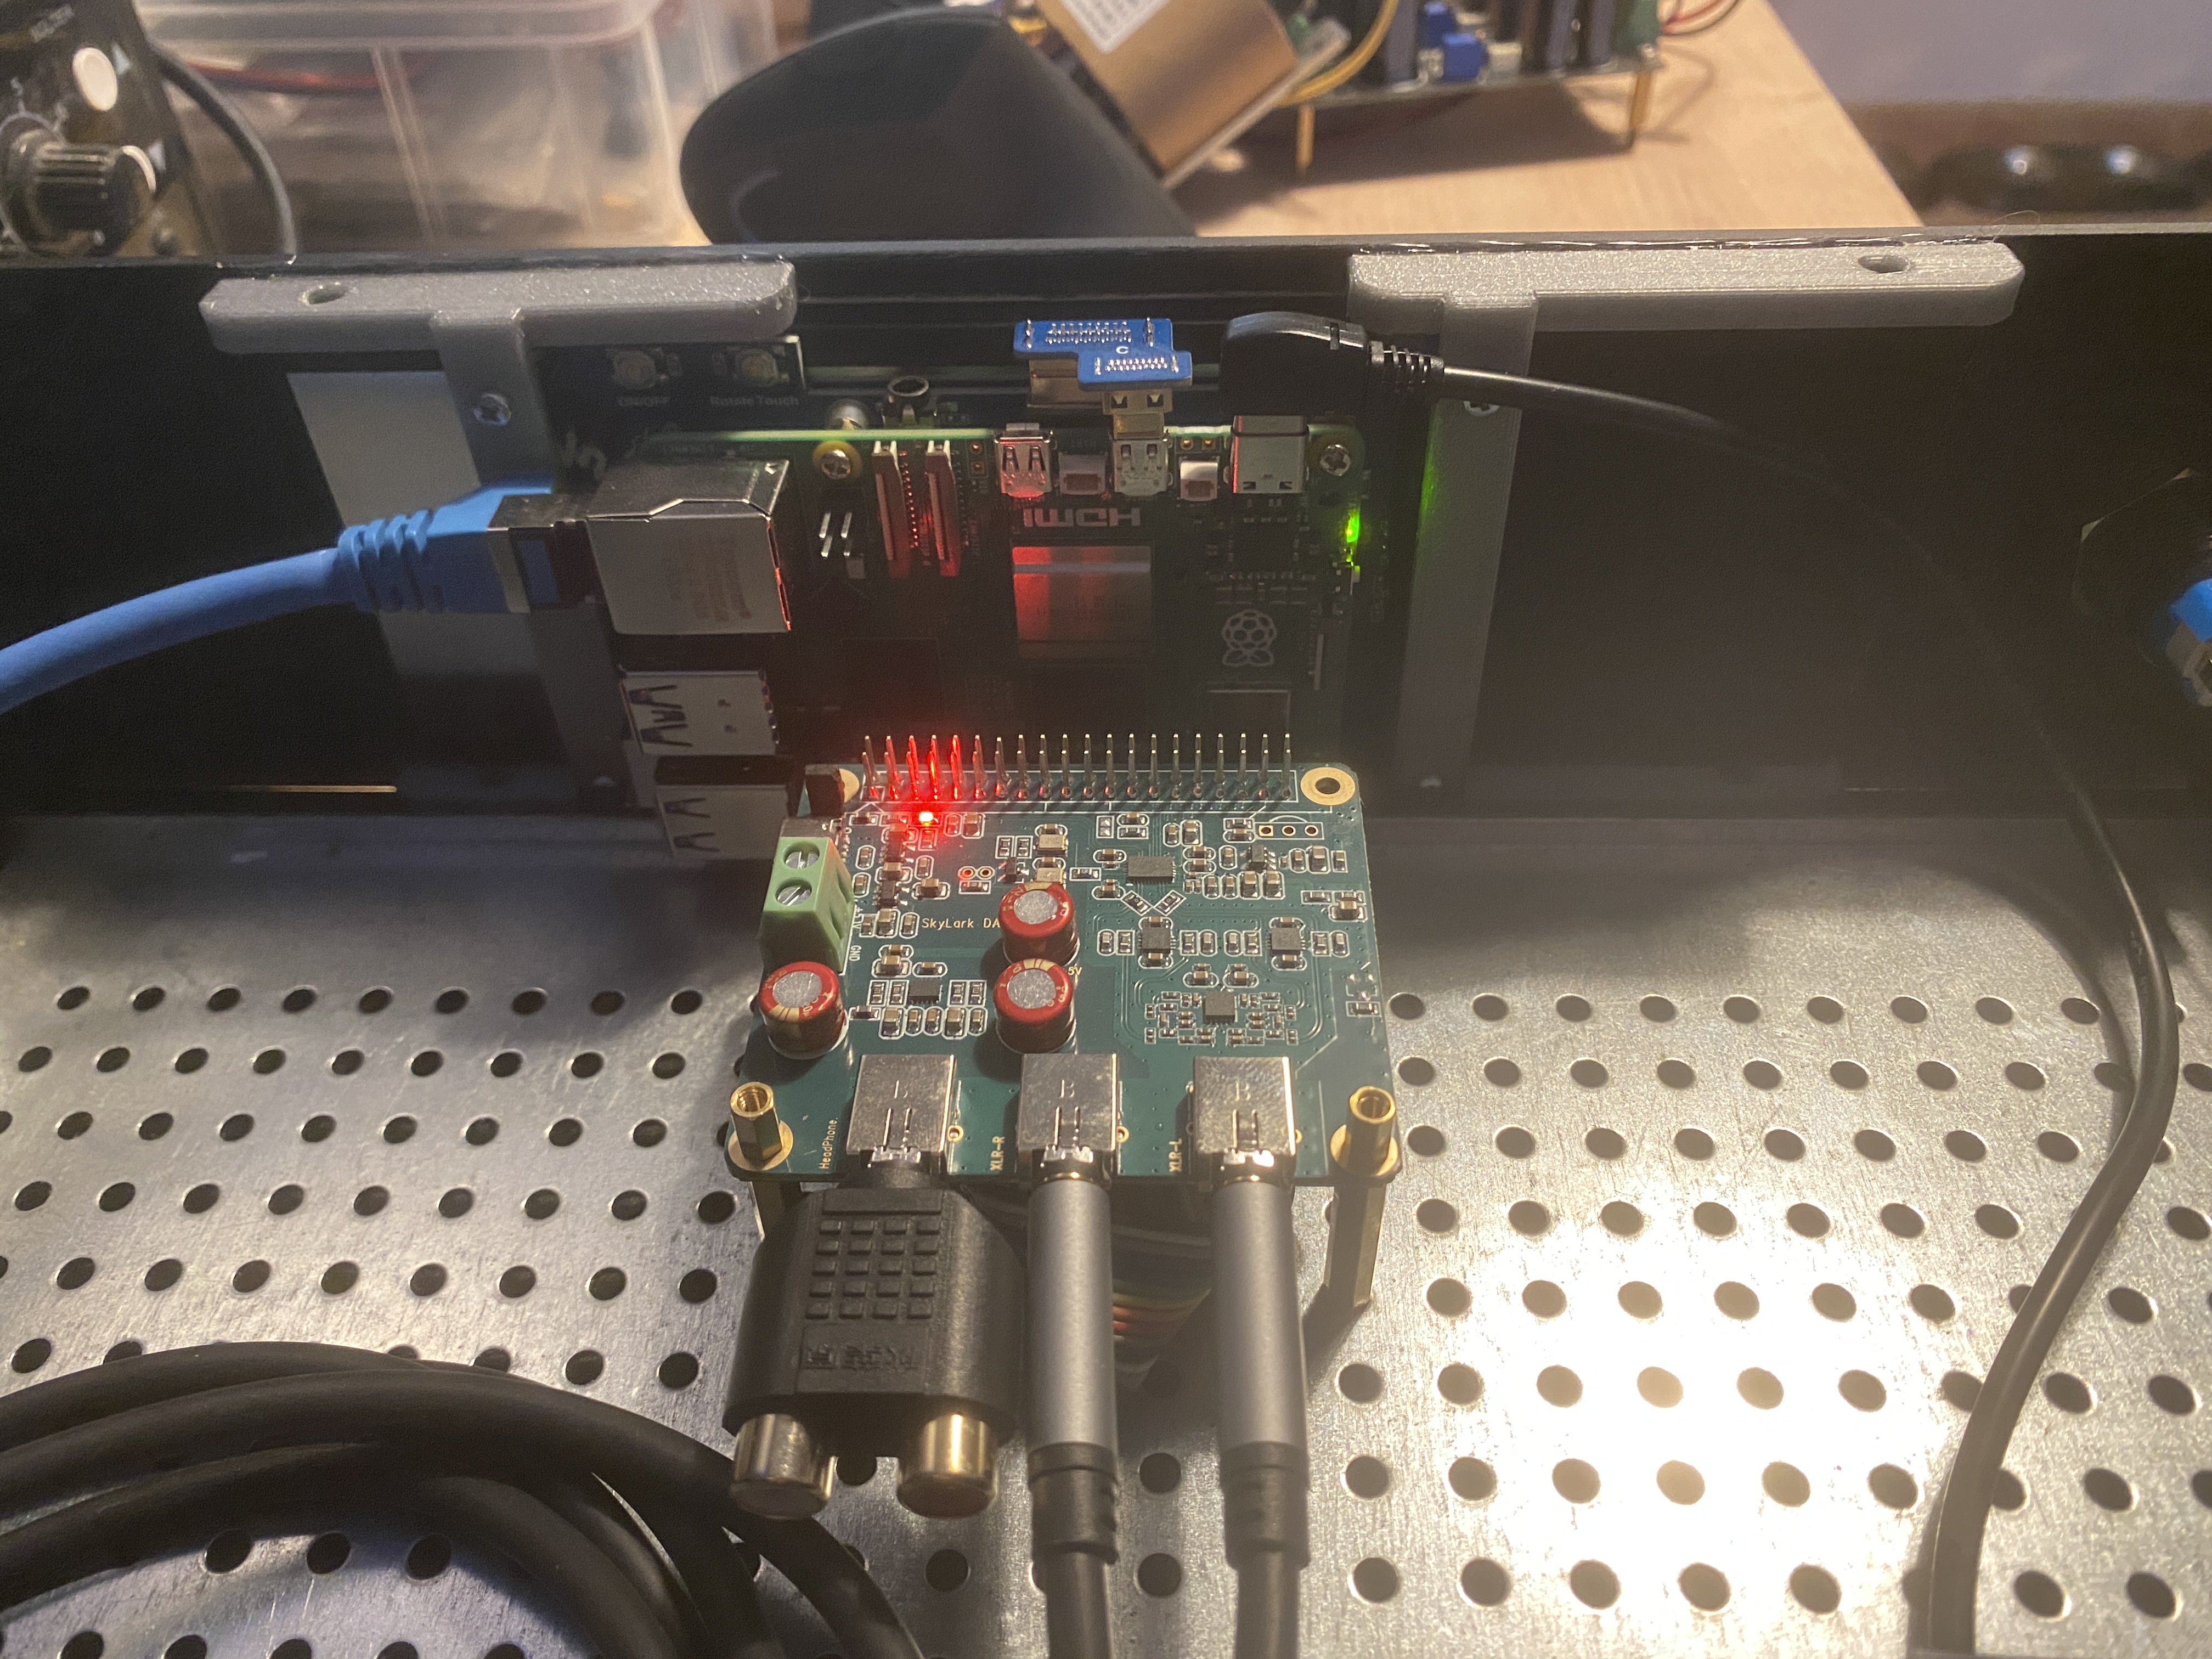
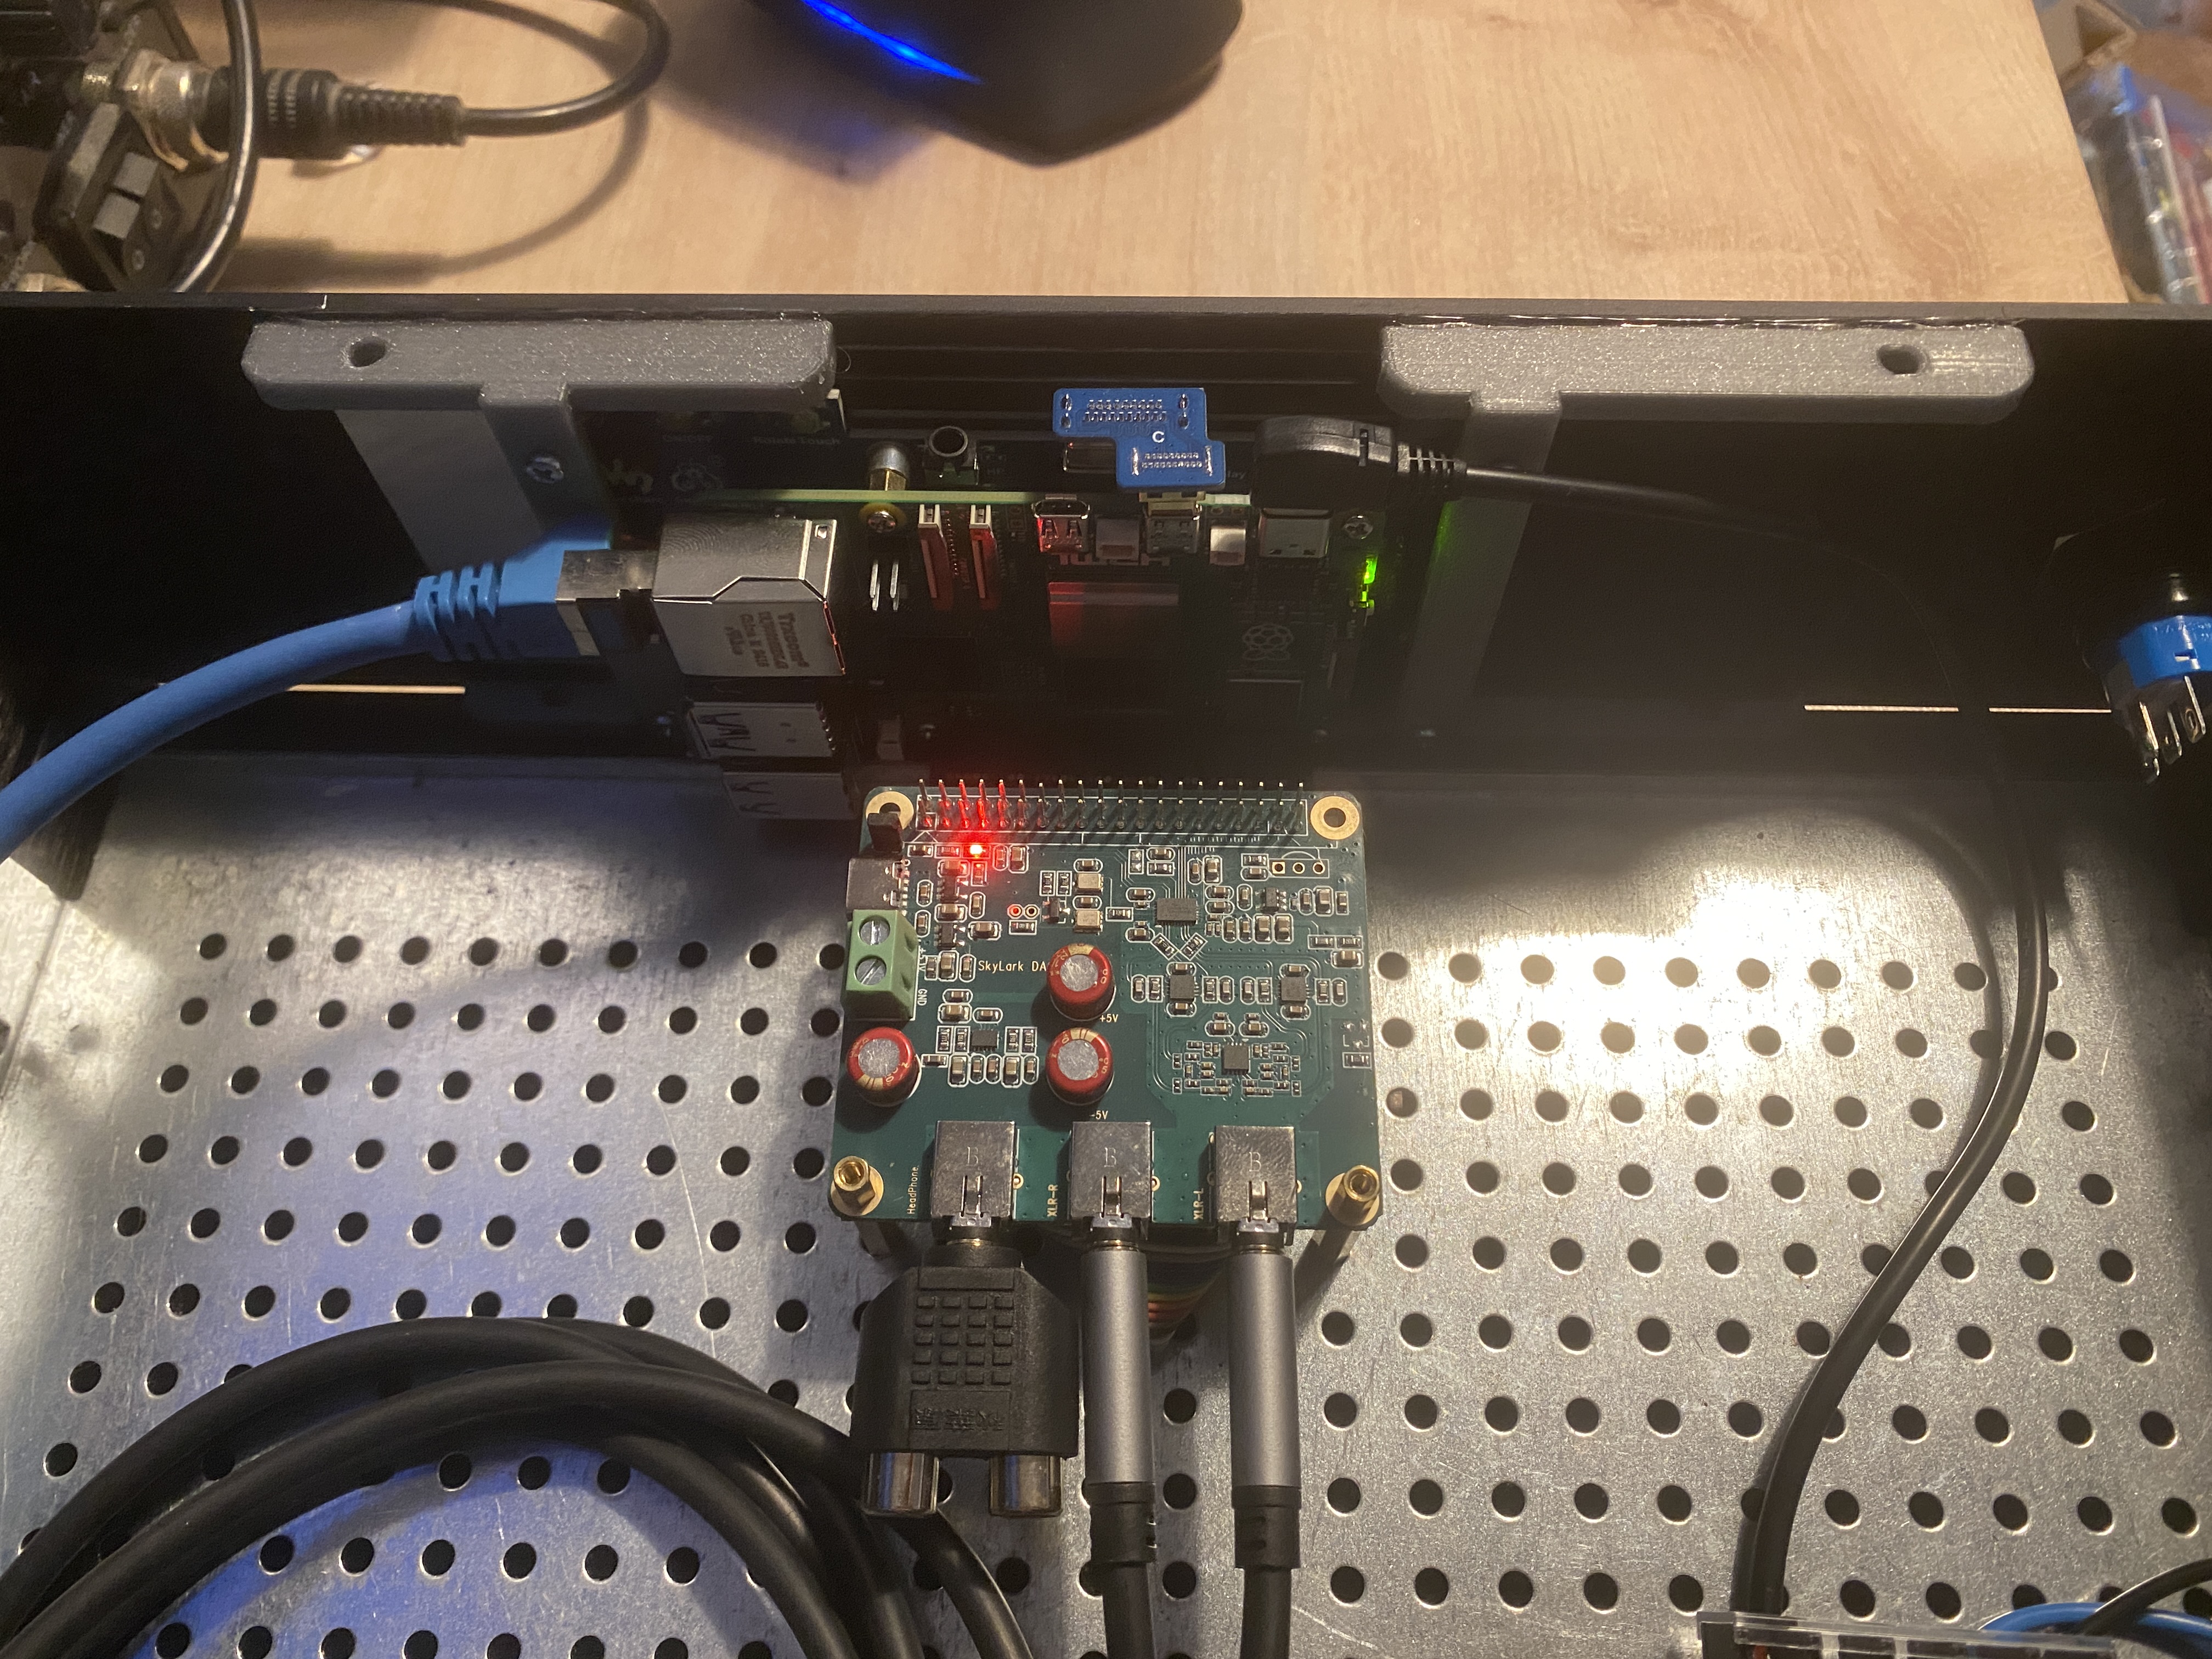
The pi5 is getting pretty hot anyway, and the Dac isn’t mounted on it yet…
Well, I think I must have a problem with the Volumio image, which comes from the official site.
I can’t launch a playback from the interface, no matter what I do it stays stuck. Test with external command on browser, on app.
My Spotify can’t send a playback either.
I’m going to make a new image and start from scratch.
It’s funny, but with the Pi3B I don’t think I’ve had so many initial problems.
The smooth running of the Rpi/dac/ecran 7.9 set conditions a bigger preamp project, the whole thing will be slipped into a 3U slimline, I’ll post a SW capture for you to have an idea.
The DAC has yet to be tested, but it gives a maximum of 2.2V on the XLR outputs.
The DAC will be powered separately from the Pi5 with an R-Core transformer and 5vdc regulated power supply.
Separate power supplies to save on quality. I’ve got it sleeping at home, I might as well use it!
I’ve never managed to get my Waveshare HDMI screen, purchased before the release of the Raspberry Pi 5, to work reliably with the rPi5. I ran into persistent issues with both the HDMI and touch adapters. The only setup that produced a stable image was using a fully wired HDMI cable, and touch functionality only worked when connected via the rPi5’s USB3 port. In the end, I opted to use the screen exclusively with a Raspberry Pi 4, where everything functions smoothly.
I’ve tried swapping the usb port and I’ve put myself on the usb3 there seems to be but not as it should be.
Out of a clear conscience, I put the pi3 back in to test the touchscreen in more depth, in case the screen failed. The touch works fine.
I also tried another screen in a classic format, same symptom.
I have to admit I’m pretty disappointed with it, I invested in a pi5 to be faster, more efficient and with native On/Off support.
I end up with a single screen (100% non-touch), and it heats up just as much as my class AB…
I took the time to test the Innomaker DAC Pro. I used it on balanced outputs with a jack/XLR cable from Uncle Ali, which was originally designed for microphones.
I must admit that the sound quality is very pleasant, a blend of smoothness and detail that really stands out.
I recommend it. My old DAC is already an ES9023, but the small upgrade to the ES9038 makes a big difference.
I’m making slow progress with my projects because I’m using them at the same time!
I had an idea:
The RPI5 has two HDMI video outputs. Is it possible to use both? One connected to the television via an HC amplifier that serves as an HDMI switch, and the other output on the box screen (a Waveshare 7.9 for now).
I can see at least one limitation: the resolution is not the same.
One or two advantages: it could serve as a digital audio output and provide a larger display.
But how could Volumio manage the outputs? We can only choose one.
I don’t know enough about computer code to detect or modify the source code.
At the same time, I need to find a way to make the PI control two relays when it is switched on. One will be used as a trigger and the other to power a toroidal transformer that will supply my DAC individually and cleanly.