OK, so first all i just wanted to say a big thanks to all on the forum, this inspired me to build my first Volumio media streamer and for a non Linux user i found this forum invaluable.
Initially when i discovered this project i was looking to just use a standard original Raspberry Pi B that i had lying around until i found that you could get a Wolfson DAC very cheaply that fits with the 26pin GPIO connecteor (and the 8 pin header that Cirrus use sprung loaded pins to connect to).
So to start with i took the latest release of Volume (1.55) and followed the instructions from here (bostonenginerd.com/posts/ge … h-volumio/) to patch in the Wolfson DAC drivers, this was a little bit of a challenge for me as i only have Windows and Mac computers available so being able to access the Linux partition to copy the necessary LIB files to was going to be awkward, however i found a Knoppix Linux distro that boots from CD and was able to boot my laptop into Linux and access the SD card slot to make the necessary changes.
Once the image was modified i was then able to boot the Pi and add my NAS shares for both CD quality music and my 24/96 & 24/192 hi-res audio and play them quite happily using a pair of cheap Logitech USB speakers i had lying around, so at this point i had a working Pi configured to play all my music, web radio and after enabling Spotify and adding my details i could also access my Spotify playlists.
Initially i decided to try to fit the Pi, Wolfson DAC, amplifier and power supply in quite a small unit which i bought from Ebay (ebay.co.uk/itm/Aluminum-chas … 3a9d057b51), however with what i had available this clearly wasn’t going to be achievable so i had to re-think the power supply and my brother suggested that i use an original Xbox 360 psu, the beauty of this is that it has a permanent 5v line and a switched 12v line that only powers up when 5v is connected to the remote wire and it delivers 14A on the 12v line so i would have plenty of power for any amp i wanted.
To enable me to power the Pi on with a momentary switch and so that the Pi will shutdown completely when i shut it down i used a pi-supply (pi-supply.com/product/pi-su … er-switch/), this would allow me to safely switch the Pi on and off ATX style.
The other advantage of this is that i could connect the 12v remote wire from the Xbox PSU to the output of the Pi-Supply so that it would trigger the 12v line and power on the amp circuit and power light only when the PI was powered on, the amp was from Ebay (ebay.co.uk/itm/MKIII-Tripath … 3a8c789060), which is a copy of the Arjen Helder Tripath amp that had rave reviews for a Class T amp (please not the description does not match the amp 2.2uf caps are actually 1.8Uf caps, the coils are SMD and not micro torodial , it clearly used cheaper components which made me a little sceptical but it was only £18 (more on this later).
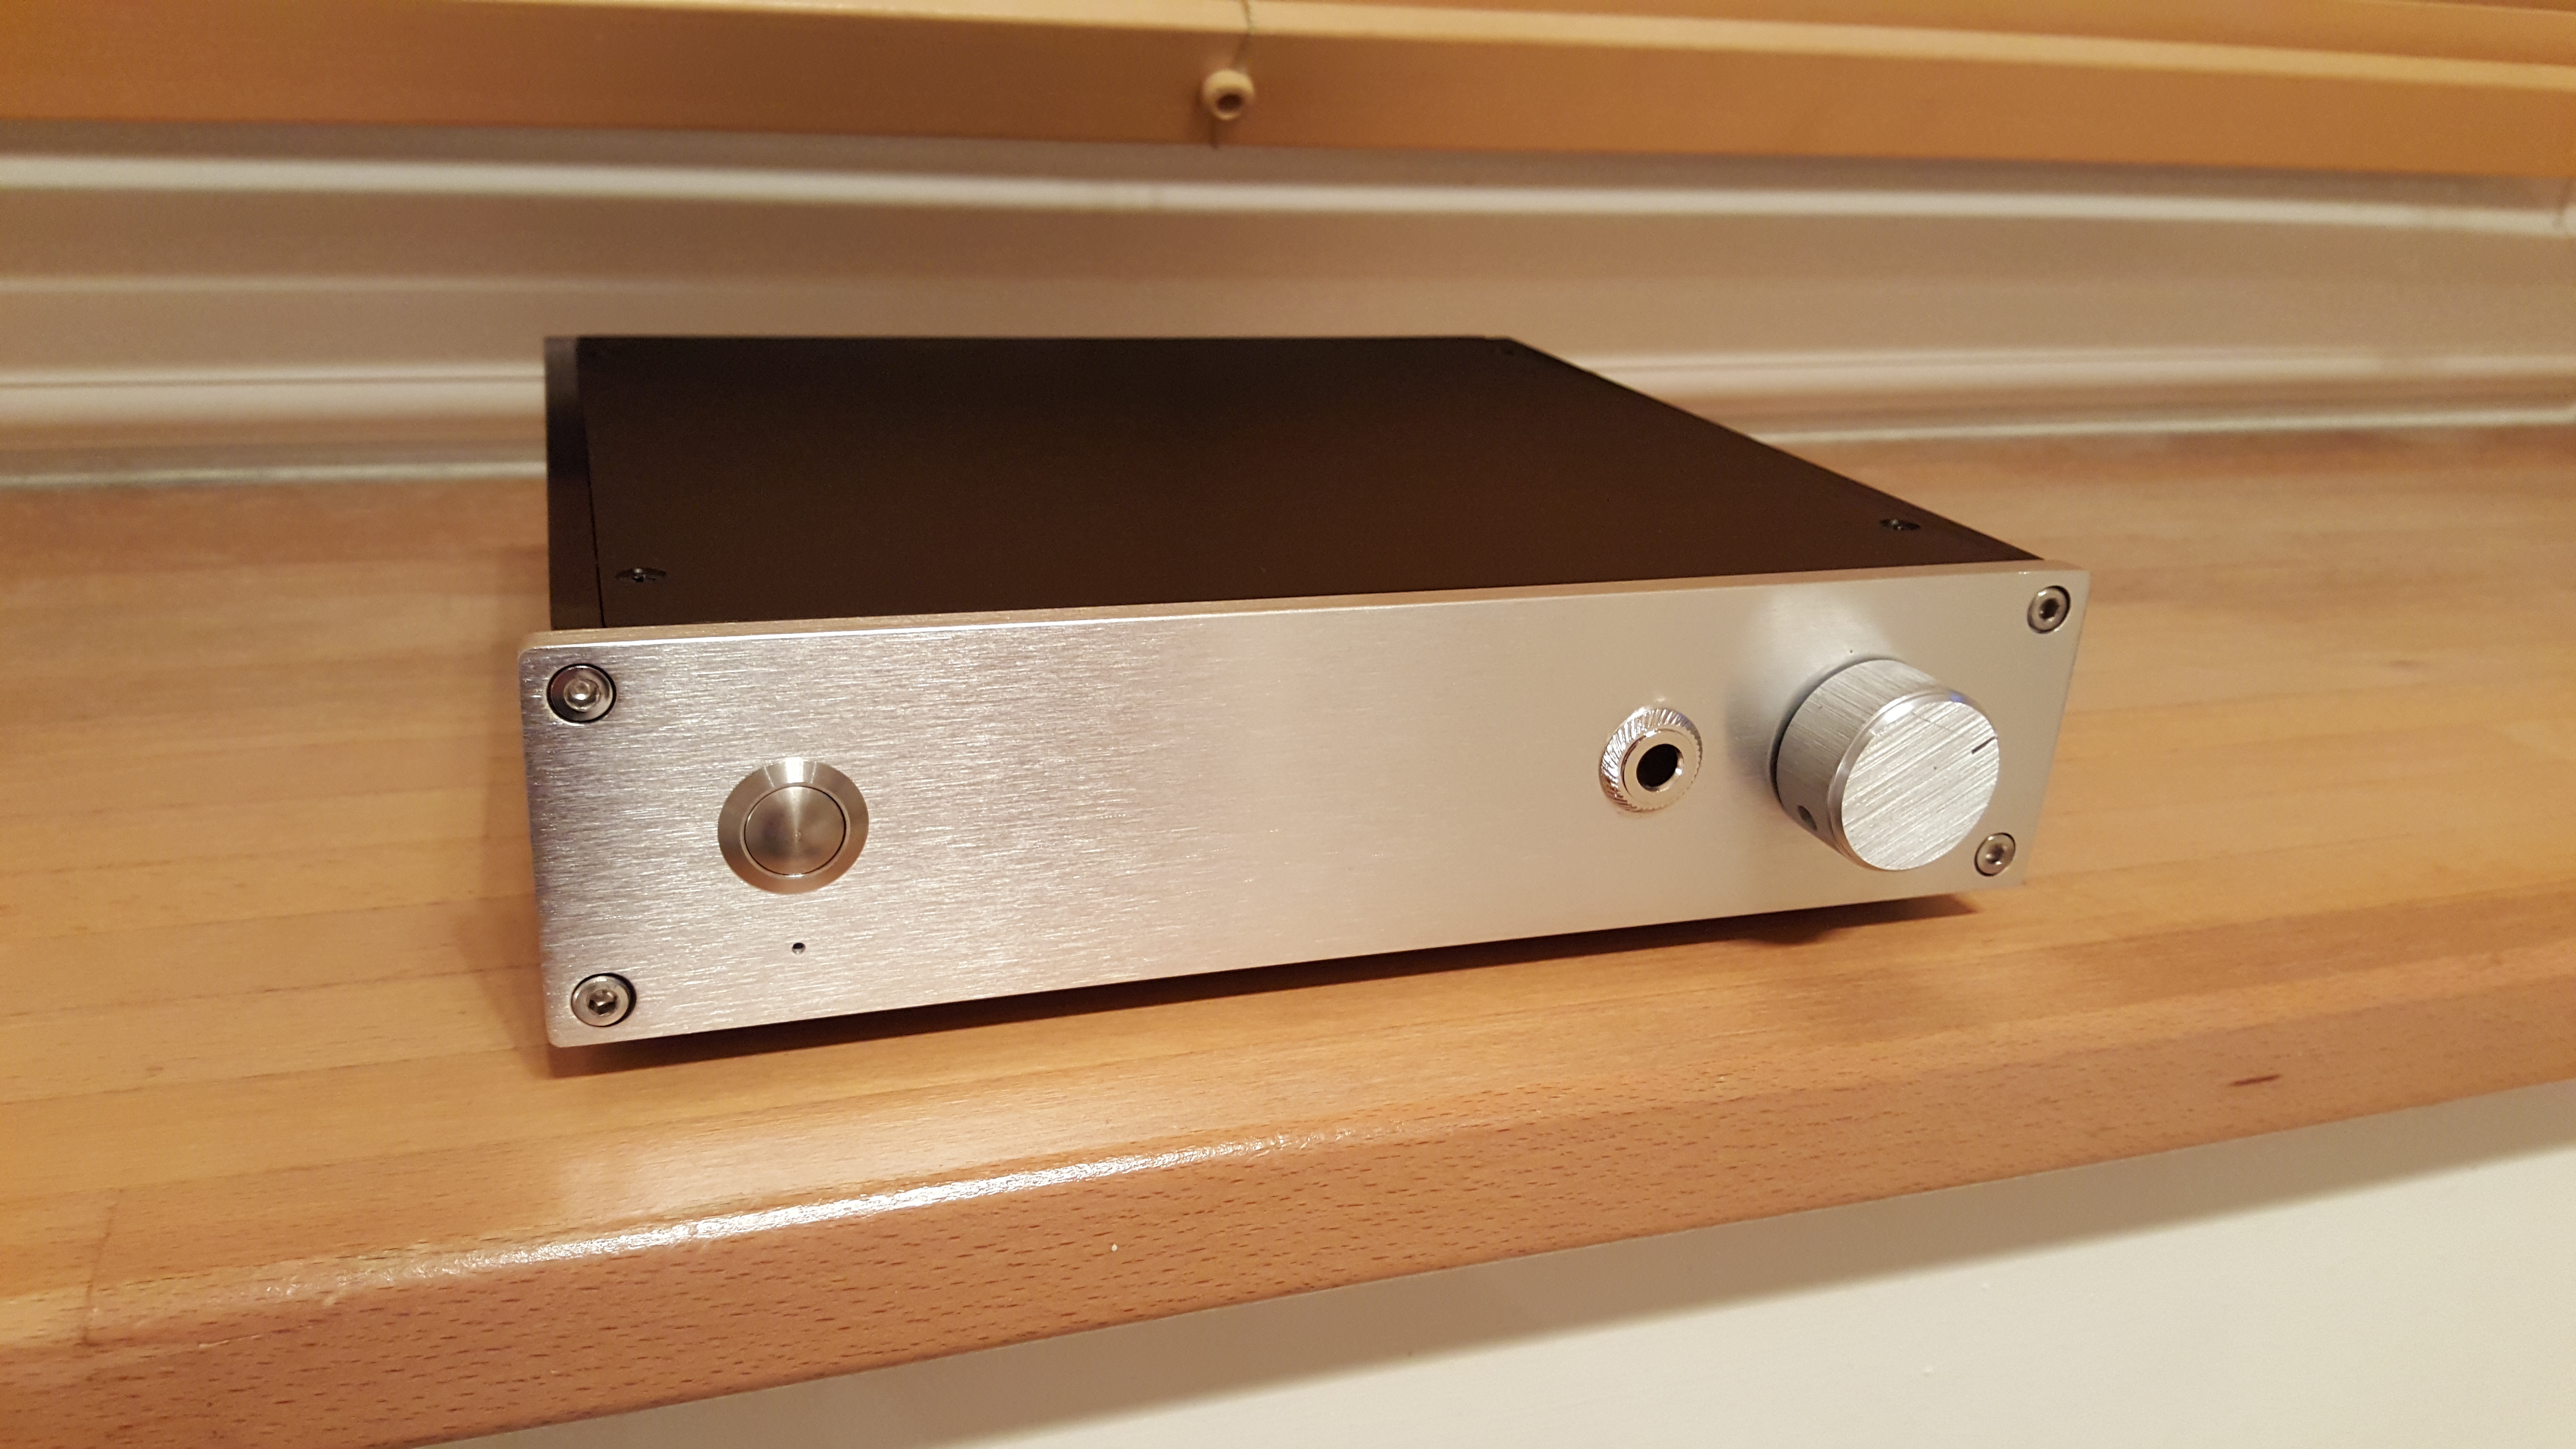
My first task now was to cut and drill the case to accommodate the necessary components (unfortunately i don’t have such tools, however i have a nice brother who has a workshop with almost everything i needed), so a quick trip to my brothers place and started to plan where everything would fit, it quickly was apparent that with an external PSU i had plenty of space to layout the necessary and only had one other consideration to keep in mind which is that later on i wanted to add a simple 16x2 blue LCD display to the front and therefore i started with the front panel, this was a relatively simple job as it’s all just a case of drilling holes and i had access to a pillar drill making it easier (or so i thought), i had two challenges here, the first was that the power switch required a 16mm hole and the biggest i had was 13mm however i found a cone drill that went to 22mm so drilled it to 12mm with a standard drill and then used the cone drill to take it to 16mm from the front and the same from the back ( the front panel is 6mm thick), the other challenge was that i was using a front mounted rotary switch to select where i wanted to output from the DAC to go (headphone, linnet at the back or the Amplifier) and that would only go through a panel thickness of 4mm, however i used and angle grinder to grind the back of the plate around the hole i’d drilled for the switch and took 2mm off of it.
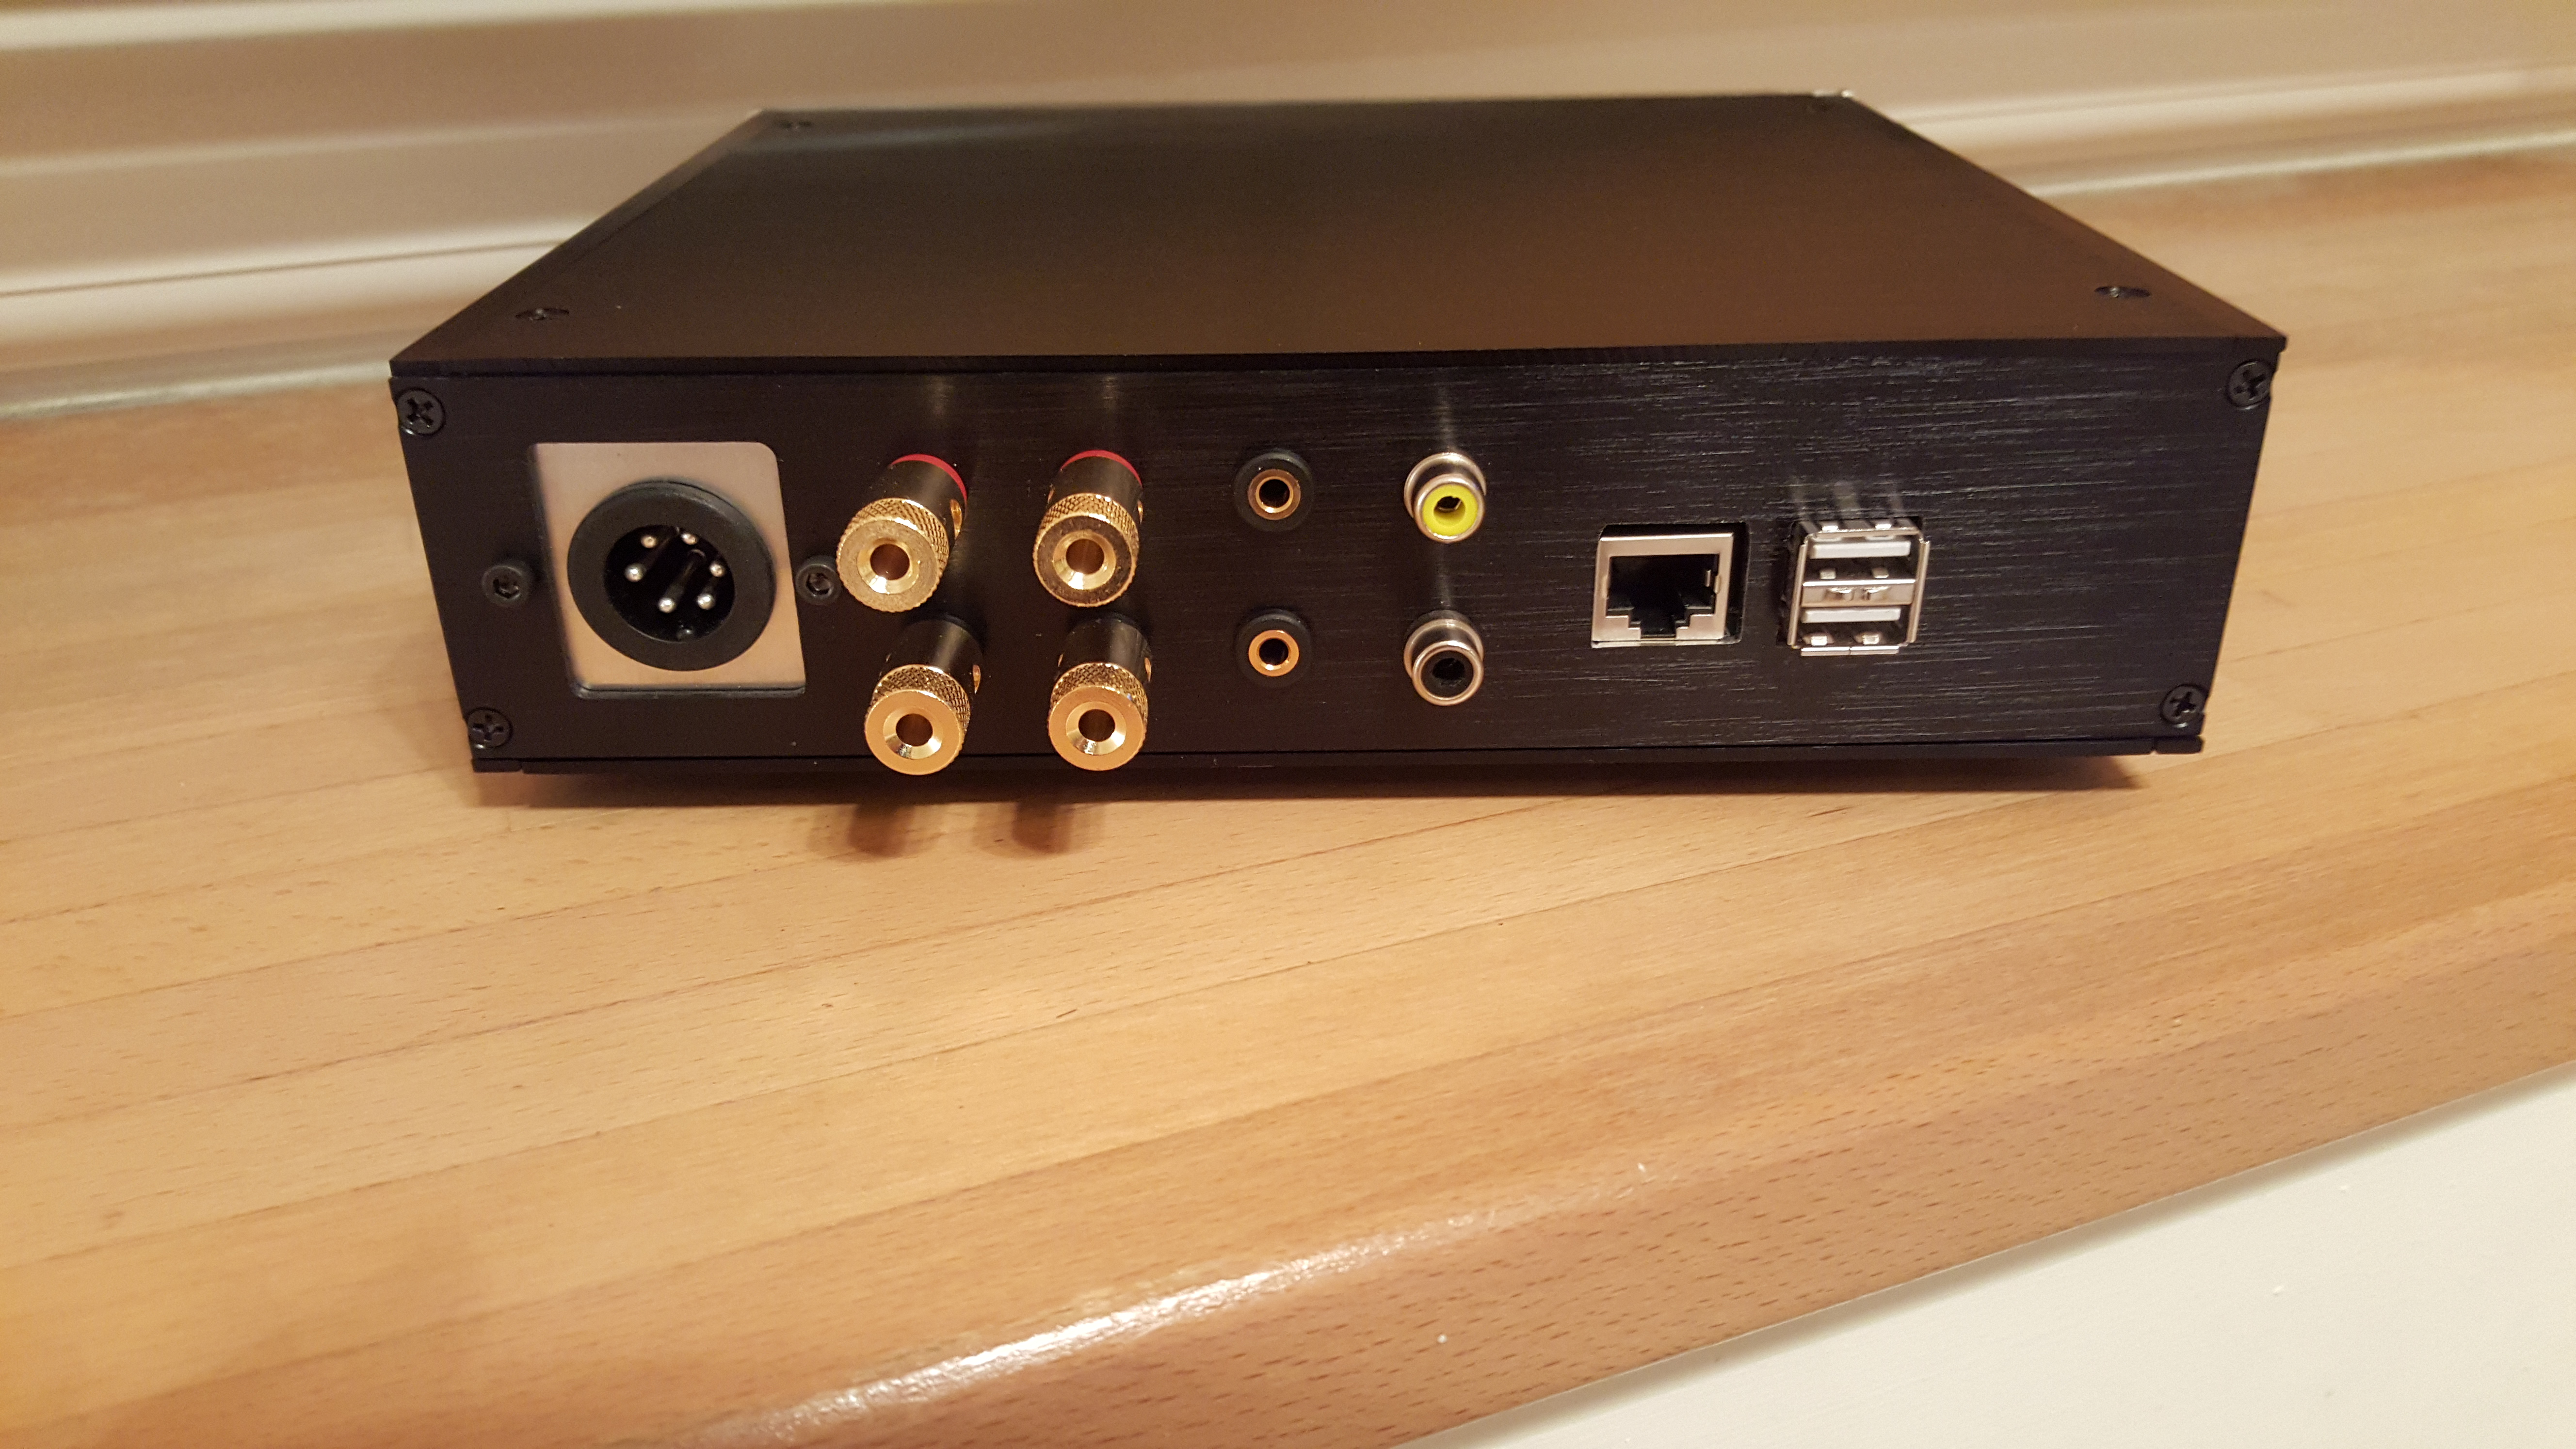
So the front was now complete and i turned my attention to the back of the unit which again was mostly holes to drill and took 20 mins to sort, the tricky part was cutting the holes for the USB and network ports so i had to mark up the mounting holes on the bottom plate first and attach the PI inside the case remembering the leave the USB sockets sticking out at the back so that the network port was flush (the USB ports stick out further than the LAN port does on the original Pi’s).
Once the Pi was mounted it was a simple case of putting tape over the back panel and marking the horizontal and vertical positions of the network port and then using the back panel of an old Pi case i had which already had the holes cut into it l lined them up with the network port and then used the case as a template to make the holes. So how was i going to cut out the squares, hmmm, a tricky one, well actually it’s not that difficult, i used the cone drill to drill out as much of the holes as possible and then using the plastic template that i clamped onto the back panel i just filed out the rest of the hole which actually isn’t that bad considering.
I now had one last problem, the case i bought came with a hole cut for a standard three pin kettle style power socket which also came with the case when i was now no longer running AC into the case and i needed four cables running into it (5v, 12v, GND and a remote signal back to the PSU to switch on the 12v rail for the Amp), luckily again my brother came through with a 6 pin circular plug and socket that was big enough and could handle sufficiant current. So my task was to fit a round socket into a square hole, my solution is not particularly elegant but actually doesn’t look to bad in that i used the mounting holes already on the back of the case for the original power socket to mount a small square of aluminium plate that i had cut a suitable hole in for the new socket with a cone drill.
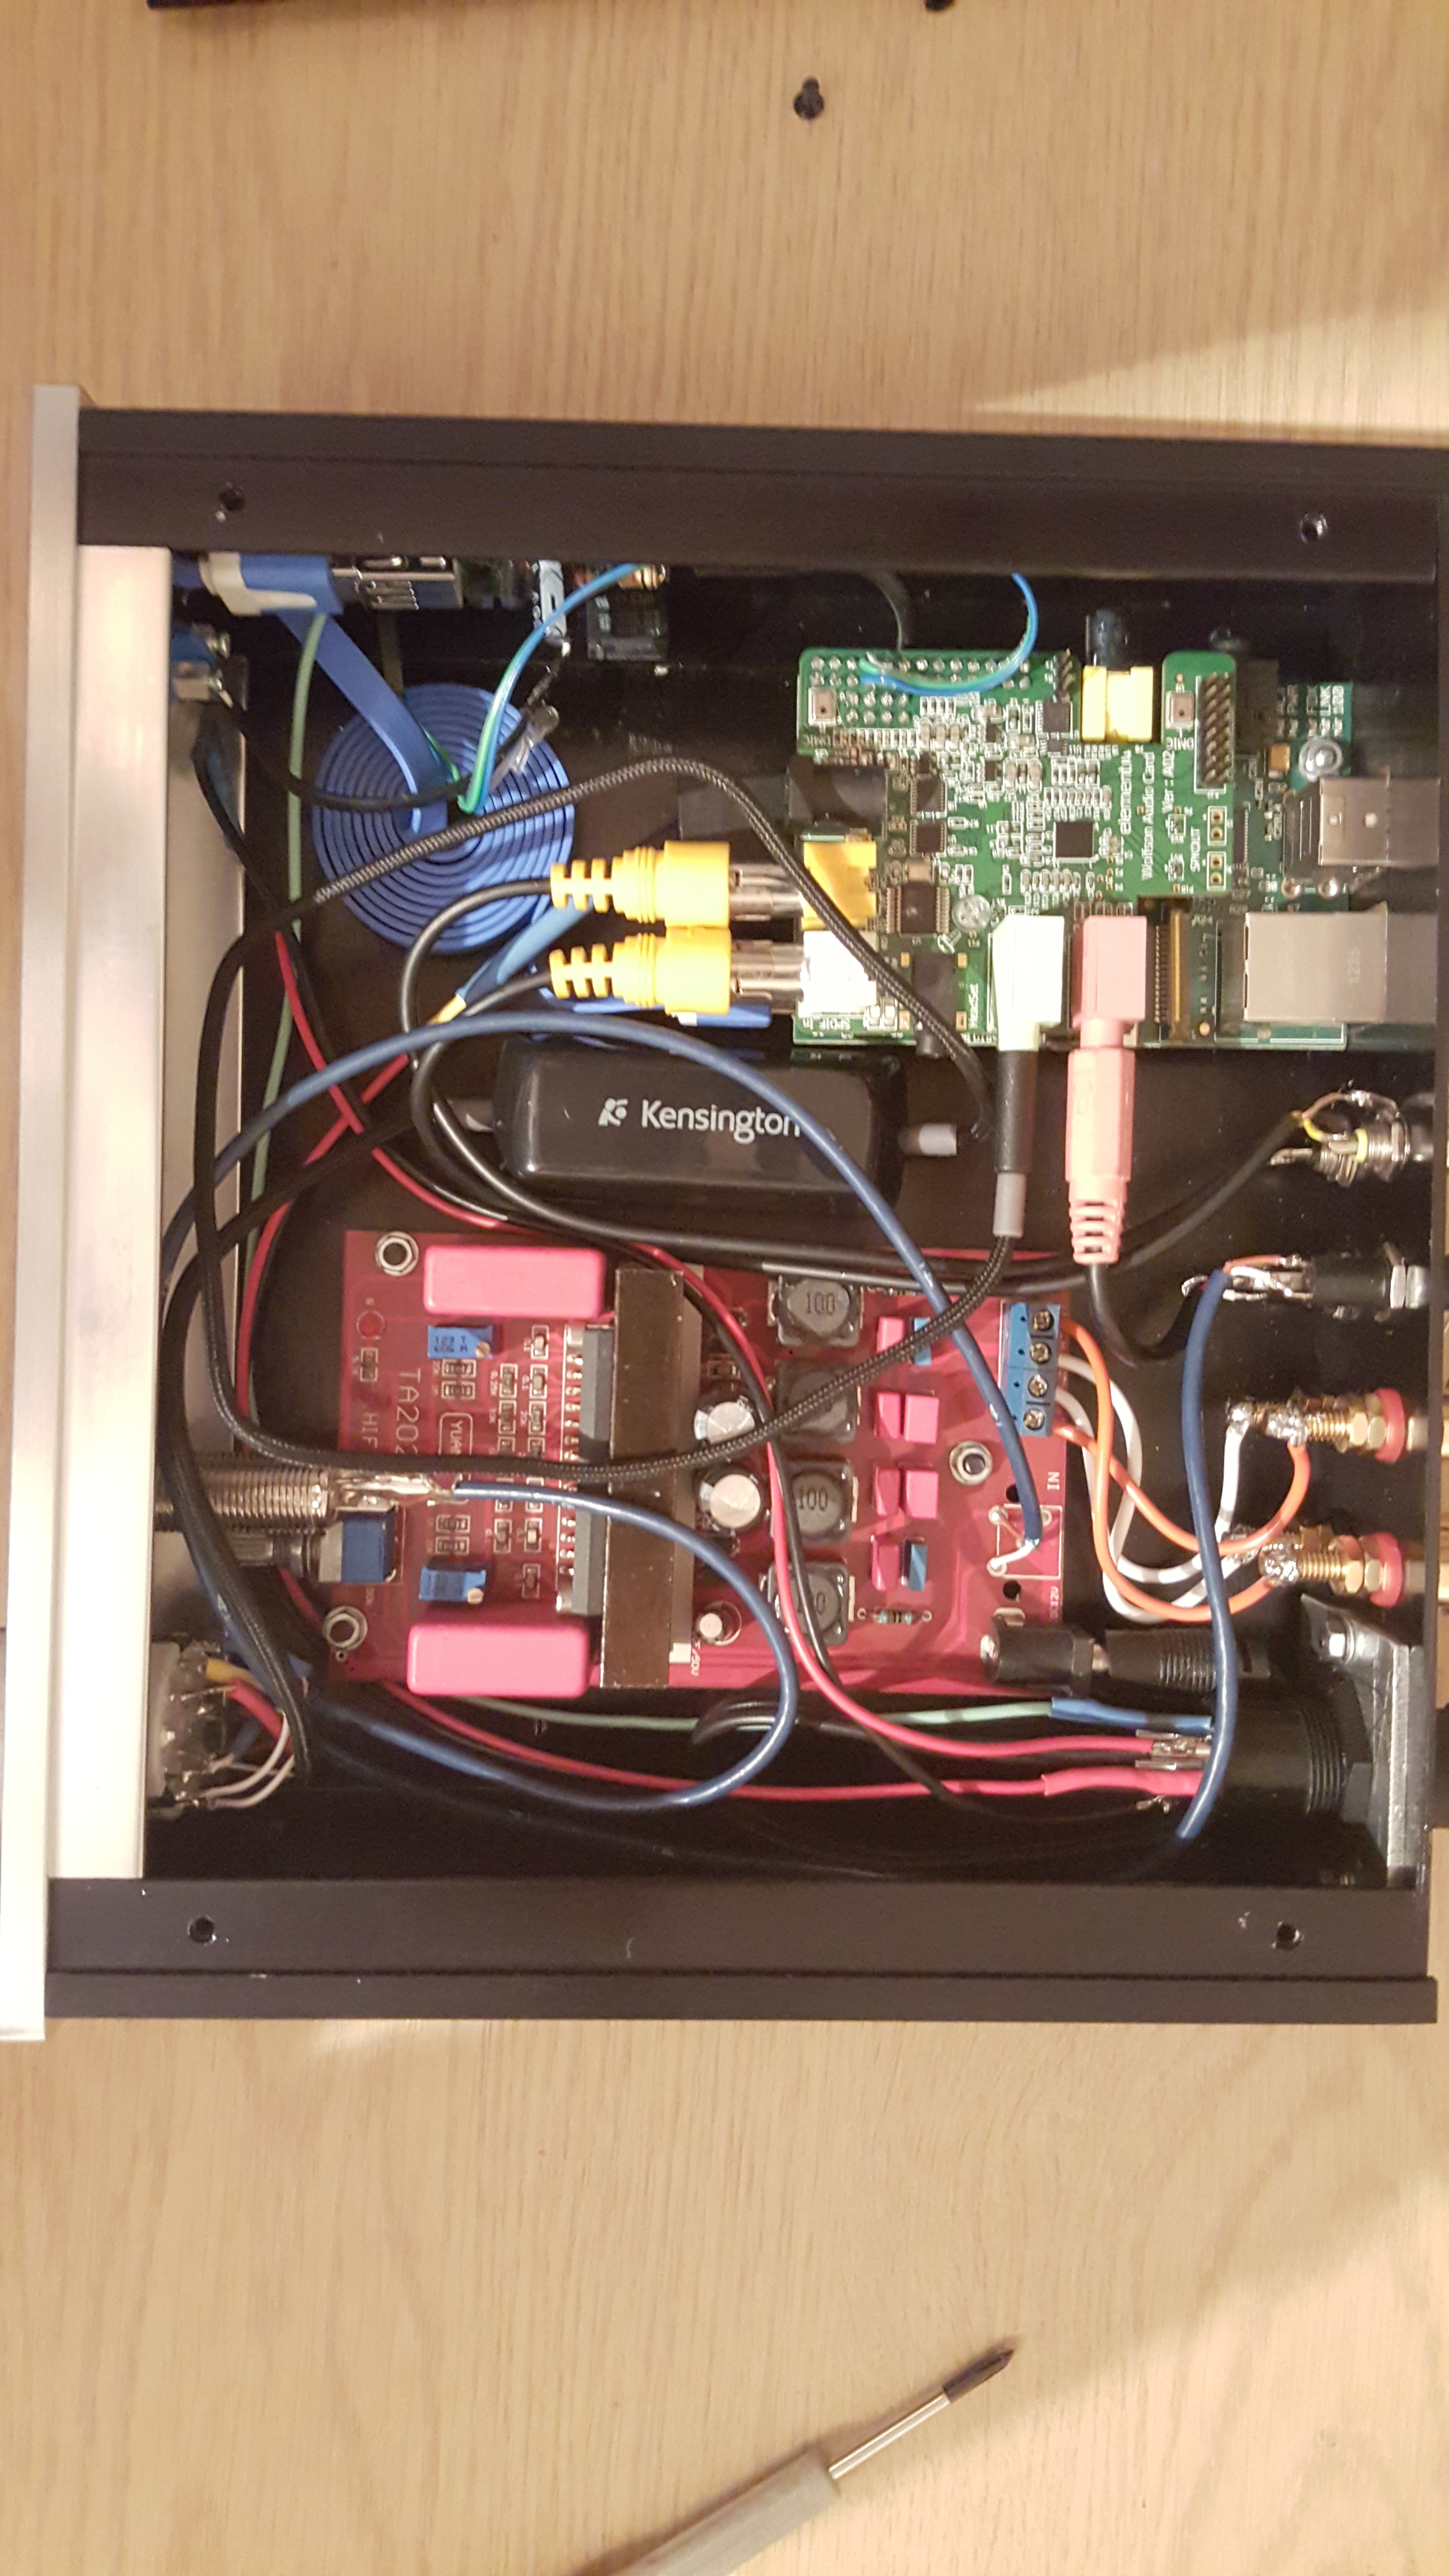
After this is was as simple matter of drilling holes in the bottom panel for the Tripath Amp board and mounting everything inside the case on small standoffs ( i used 5mm ones for the amp but i’d used 8mm ones for the Pi so that the USB and Lan sockets were more central on the back panel.
Once i had everything mounted it was merely a case of wiring up the Wolfson line out to the rotary switch and then the three switched outputs from the rotary switch to the line out socket on the rear, the amp and the front mounted headphone socket (i used the Wolfson line out for all three even though there was a headphone socket which would not have cut out the speakers when using headphones), then i ran the power lines and the 12v remote switch wire to the Pi-supply, connect the pi-supply to the Pi and connect the 12v lines directly to the amp and front panel mounted power led/resistor and the amp speaker outputs to the speaker binding posts on the back panel.
Although i am not using the Wolfson SPDIF in/out and line input i did attach them to rear panel mounted sockets for later use if needed, at this point i was ready to power on and surprisingly the unit powered up first time and the light on the xbox power supply went from orange (standby mode) to green and powered up the front power light and amp.
Once i had tested the unit was up and running i also put the lid back not the case and thought i was done, unfortunately this was not going to be the cases as one of the worries i had about using the same PSU for both the amp and the Pi did show it’s ugly head in the form of digital noise coming out of the amp whilst the Pi was active, this now posed a bit of an issue, however once agin my smart little brother suggested attaching an electrolytic capacitor across the 5v line into the pi-supply which although did help a little bit was just not enough, so how was i going to fix this?
One thing i had noticed whilst running the system was that the noise only came through the speakers when the Wolfson DAC output was connected to the amp, if i unplugged the DAC from the amp all was quiet and therefore the noise was actually being generated from the DAC whilst the amp was powered from the same supply, if i powered the PI from a standard USB wall power supply the noise disappeared and therefore i could tackle the problem by using and audio isolation transformer between the DAC and the amp and luckily enough i had a 3.5mm to 3.5mm audio lead that had such a transformer in the middle that i use between my mobile phone and the AUX input to my care to get rid of a similar problem (amazon.co.uk/Kensington-Nois … e+Reducing).
Once i had put this in-between the DAC and the amp 99% of all the noise disappeared, at some stage i will replace this with a better isolation transformer as i can still hear the noise ever so slightly in between music tracks when using headphones, especially when using the rear line output into my portable headphone.
All in all i am very pleased with the end result which is powering a pair of Q-Acoustic 2010 speakers and some high ish quality speaker cable (yes i know some people think this is a myth but i’ve tried several cables and can hear some distinct differences, i especially like Superfi’s own cable as it gives quite a warm sound), and actually although the cheap amplifier is a copy of what is considered very good amplifier it actually sounds fantastic, although i may swap the coils and the output buffer caps at a later stage.
However i am facing a few little issues with the software, i seems to be a little unstable at times, issues like :
Spotify disappears off the library sometimes.
It won’t always play some of the hi-res files especially after listening to Spotify.
twice now the audio has started coming out of the left speaker only (software related).
If i don’t hit the stop button when i’ve finished listening to Spotify before playing an album from my NAS it plays but i don’t hear the audio.
Occasionally when i select another album to play it accepts the command and replaces the playlist with the new album but continues to play the previous one.
I’m very much looking forward to Volume 2, and would love for the Wolfson DAC drivers to be included in the image as well as better Spotify integration (ability to browse).
Good luck to fellow Volumio’eers building your own projects.
Steve