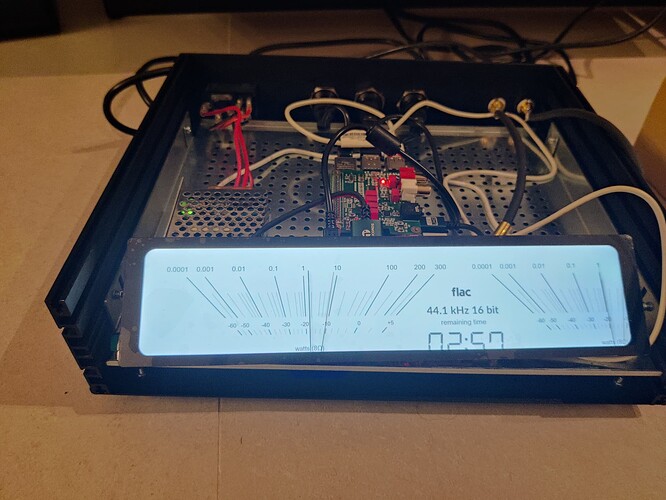
DIY Streamer with HiFiBerry DAC2 HD and 11.9" Display

Oh sorry just wanted the 3d printing file for the Display holders.
I also have this case. Forgotten to Write which 3d file i wanted to get.

Prosim ako si spravil popisi (RCA,USB) na zadny panel

Google translate:
Please, how did you make the descriptions (RCA, USB) on the back panel

@mchief Could you please share the dimensions you have ordered to the vendor, I have got all the devices but was only confused with the dimensions. Your snaps has made it very clear for me.

If you can please share the dimensions, it will be a huge help.
Also for the On/Off Button what all you did both on the physical side as well as programming side to make it work. Please share.

Regards
Rajiv

Look here

@mchief
I follow your project and I am stuck on how to install the display in the case.
Can you share 3D file for display holders?
Thank you.

Sorry for the late reply.
Here are the two templates.

left

right

Congratulations for your project. It looks amazing and very stylish. I plan to set up a similar streamer device, and the photos, particularly the first one, have been very helpful to have a clear idea of how to arrange the components.

I would be extremely grateful if you could provide full details on how you installed the power button, including information on the wiring and the software settings. I own a IQAudio DAC, which I believe is esentially the same as your HiFiBerry.

Thank you very much in advance

1 Like

Hello, sorry for the very late reply.

The power switch is only used to start the Pi. Switching off is only on the software side.
The switch is connected to GPIO 3 (5) and Ground (6).
The LED of the switch is connected to GPIO 26 (36) and Ground (37).
It is controlled with the “GPIO Control” plug-in.

I hope I was able to help you a little.
Have fun with your project.

If possible to have a parameter of gpio control to use? Thanks

If possible to have your config txt for the display? And possible have a file to insert in peppymeter folder? I have that problem

my config.txt

initramfs volumio.initrd
gpu_mem=32
max_usb_current=1
dtparam=audio=on
audio_pwm_mode=2
dtparam=i2c_arm=on
disable_splash=1
hdmi_force_hotplug=1
force_eeprom_read=0

include userconfig.txt
max_framebuffer_height=1480
hdmi_group=2
hdmi_mode=87
hdmi_timings=320 0 80 16 32 1480 0 16 4 12 0 0 0 60 0 42000000 3
display_rotate=3 #1: 90; 2: 180; 3: 270

Volumio i2s setting below: do not alter

dtoverlay=allo-boss-dac-pcm512x-audio

For peppymeter i have used this:

and replace custom_5 (1920x480) all file internal, but don’t work for me
didn’t know that your screen has a height of 1480 a width that seems normal but a height not.

I have copy this, is not correct?

1 Like

@Wheaten hi buddy max_framebuffer_height=1480 is this normal ?

yes, depends on screen.

@mchief looks really professional!

I’ve made something similar with Waveshare 11.9" display, HiFiBerry Digi2 Pro and RGB button.
It runs on Raspberry CM4 powered via POE

Code available at GitHub - i0466lt/mustang_streamer: Waveshare display and RGB Pushbutton for Volumio3

Hi mchief,
I’m a bit in trouble because in my 11.9" display the album art remains in the middle of the display, while in yours it remains on the left side (my preferred). Did you created/used a script to modify the Volumio default album art positioning or some additional plugin?

Many thanks, your is the most beautiful project till now :slight_smile:

Gianfranco

Where did you find this chassis? Love it. Did you have to cut out the front for the lcd?

He used NowPlaying plugin to reorganize screen.

Hello!
Yes, i use the „Now Playing“-Plugin!

I buy the Case here

And i cut out the front here