12 volts trigger - GPIO pin output .150 volts when output signal is off

Good afternoon all!

I’m currently building a 12v circuit with a relay to turn on my amp using the 12v port when I start playing music through volumio. I checked both the logic and the eletric signals. The logic is fine, as I checked it using gpio readall command (when I stop or pause music for more than 10 seconds, it turns off the signal on GPIO #17). But as it turns out, it keeps a voltage of .150 volts between the ground signal and the GPIO #17 pin. This .150 voltage apparently is enough for my relay to understand that the signal is still “on”, and the amp keeps on all the time.

Has anyone been through it or have a hint of what to do in this case?

Thanks in advance.

Best Regards
ArturS

Have a look here:

1 Like

You need to use resistors.

EDIT: Ups @Wheaten was faster :upside_down_face:

1 Like

Thank you, you guys are the best!!

Hello all,

I just wanted to finally share my solution for this problem.
While slowly looking for more than a year into this issue, I found out that the 5 volts VCC voltage is not enough to drive the 12v trigger because of the limited current out of the pins (yes, the 12 volts trigger is the maximum voltage, not the minimum). Also, the original problem here was solved with a TP31C transistor and a 1,2kohms resistor.

I asked Claude 3.7 Sonnet to refine my explanation of the solution, here it is:

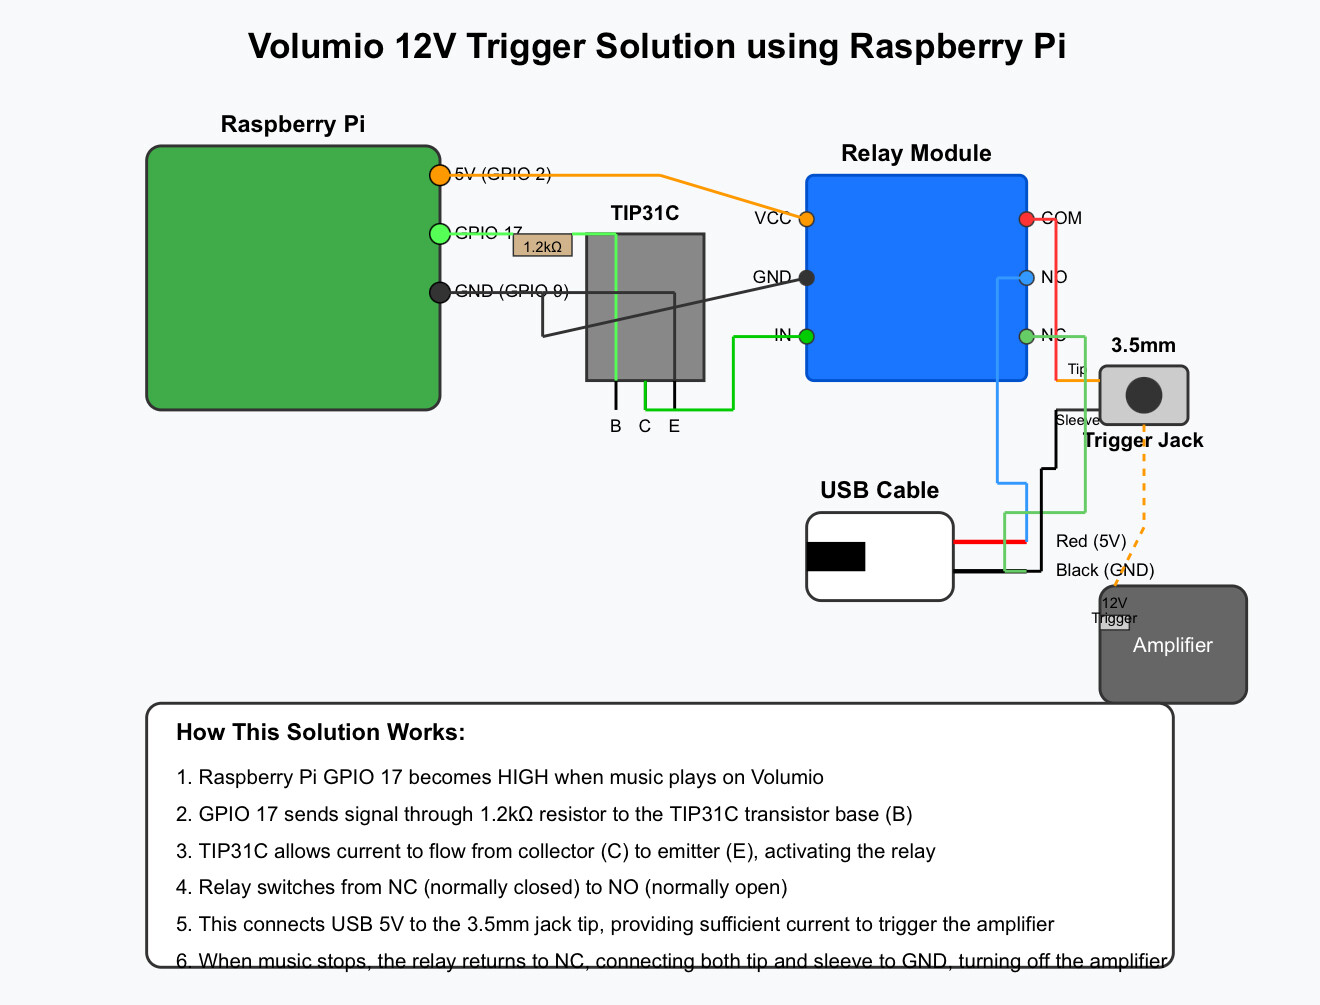
This circuit allows a Raspberry Pi running Volumio to automatically turn on an amplifier when music starts playing and turn it off when music stops, using the amplifier’s 12V trigger input.

Components Used

  1. Raspberry Pi running Volumio OS
  2. TIP31C NPN power transistor
  3. 1.2kΩ resistor
  4. 5V relay module
  5. USB cable (cut open to access power wires)
  6. 3.5mm mono jack cable (to connect to amplifier’s 12V trigger input)

Connections Explained

Raspberry Pi to Transistor/Relay Circuit

  • GPIO 17 → 1.2kΩ resistor → TIP31C Base (B)
  • 5V pin (GPIO 2) → Relay module VCC
  • GND pin (GPIO 9) → Relay module GND and TIP31C Emitter (E)
  • TIP31C Collector (C) → Relay module IN

USB Cable to Relay Contacts

  • COM terminal on relay → 3.5mm jack TIP (one wire)
  • NO terminal on relay → USB 5V (RED wire)
  • NC terminal on relay → USB GND (BLACK wire)
  • 3.5mm jack SLEEVE (other wire) → USB GND (BLACK wire)

How It Works

  1. When Music Starts Playing:

    • Volumio sets GPIO 17 HIGH
    • This activates the TIP31C transistor
    • The transistor completes the circuit for the relay coil
    • The relay switches from NC to NO
    • This connects the 3.5mm jack TIP to 5V (USB red wire)
    • The 5V potential between TIP and SLEEVE triggers the amplifier
  2. When Music Stops:

    • Volumio sets GPIO 17 LOW
    • The TIP31C transistor stops conducting
    • The relay returns to NC position
    • This connects the 3.5mm jack TIP to GND
    • Both TIP and SLEEVE are now at GND (0V difference)
    • The amplifier detects this and turns off

Key Advantages of This Solution

  1. Overcomes Current Limitations: Uses USB power which can provide more current than GPIO pins alone
  2. No External Power Supply Needed: Everything is powered from the Raspberry Pi
  3. Compatible with 12V Trigger Systems: Most amplifiers with “12V trigger” inputs actually work with 5V signals
  4. Galvanic Isolation: The relay provides electrical isolation between the Pi and the amplifier
  5. Simple Implementation: Uses common, inexpensive components

Notes for Implementation

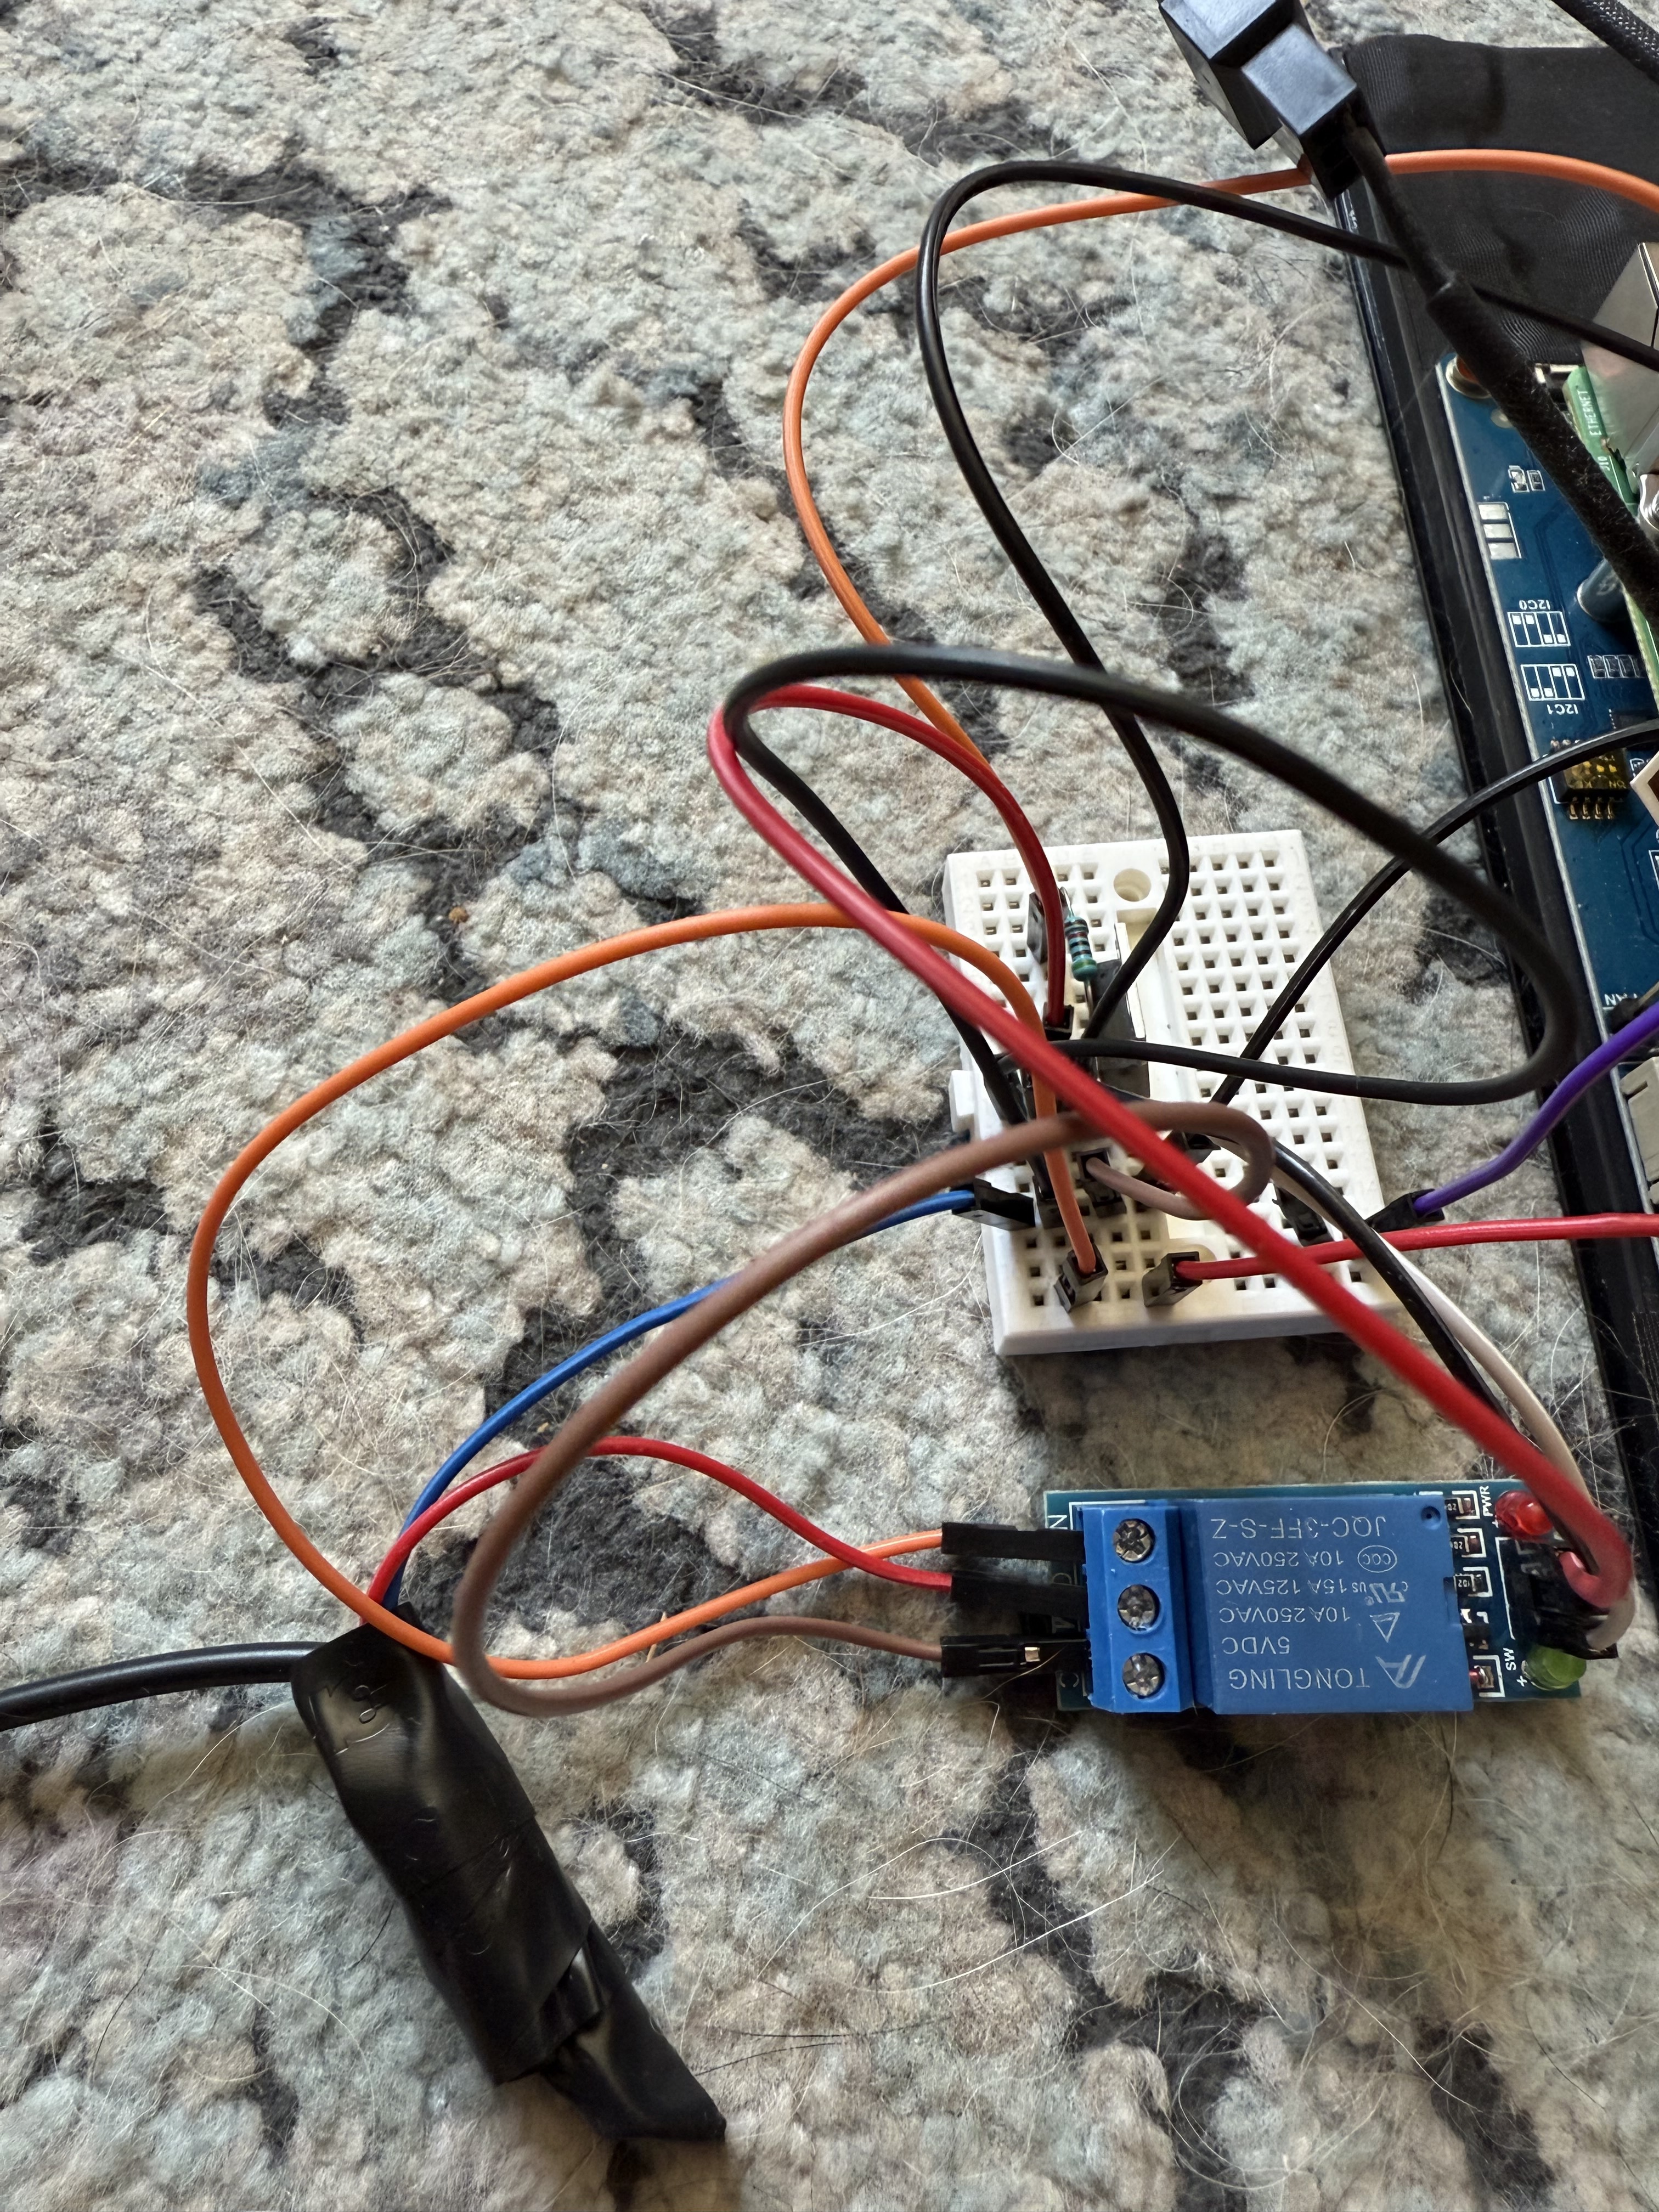
  • Ensure the relay module is a 5V type (most common ones are)
  • Double-check the TIP31C pinout (E-B-C from left to right when looking at the flat side)
  • Verify which wire in the USB cable is +5V (typically red) and GND (typically black)
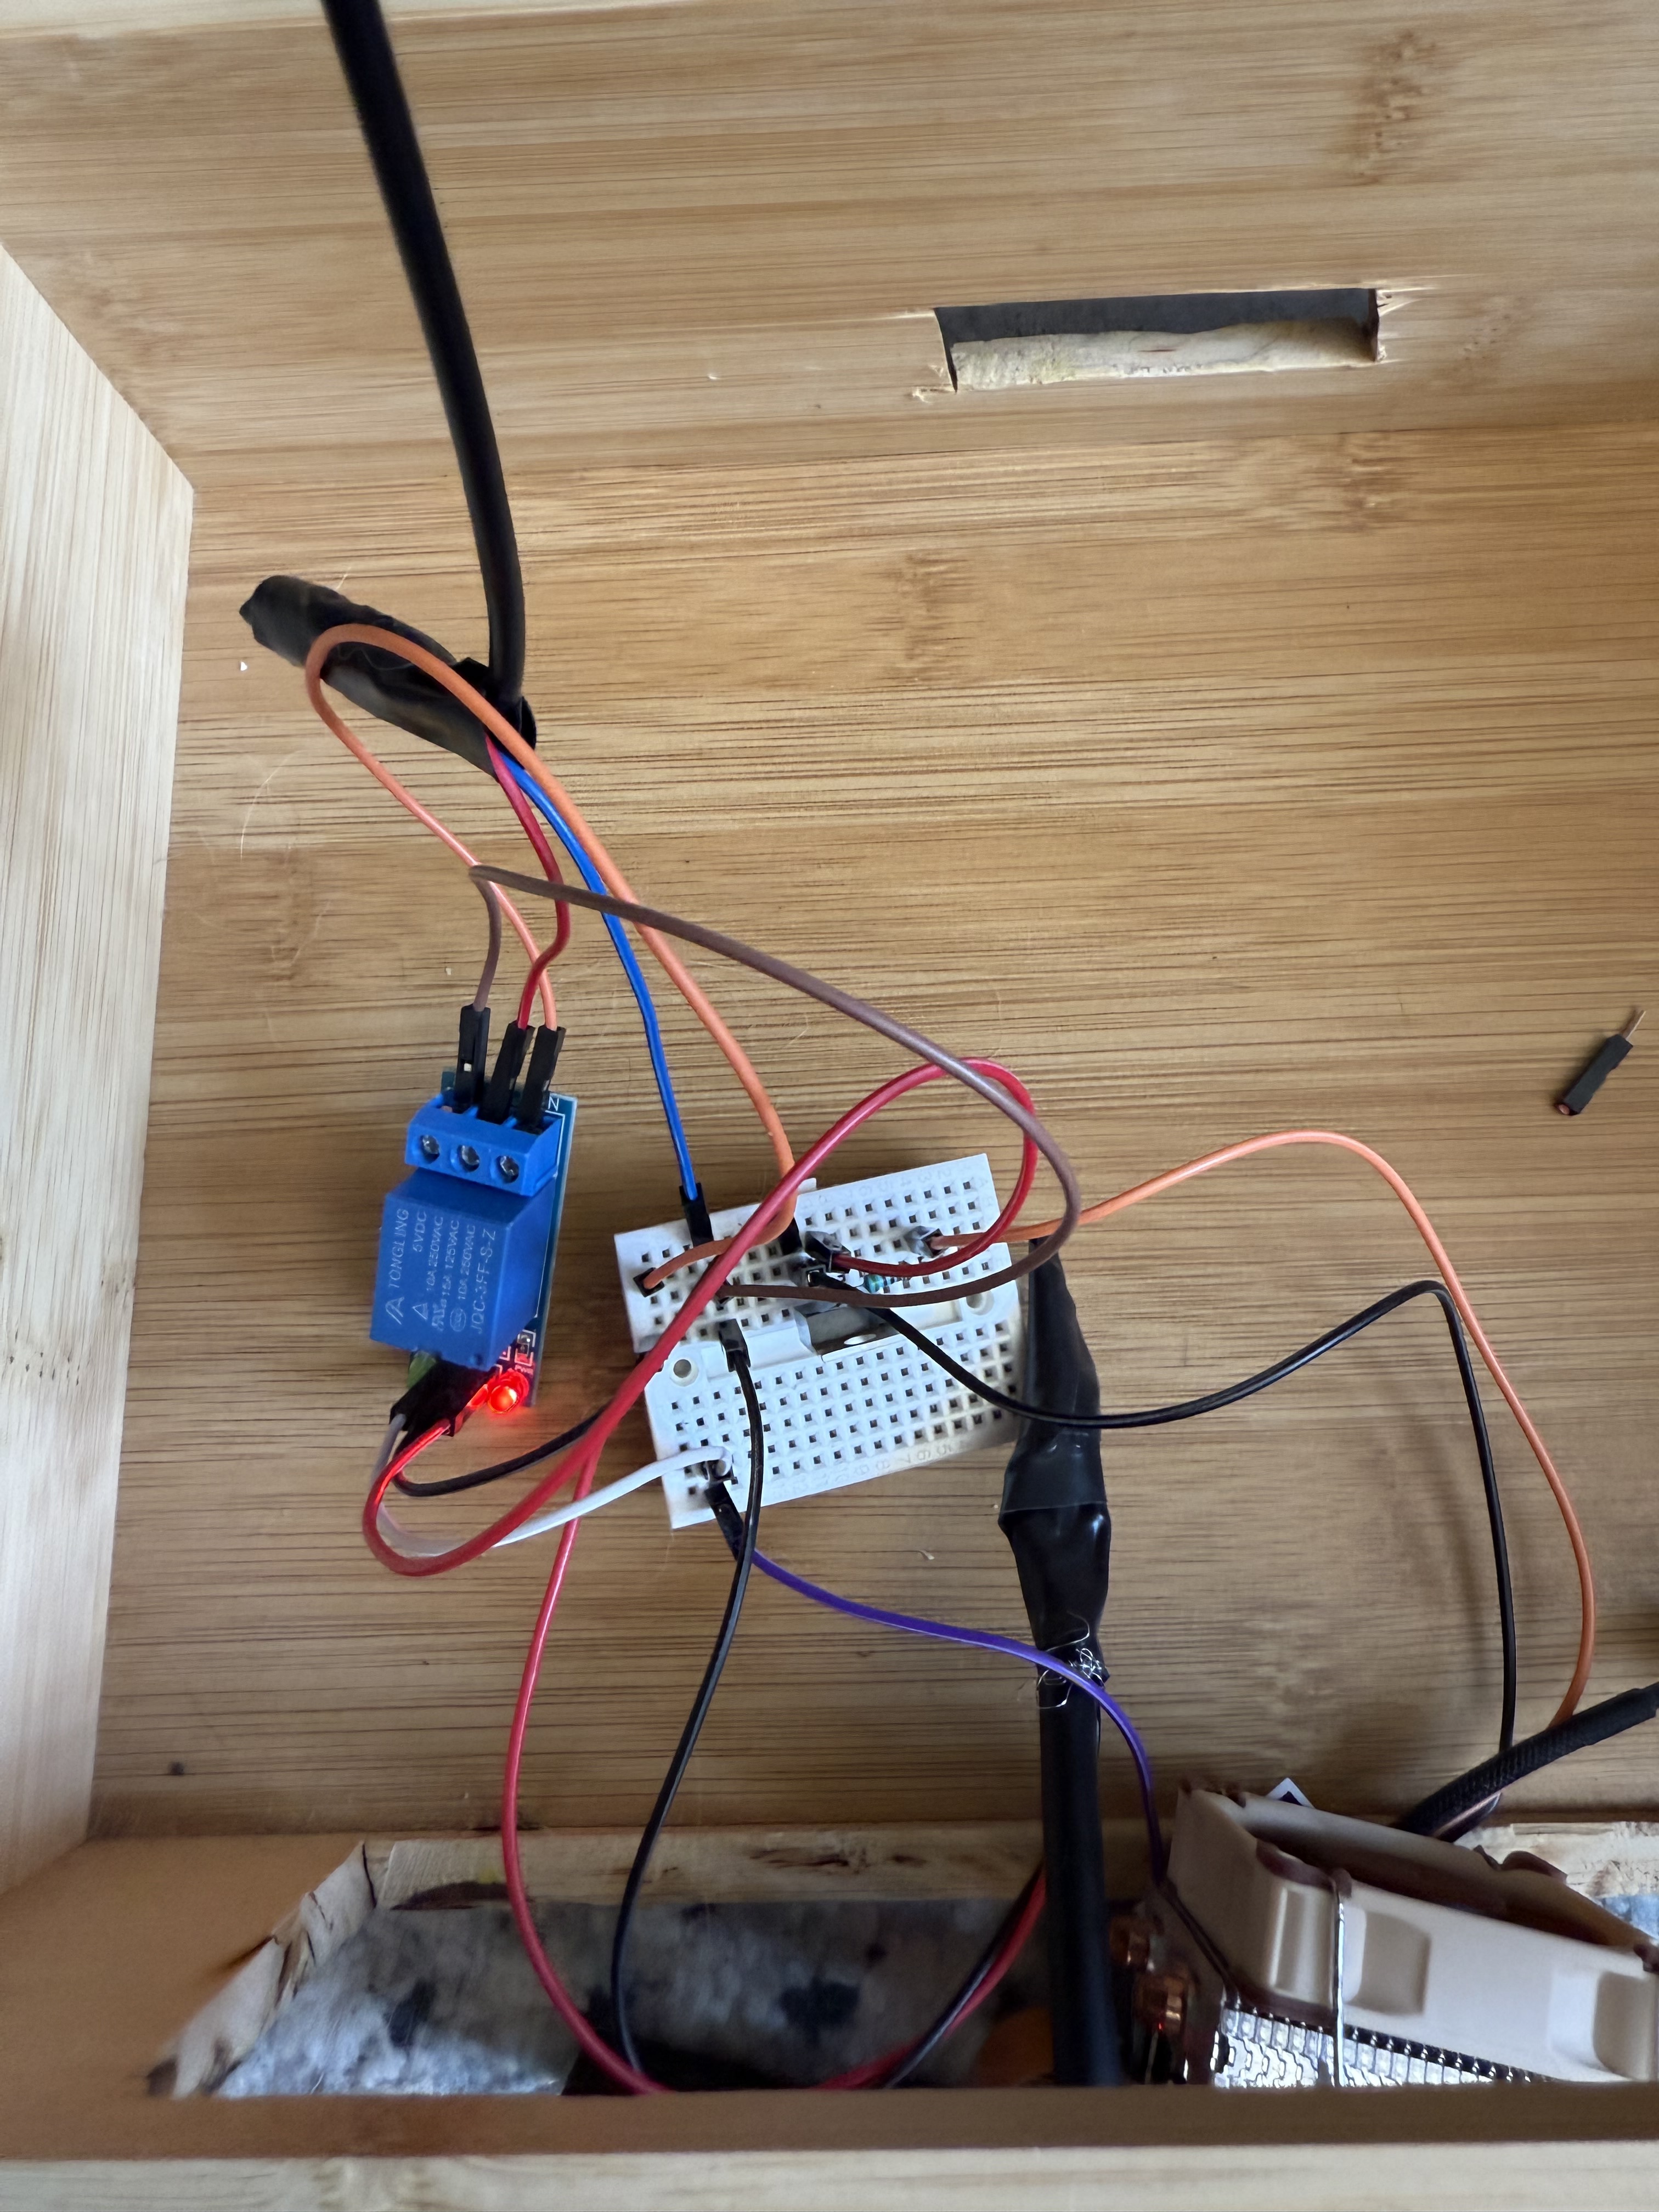
  • This solution can be implemented on a small breadboard and housed inside your Volumio enclosure

This solution is elegant because it uses the USB port’s higher current capability while still being controlled by the low-current GPIO pin, solving the problem without needing a separate power supply.​​​​​​​​​​​​​​​​


This is my network streamer working with the solution above.