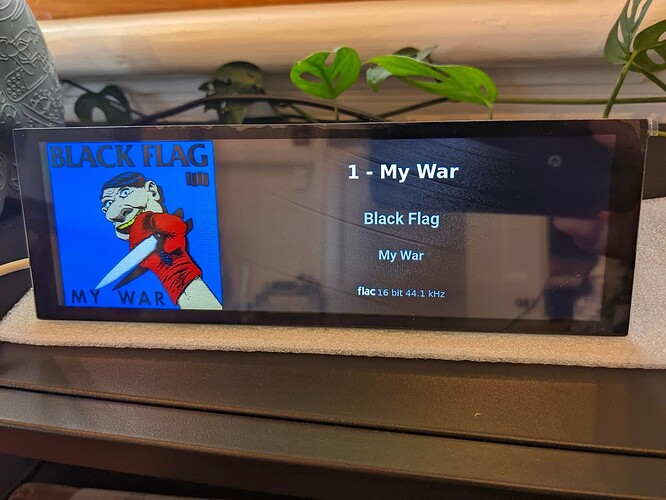
Here is my final guide on how to get Waveshare DSI monitors to work on Volumio.
My Gear (for reference)
- Raspberry Pi 4B
- Waveshare 7.9 inch DSI screen (not HDMI).
Base Installation
Install Volumio and Touch Display plugin. Optionally install Now Playing plugin (allows more customisation to make the screen nicer).
Go to volumio web interface and change the URL to have /dev at the top, and enable SSH.
Reboot volumio. You’ll note that the screen is still permanently turned off. If yours is somehow working, don’t bother with the further instructions as you have a different screen to mine.
Driver Installation
Download these drivers 5.10.92-32.zip (33.3 KB) which are not currently available publically.
Unzip the files as volumio doesn’t seem to have unzip installed.
SCP these to your volumio instance with the following command
scp /path/to/unzipped/files/* volumio@your.volumio.ip.address:~
This should copy them into your home holder on volumio, so now you can login:
ssh volumio@your.volumio.ip.address
Run the driver installation files
sudo bash ./WS_xinchDSI_Main.sh 7_9inch I2C0
Note you can change those last two parameters if you have a different screen or have changed the touch screen jumpers for some reason. Valid options are:
SCREEN_TYPE: 2_8inch, 4inch, 7inch, 9inch, 10_1inch, 7_9inch, 11_9inch
I2C_TYPE: I2C0, I2C1
Now reboot either through the volumio interface or because you’re already SSH’d into a terminal type reboot now
Now when it boots you should see first a terminal with some white text asking to login, but after a while you should see volumio appear on the screen, but it will be rotated the wrong way. This is because by default the screen is in portrait not landscape.
Correcting the screen orientation
I found that the settings in the Touch_Screen plugin did not work, so ignore them. Volumio seems to use a package called openbox to create its GUI, and it allows a simple per-user startup script, so let’s create one.
First make the folder in question
mkdir /home/volumio/.config/openbox
Now let’s make the startup file.
nano /home/volumio/.config/openbox/autostart
Type in the following line. Change ‘left’ to ‘right’ if you want it orientated the other way.
xrandr --output DSI-1 --rotate left
Reboot once more, and now when it starts it should work just right!
Bonus: Now Playing plugin settings
If you like the way I’ve got mine setup I’ll share how I made it this way by changing some settings in the Now Playing plugin. Note that I’m deliberately not using touch controls, I plan to make a HiFi style streamer and I don’t want people touching the screen. I have the android app for managing what’s playing and only want my screen to show what song is currently playing.
Text Styles:
  Font Sizes: Custom
  Title: 40px
  Artist: 36px
  Album: 30px
  Sample Rate: 20px
  Alignment (Horizontal): Center
  Alignment (Vertical): Spread

Widget Styles
  Widget Visibility: Custom
  Playback Buttons: Off
  Seek Bar: Off

Album Art
  Show Album Art: On
  Album Art Size: Custom
  Width: 400px
  Height: 400px
  Album Art Fit: Contain

Background
  Background Type: Volumio Background
  Image: myvinyl.jpg
  Image Fit: Fill
  Image Position: Center
  Background Overlay: Custom (Gradient)
  Gradient CSS: linear-gradient(to right, rgba(0,0,0,1), rgba(0,0,0,0.5))

Dock Component Menu
  Enabled: Off

Dock Component - Action Panel Trigger
  Enabled: Off

Volumio Kiosk (Local Display)
  Enable this. It makes this external screen show 'Now Playing' instead of the default 'Touch Screen' UI
Please if anyone follows this guide please let me know it works. I am doing it from memory after a lot of trial and error!
